This is Step 2 in our tutorial for setting up Google Analytics 4. If you haven’t already done so, first start by creating a GA4 property in your Google Analytics account. Then come back here for help tracking down the current UA (Universal Analytics) tag on your site and how it’s being added.
Tracking data won’t start flowing into your new GA4 property until you add the GA4 tracking code to your site.
For reliability and future-proofing, we recommend not using a tag “connection” directly in the Google Analytics Dashboard, where you connect the GA4 property to a UA property (or vice versa). Instead, the GA4 code should be added to your site alongside your existing UA tag, through the use of a plugin or by directly placing the code on your site
The best method for you will depend on what your current setup with your UA tracking code is. So, first, you need to figure out how your current UA tag code is added to your site. There are several ways this can be done, including Google Analytics plugins, in the theme settings, or using a snippet or code plugin.
Table of Contents
Video Walkthrough
Google Analytics Plugins
If you’re already using a plugins to add your existing Analytics tag, we recommend using the same plugin to add the GA4 tag as well. The two most popular plugins our clients use are MonsterInsights and Google Site Kit.
👉 If you use one of those, please follow our directions for Step 3: Adding the GA4 tag to your site, for…
Documentation for other popular WordPress plugins can be found here:
If you use a different plugin, it’s best to consult the documentation for that plugin. Alternatively, you can remove that plugin and switch to MonsterInsights or Site Kit, following the directions linked above. Just be sure not to set up two plugins, or you will have double-tracking issues.
If you’re not sure if you’re using a plugins to add your current Google Analytics tag, log into your WordPress dashboard and visit the Plugins page to review your list of current, active plugins.

If you’ve checked your WordPress plugins and don’t find one used for adding Google Analytics to your site, your code may have been added through your theme settings or snippet plugin (see below).
Tags Added Through Theme Settings
Themes may include methods for adding code snippets or GA tracking codes directly. The example shown below a site is for the Genesis theme. If you’re unsure if your GA code has been added through your theme, it can help to check with your designer or developer or have a look at the documentation for your theme.
For sites on a Genesis child theme, the code may have been added in the theme settings in the Customizer. To check this:
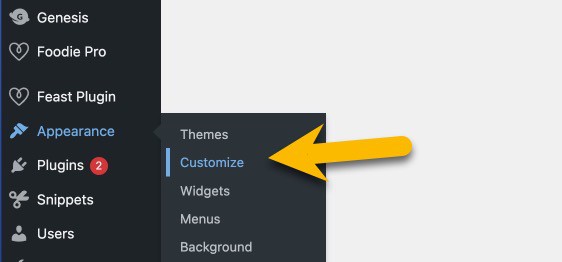
- Log into your WordPress dashboard and go to Appearance > Customize in the side menu.
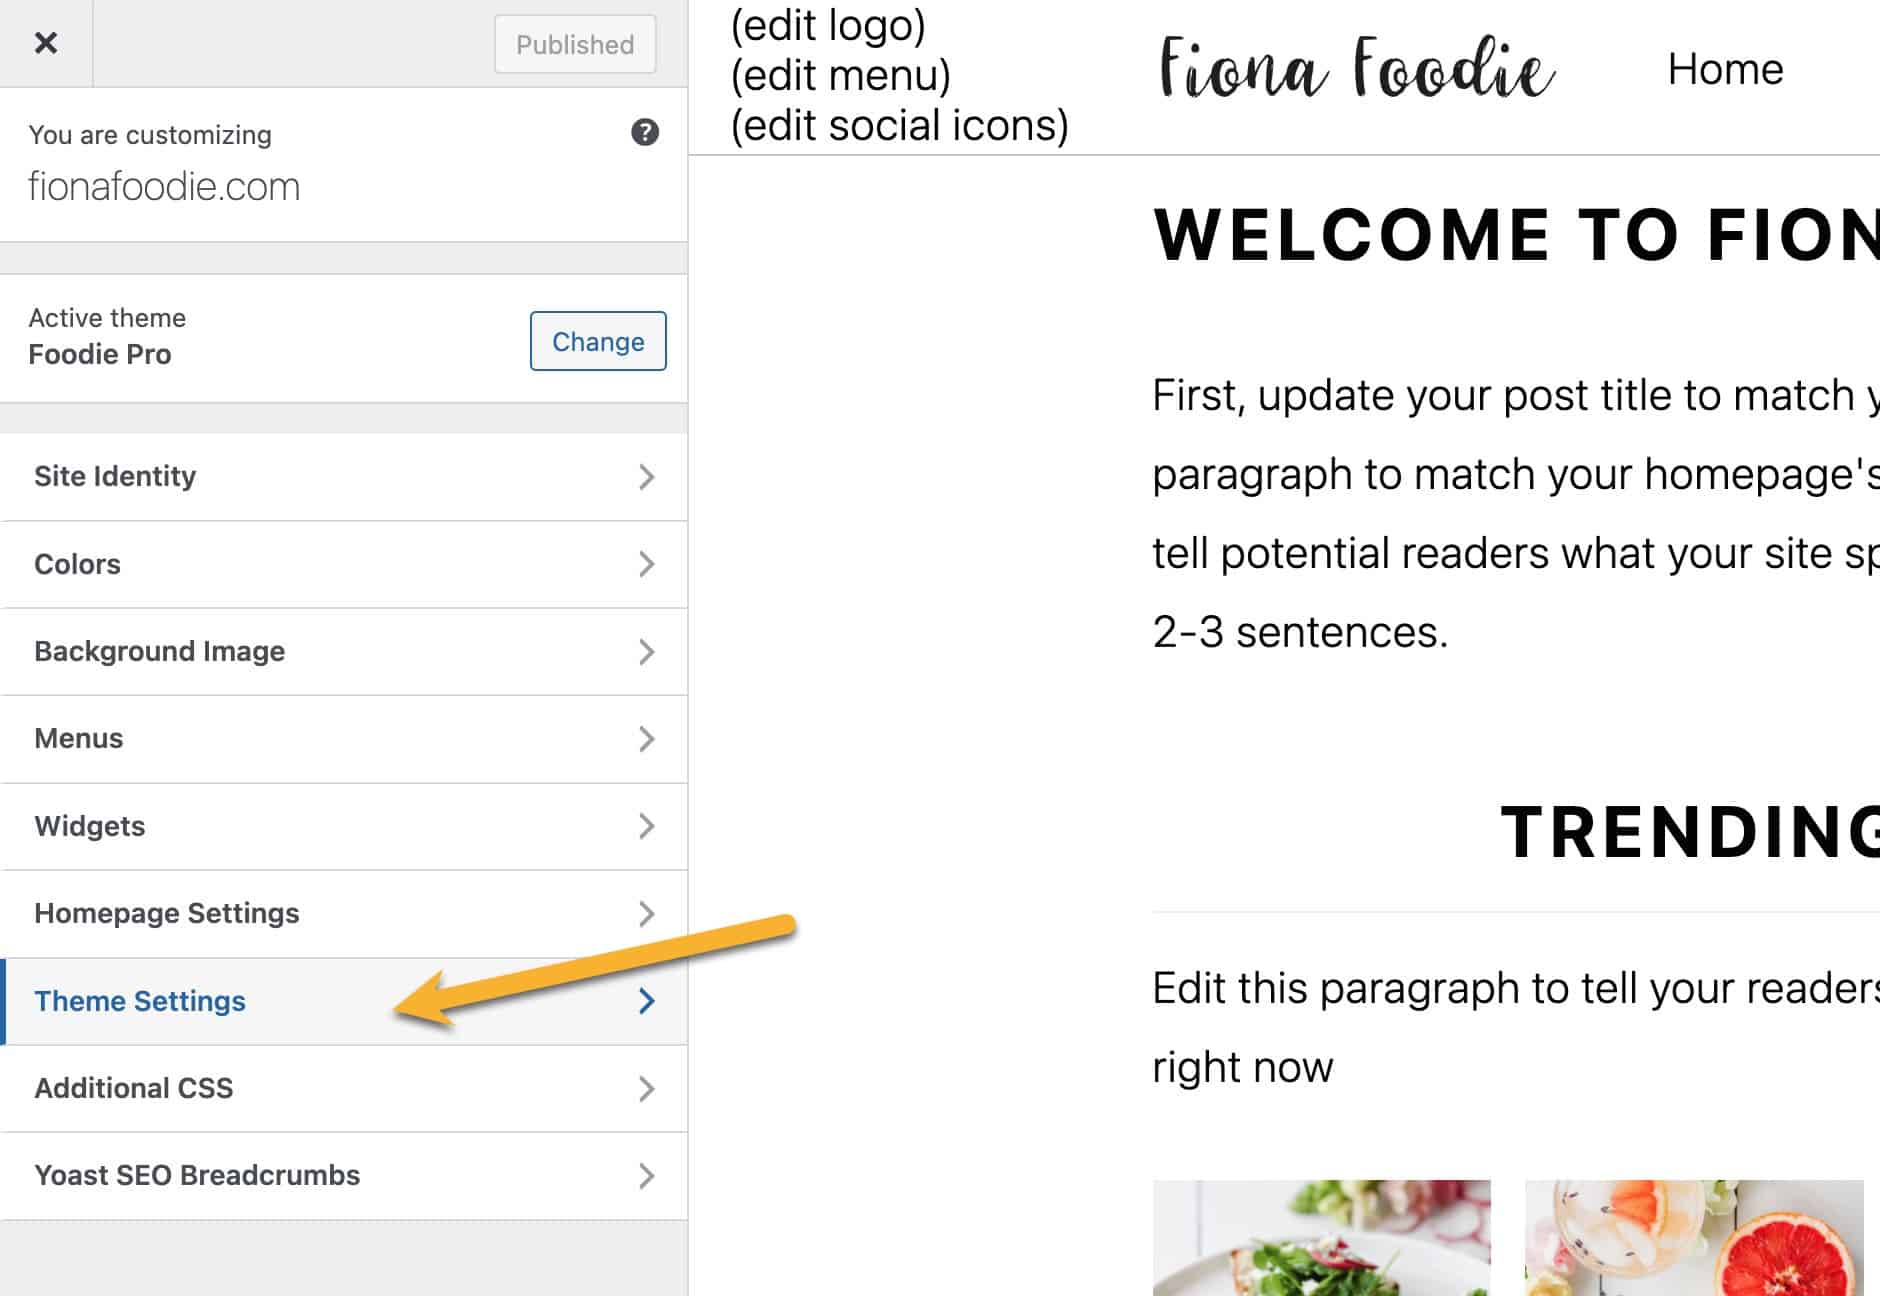
- When the Customizer loads, click on the Theme Settings tab.
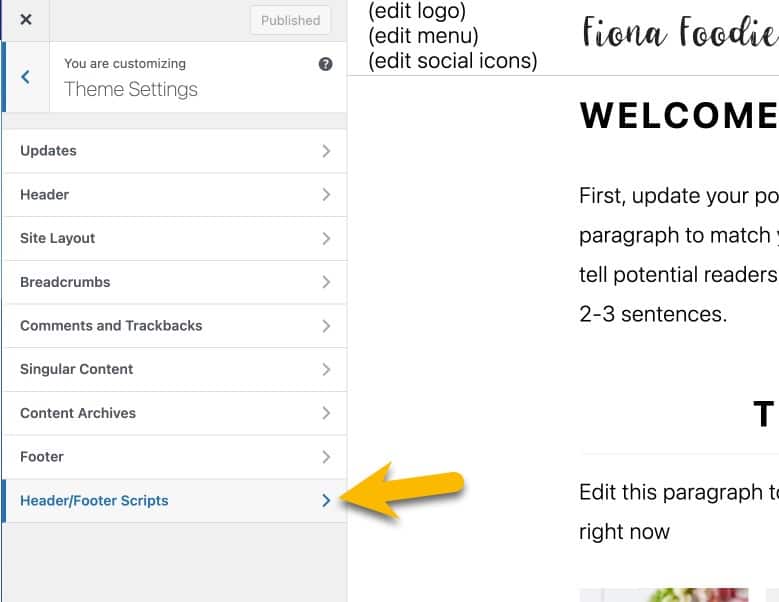
- Then find the Header/Footer Scripts tab and click on that.
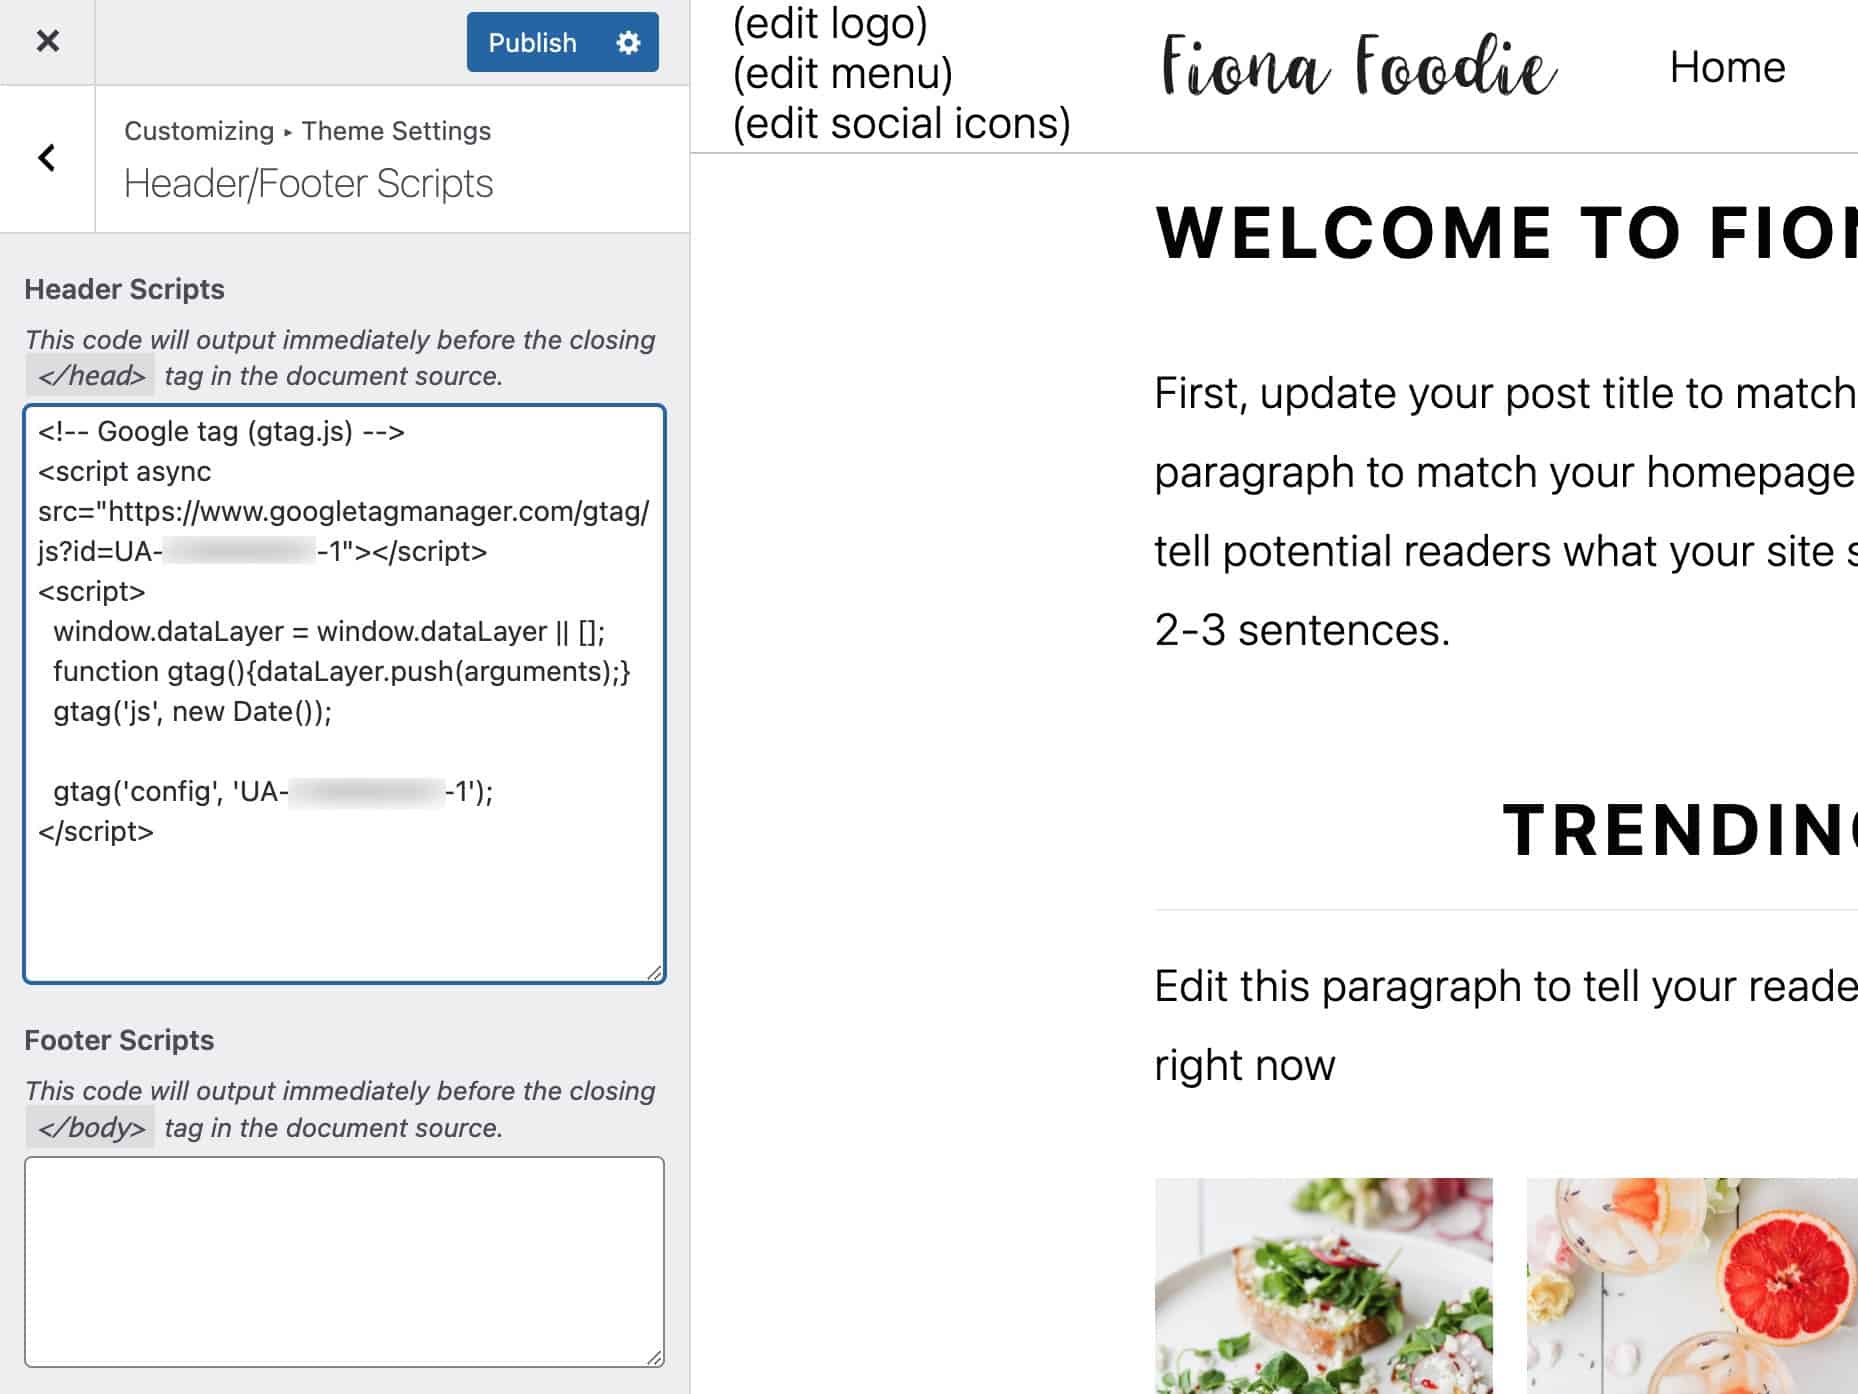
- If your Google Analytics UA tag code has been added via this method, you’ll see code in the Header Scripts box that looks something like this:
👉 Once you’ve located the code in your theme settings, proceed to Step 3: How to Add GA4 To Your Website by Editing an Existing Site Code.
Tags Added Through Snippet Plugins
Another way your GA code can be added to your site is through a WordPress snippet plugin like Code Snippets, WPCode (formerly Insert Headers and Footers), Header Footer Code Manager, and others.
To find if your GA code has been added using one of these plugins, visit your Plugins page and check for one of the plugins above. Also, look for any other plugin related to snippets or headers and footer code.
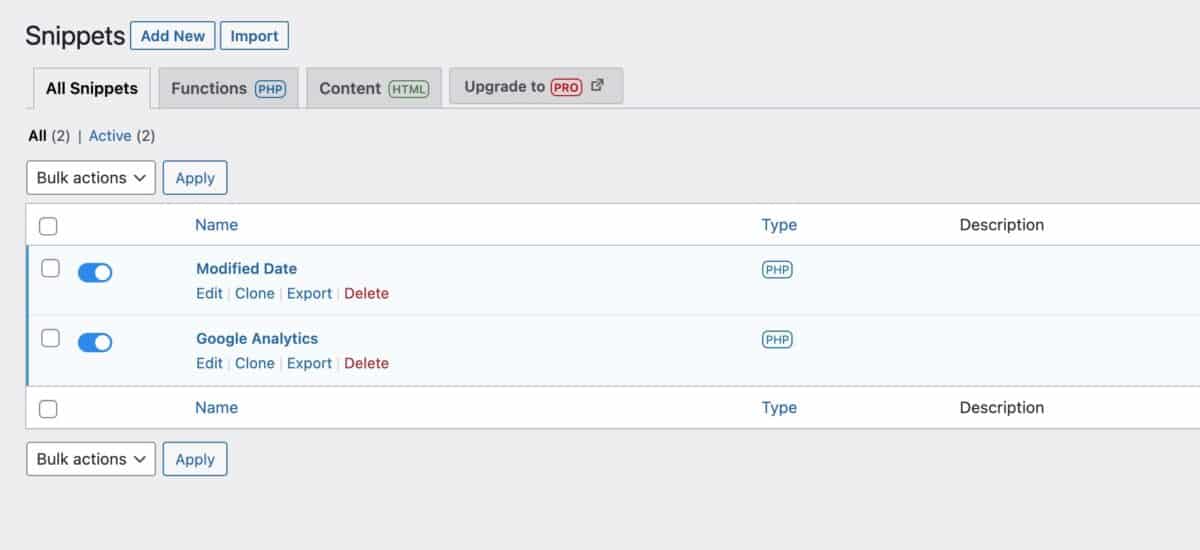
If you find one of these plugins on your site, visit the plugin settings or snippets page, often called something like All Snippets or Snippets.
Hopefully, when your GA code was added via a snippets plugin, someone gave the snippet a descriptive name.
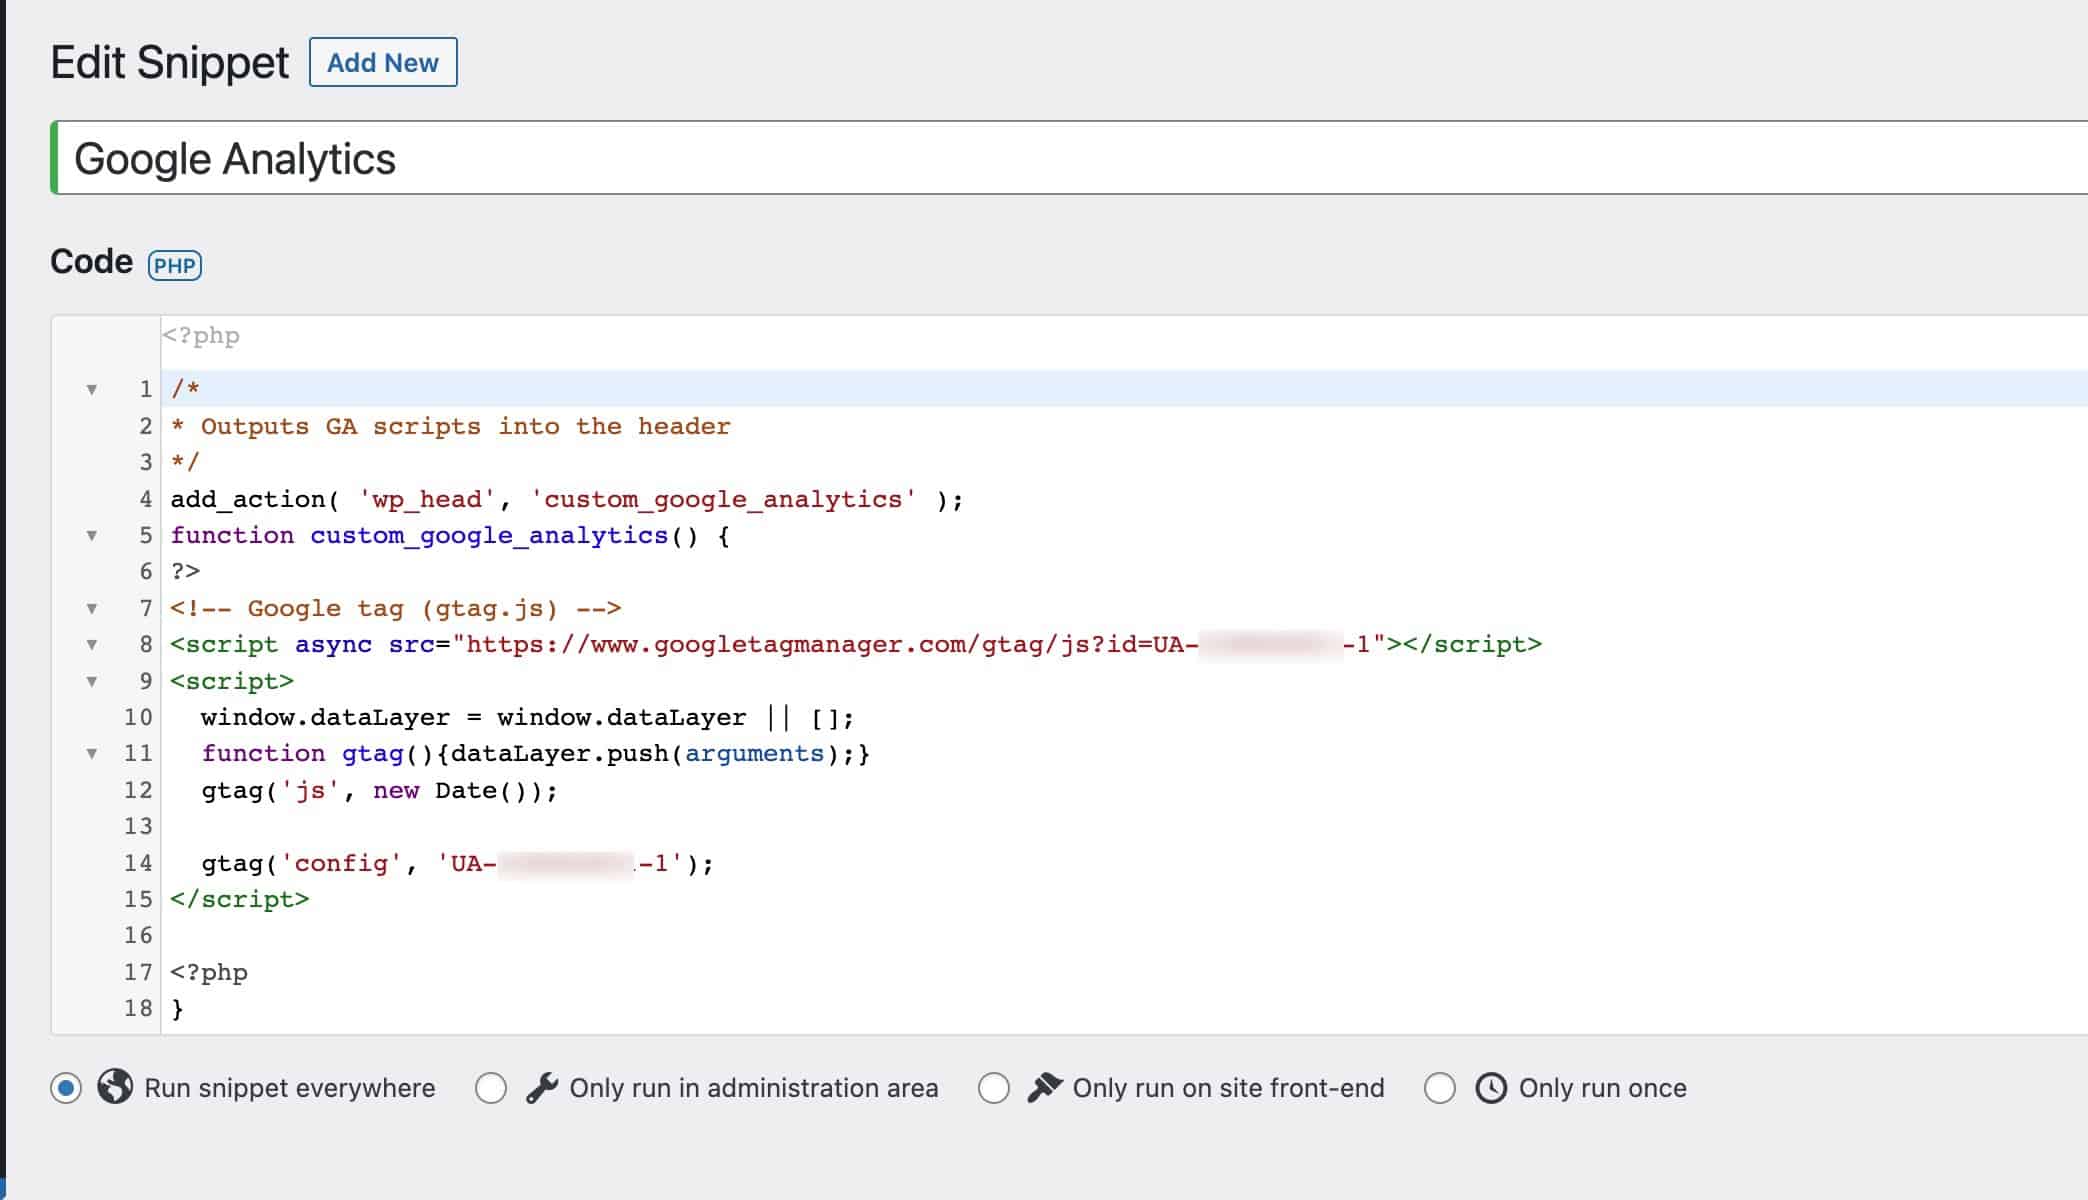
And if you view the snippet, the code should look something like this:
👉 Once you’ve located the code in a snippet plugin, proceed to Step 3: How to Add GA4 To Your Website by Editing an Existing Site Code.


