Get key takeaways:
GA4 is the future of Google Analytics. It offers several new features and improvements over the previous version, including better tracking of user interactions, improved cross-device measurement, and a more intuitive interface. In October of 2022, Google announced that their legacy analytics platform would be sunset in July of 2023, yielding way to GA4 as their only analytics platform.
In late January 2023, Google began notifying users that if they hadn’t already created and connected a GA4 property to their existing UA website property, they will create and deploy one automatically in March 2023, unless users opt out. To ensure a seamless transition, we recommend setting up GA4 yourself, making sure it’s tracking properly, and then opting out of the automatic deployment.
In this article, we’ll walk you through the steps for creating a GA4 property for your website and provide links to directions for adding the GA4 tags to your site (the method varies, depending on how your legacy UA tag is currently configured).
Setting up GA4 involves four steps:
Table of Contents
If you already have an existing GA4 property that’s connected to your website and collecting analytics data, we don’t recommend making any changes to that setup. You can skip to Step 4 below to opt out of the automatic deployment.
If you’re not sure if you have a GA4 property set up and running for your site, please check out our article on How to Check Your Google Analytics Tags with Tag Assistant.
Step 1: Create a GA4 Property for Your Website
Video Walkthrough
Step-by-Step Instructions
- Log into your Google Analytics account.
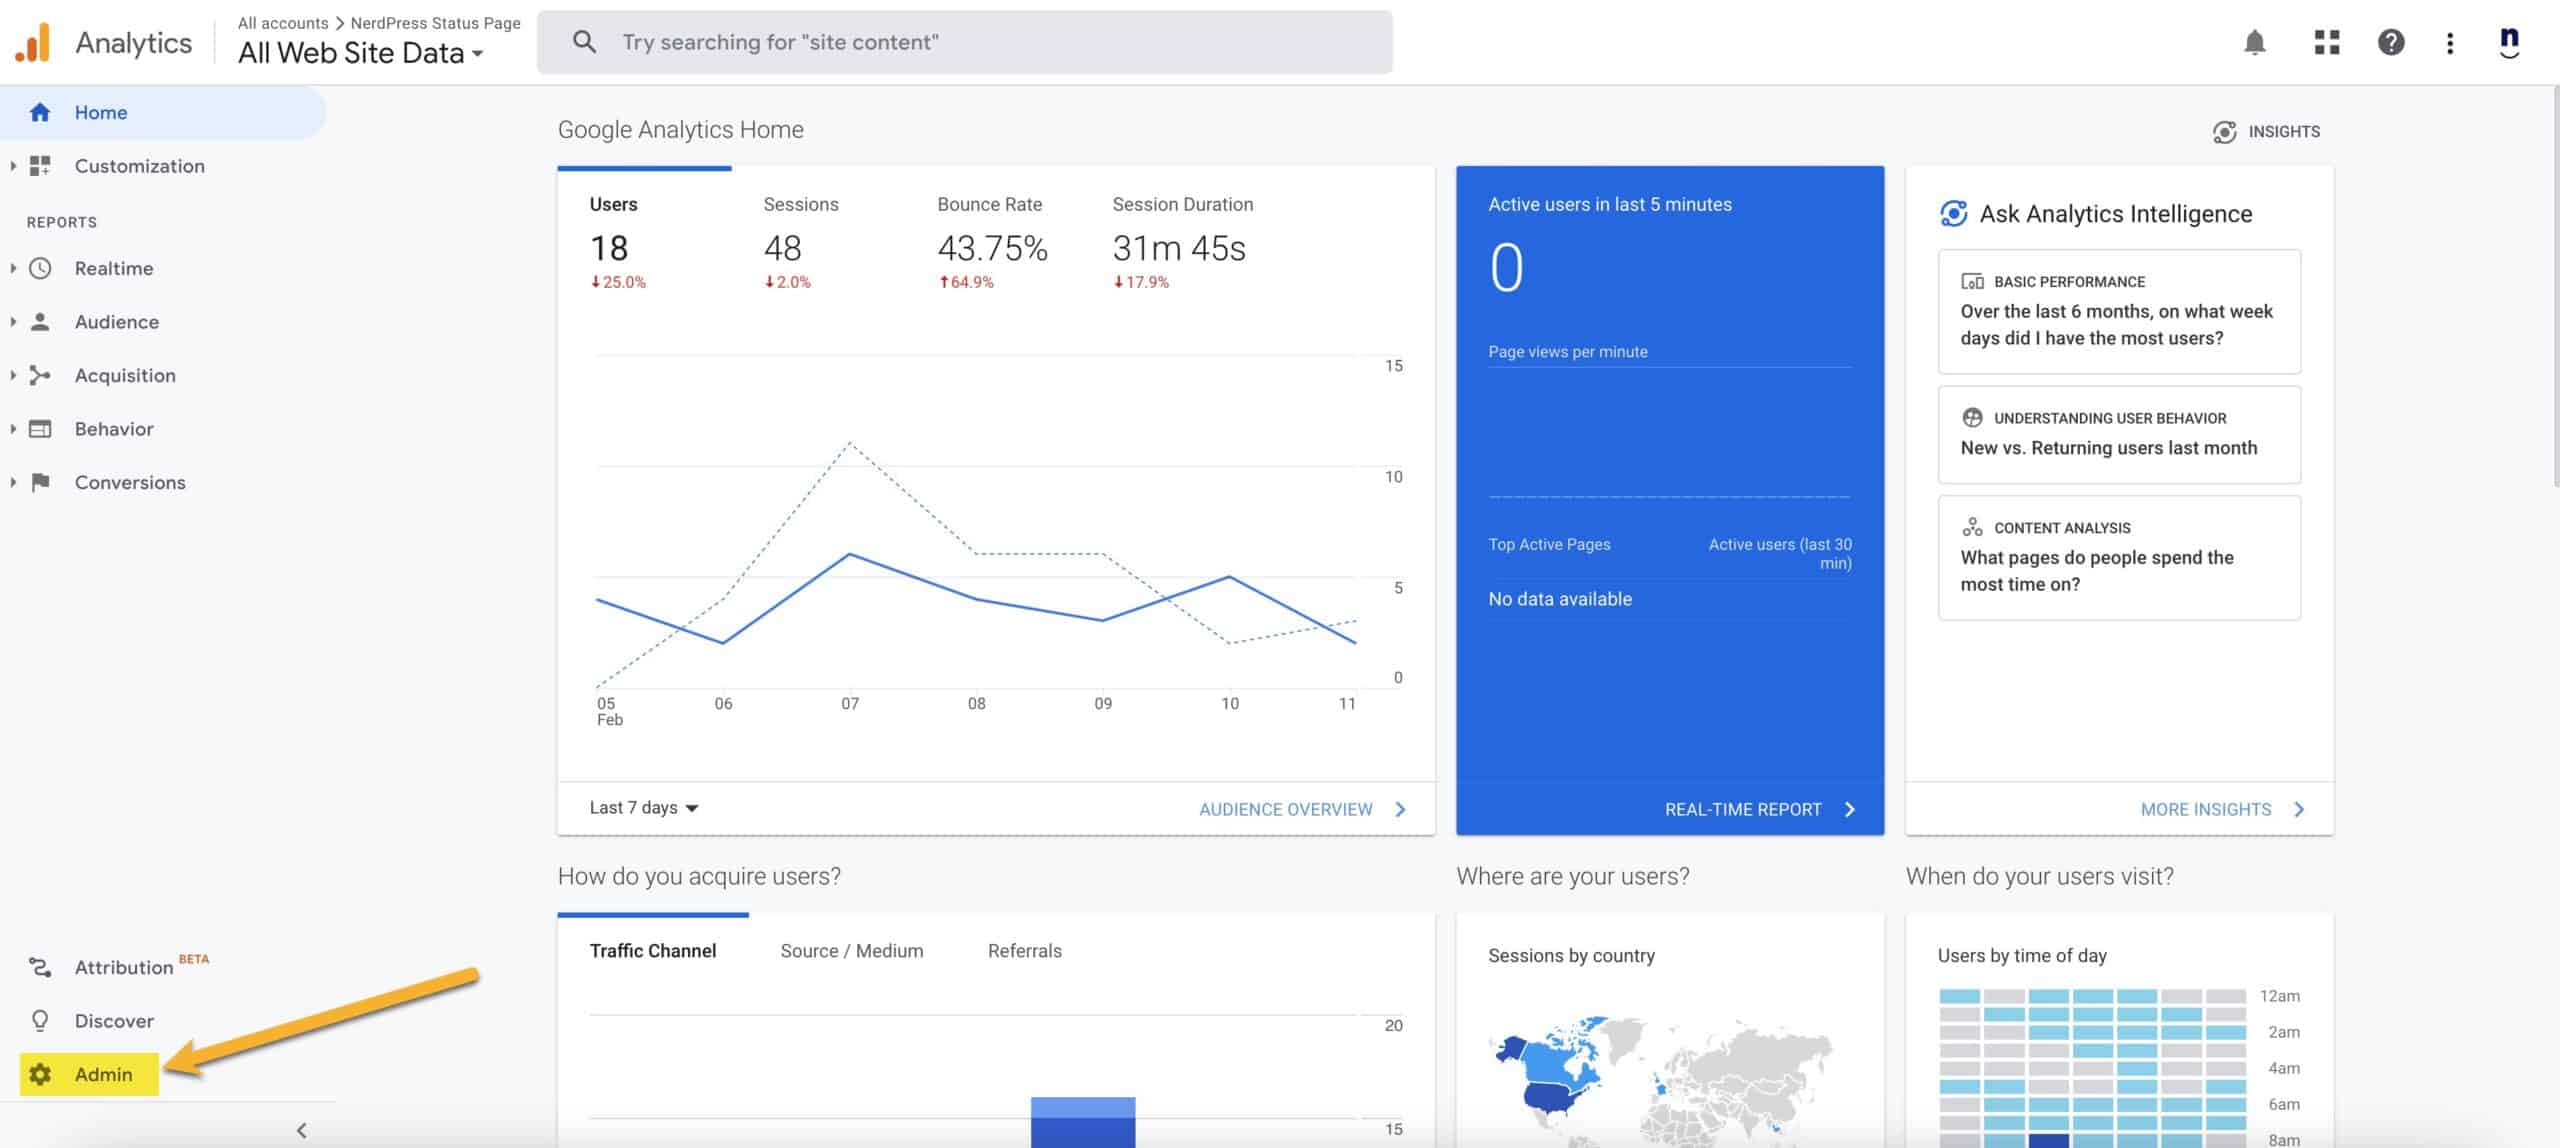
- Click the Admin link in the lower-left corner of the page.
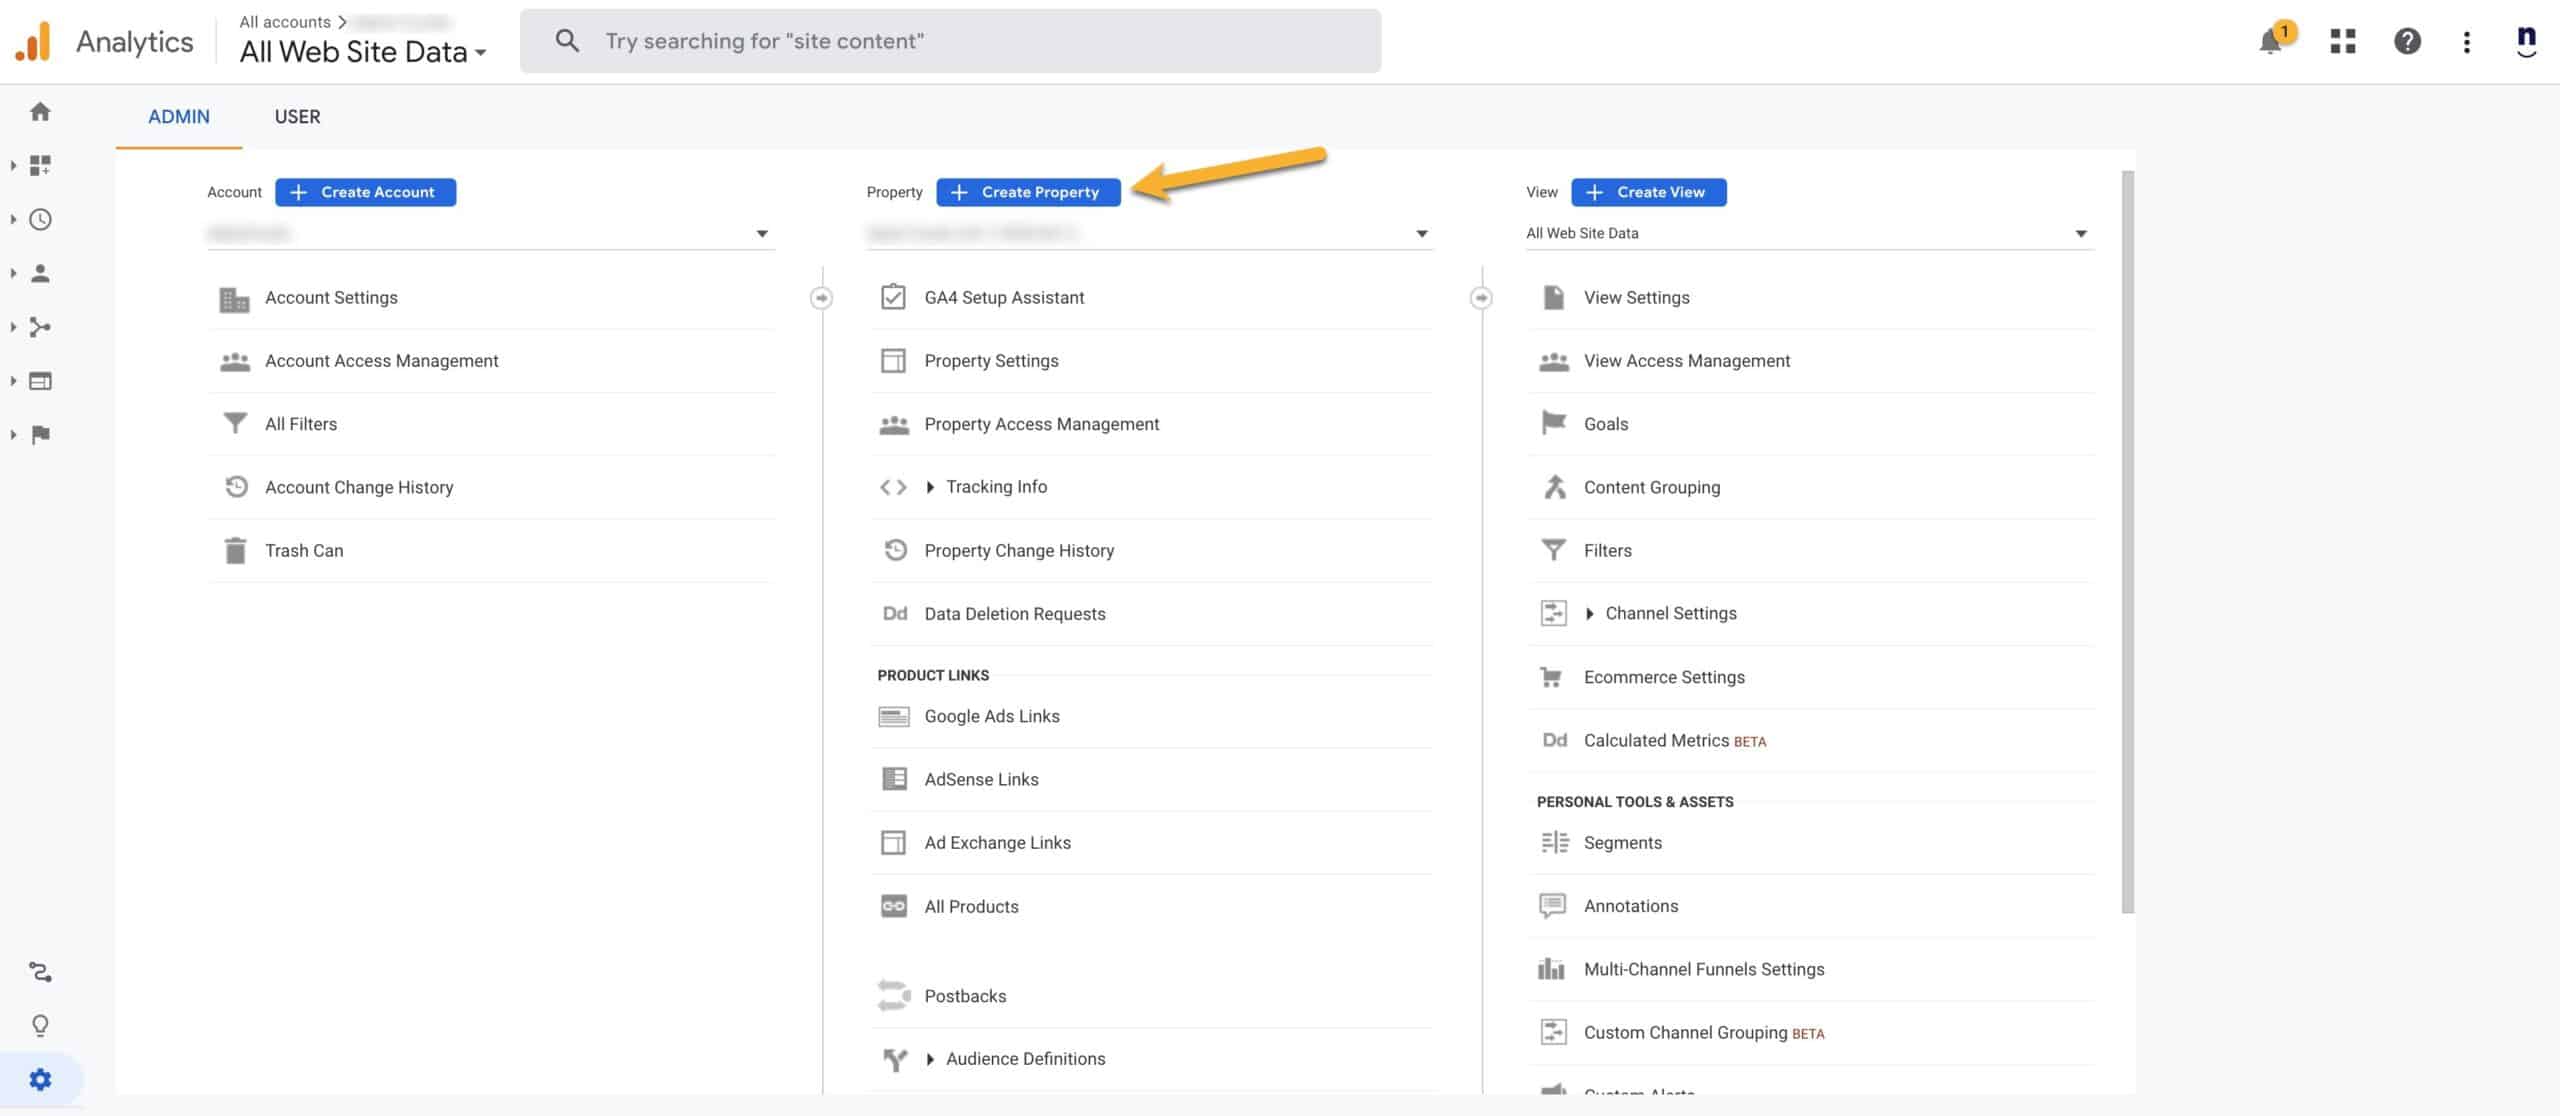
- In the middle Property column, click the Create Property button to create a new property.
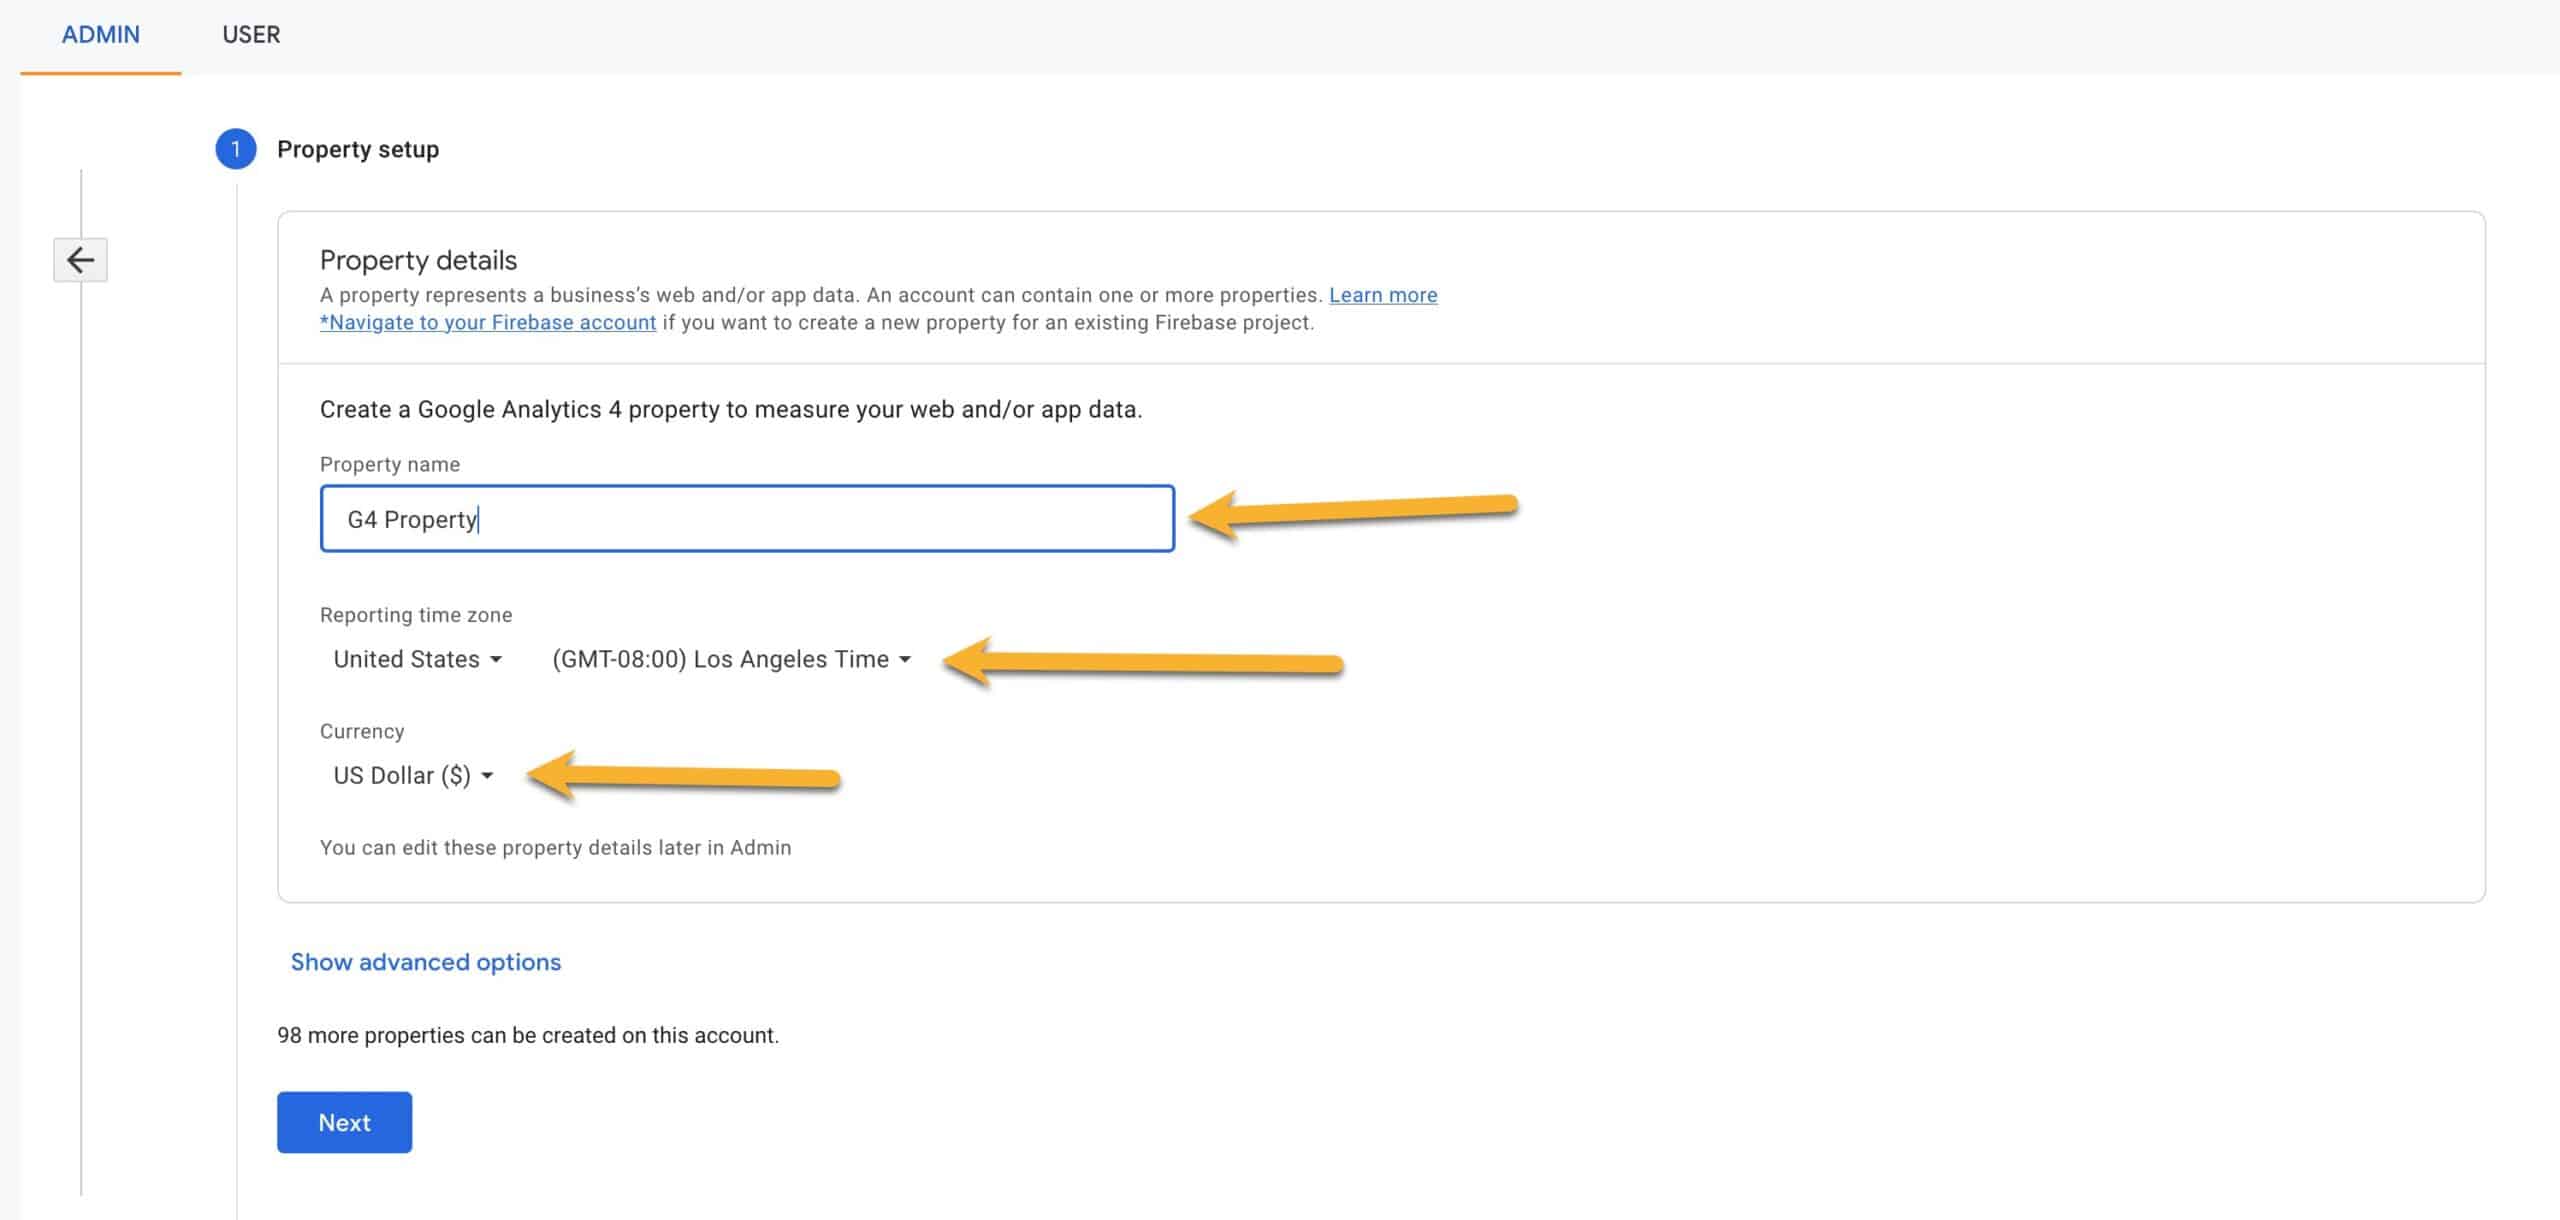
- Add a Property name. You may want to include “GA4” in the name. Next, select your report time zone. You can select your own time zone but if you work with an ad network, some of them want the time zone to be New York (EST). Finally, select your currency and then click the Next button.
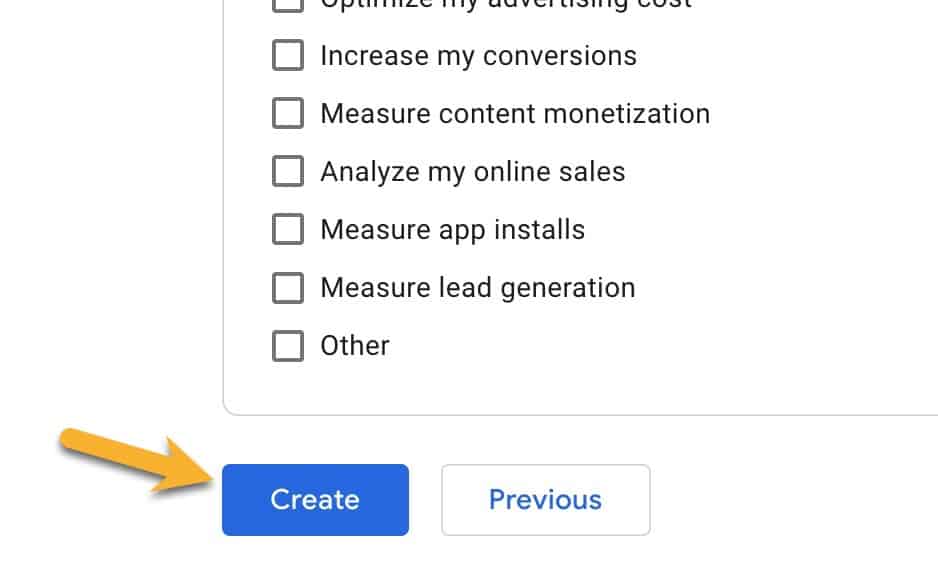
- In the About your business section, select an Industry Category and then indicate your Business size and how you intend to use Google Analytics with your business.
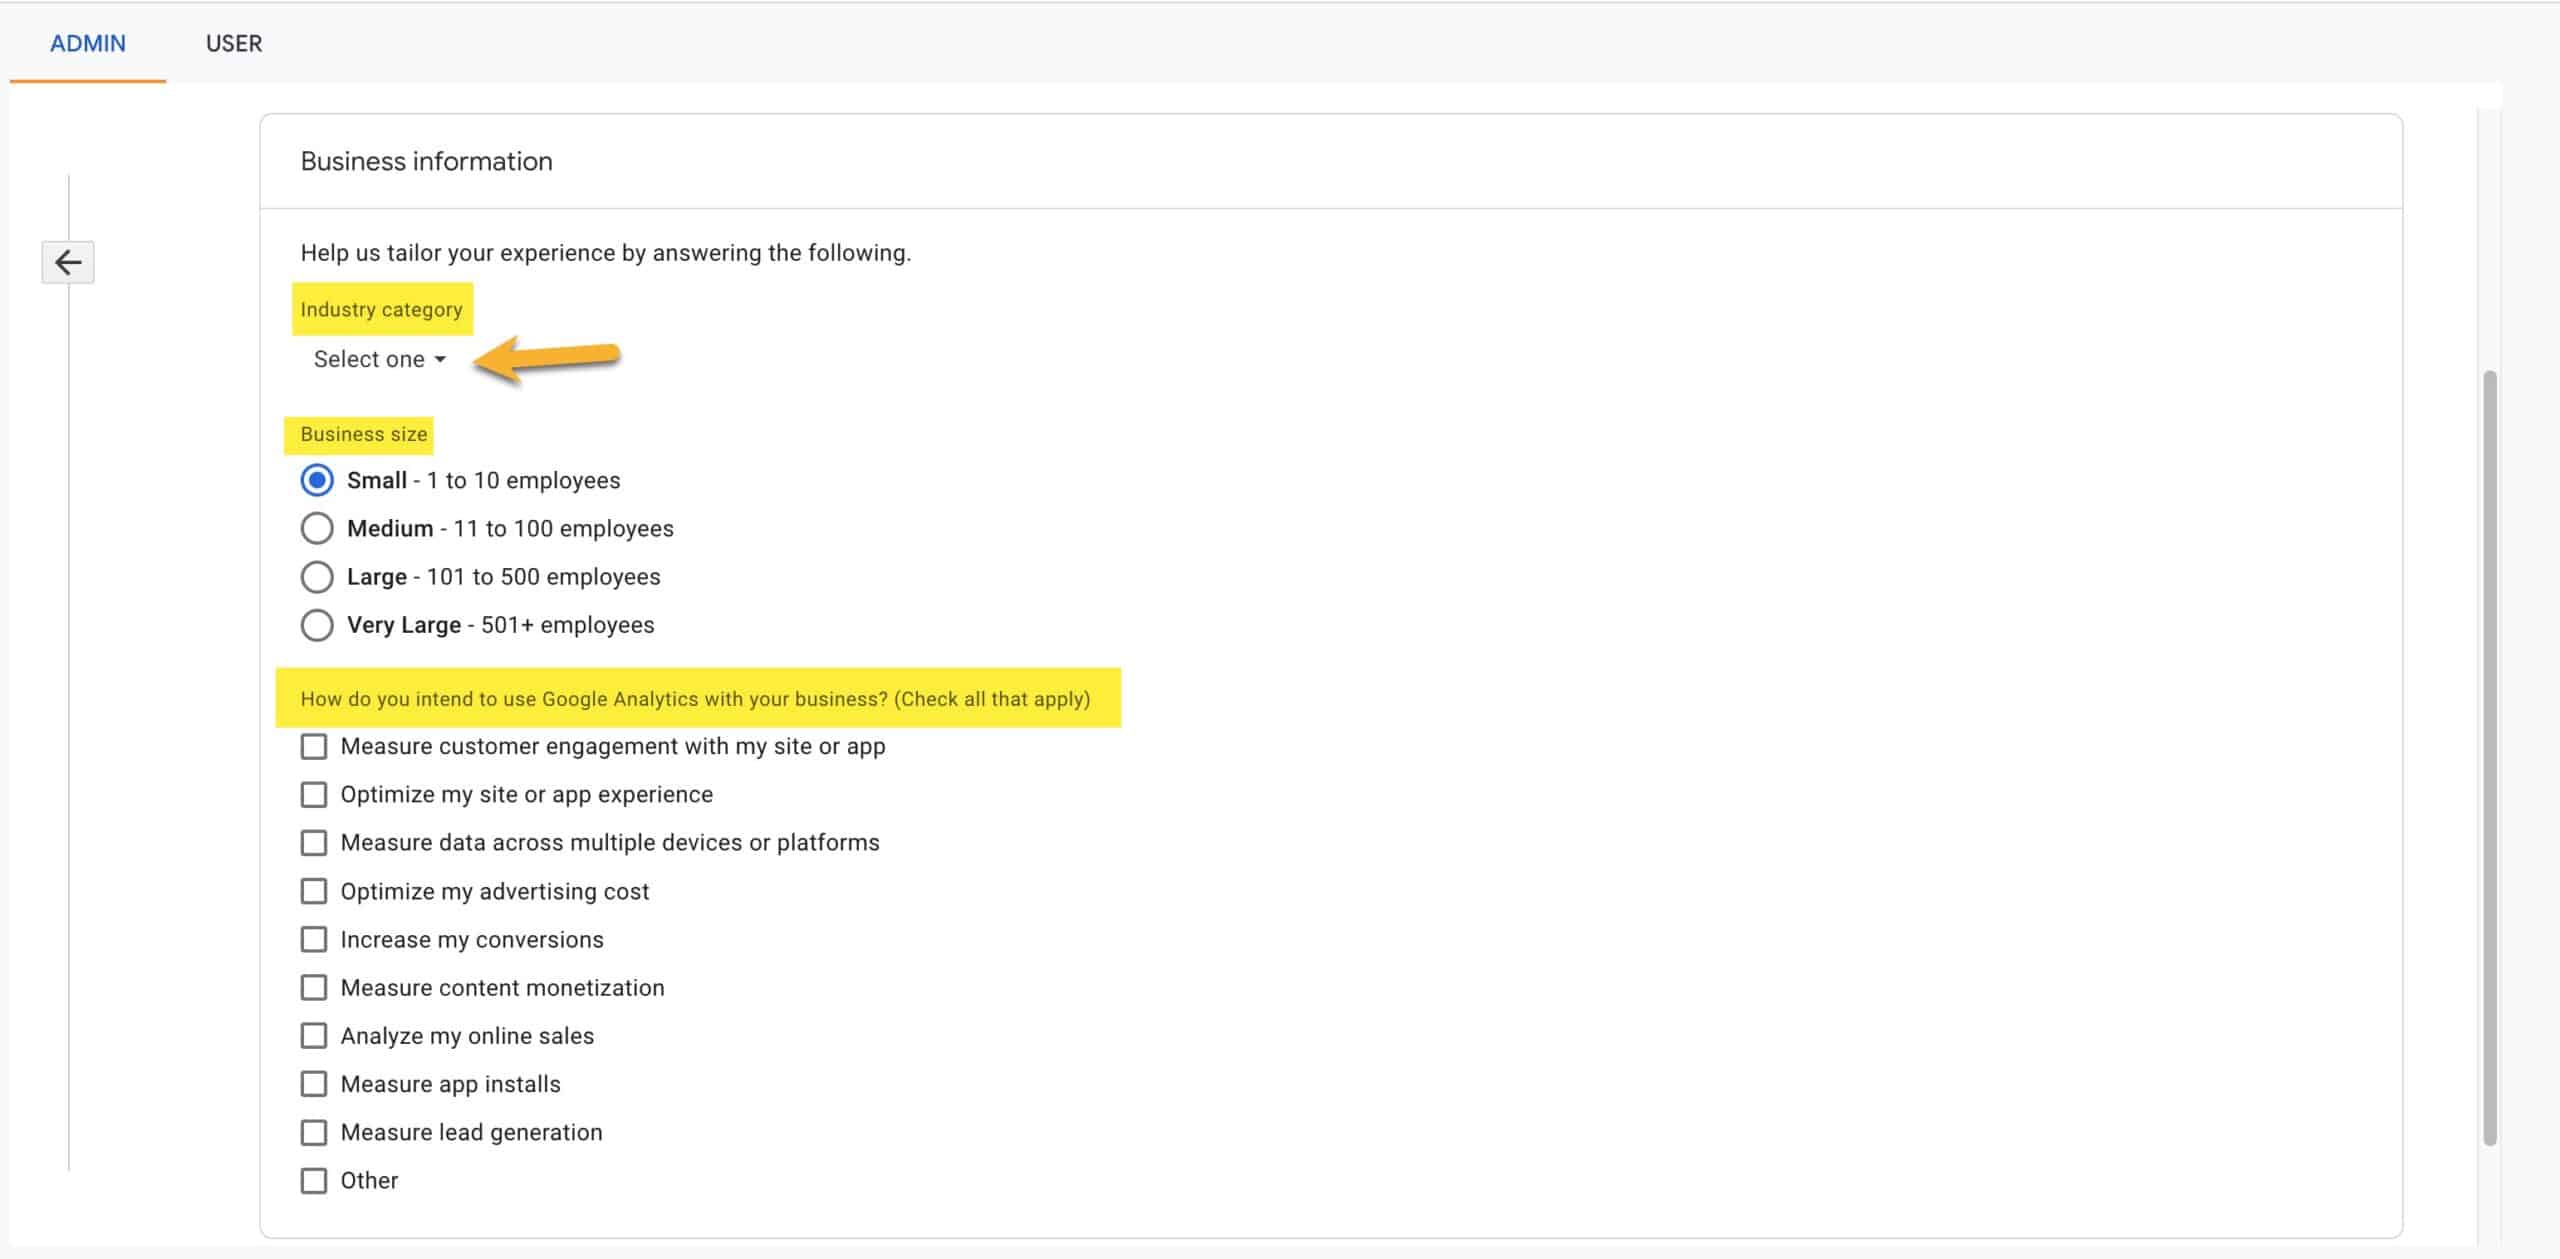
None of these settings will affect your GA4 reporting — and they can be changed later.
- Click the Create button.
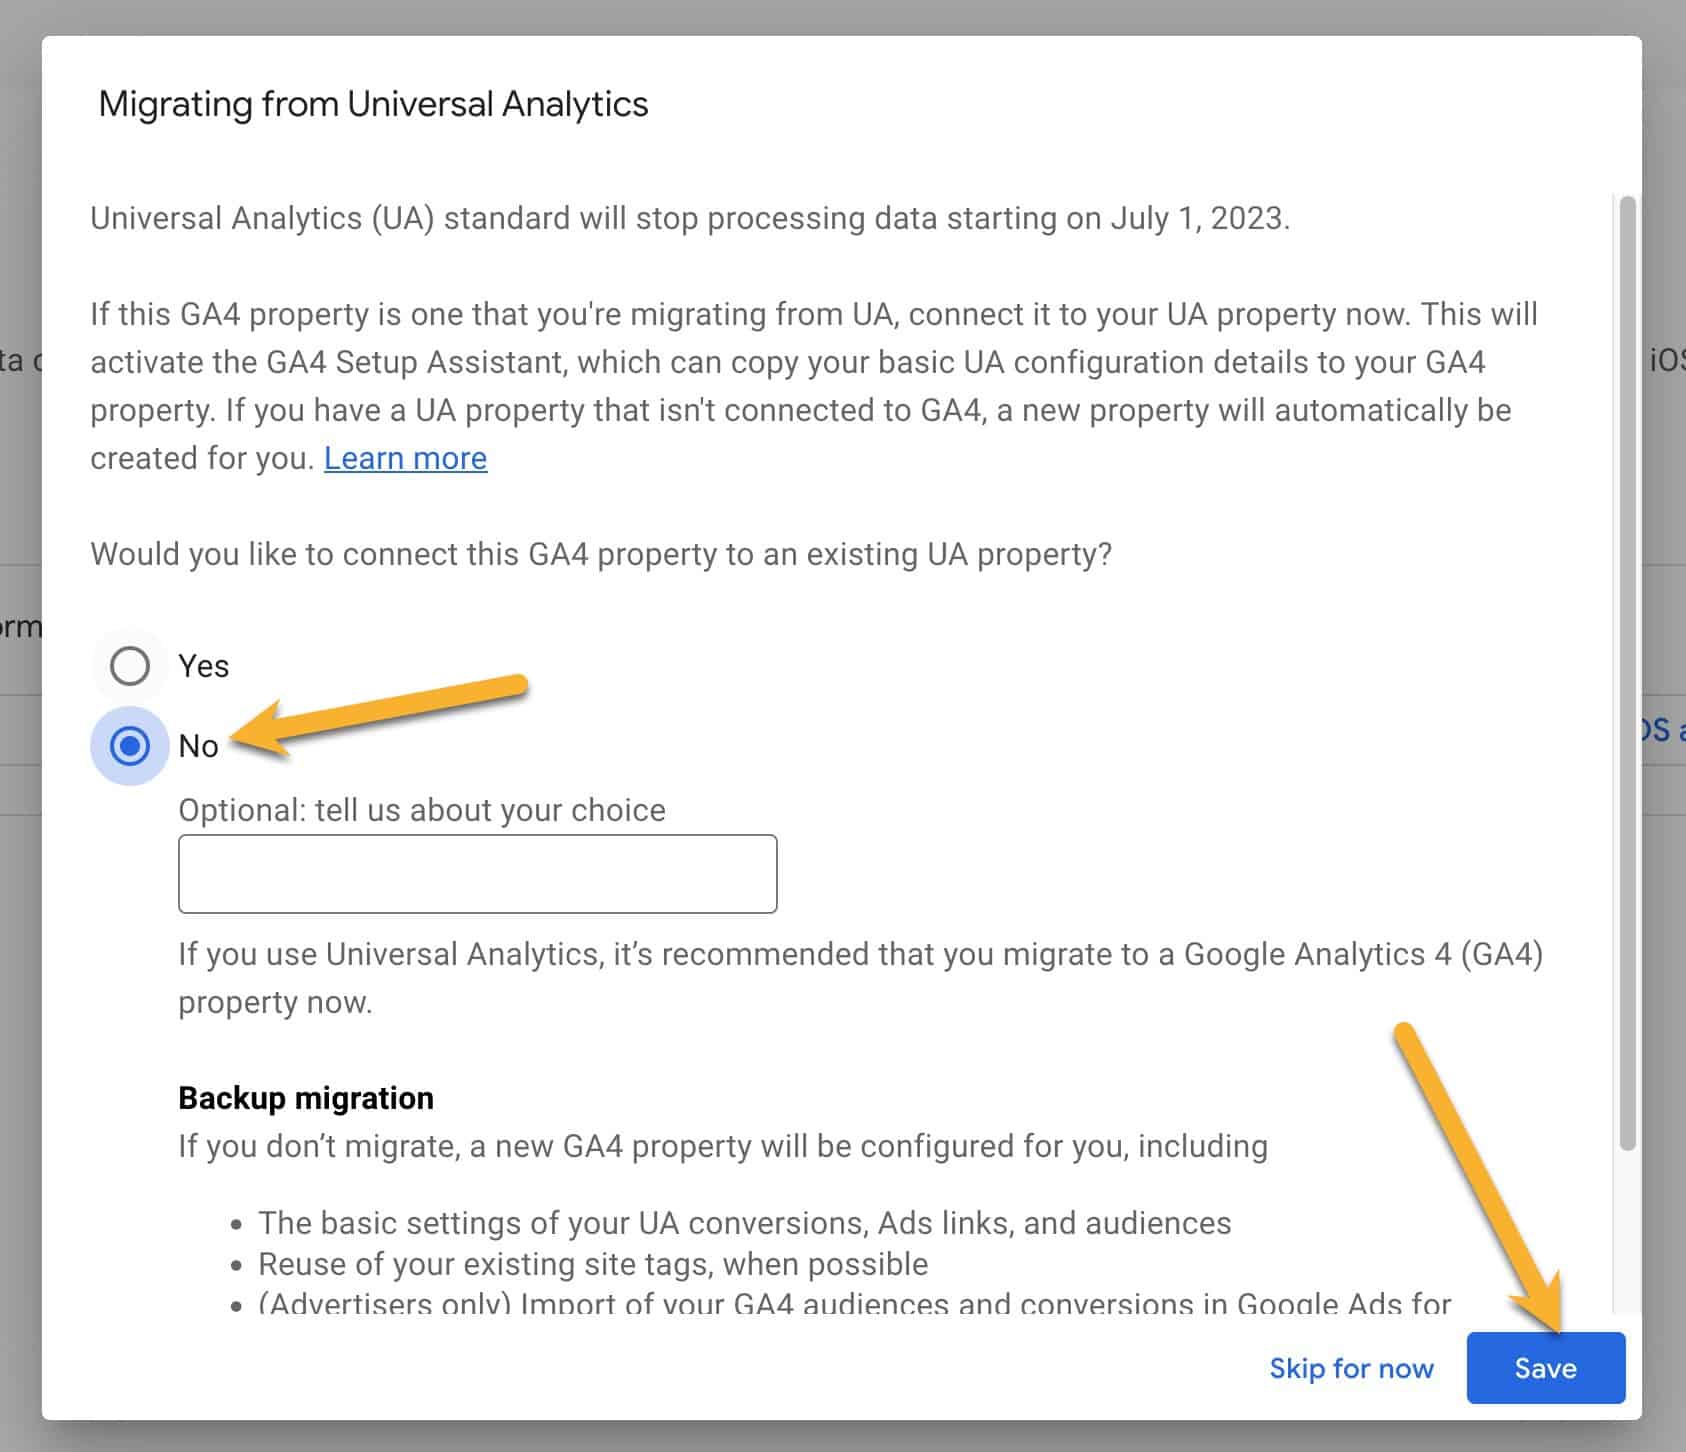
- If you get a pop-up that says Migrating from Universal Analytics which asks if you want to connect this new property to an existing UA property, we recommend you select No and then click Save. (Some issues have been reported by some of the ad networks with connected tags so we don’t recommend this setup.)
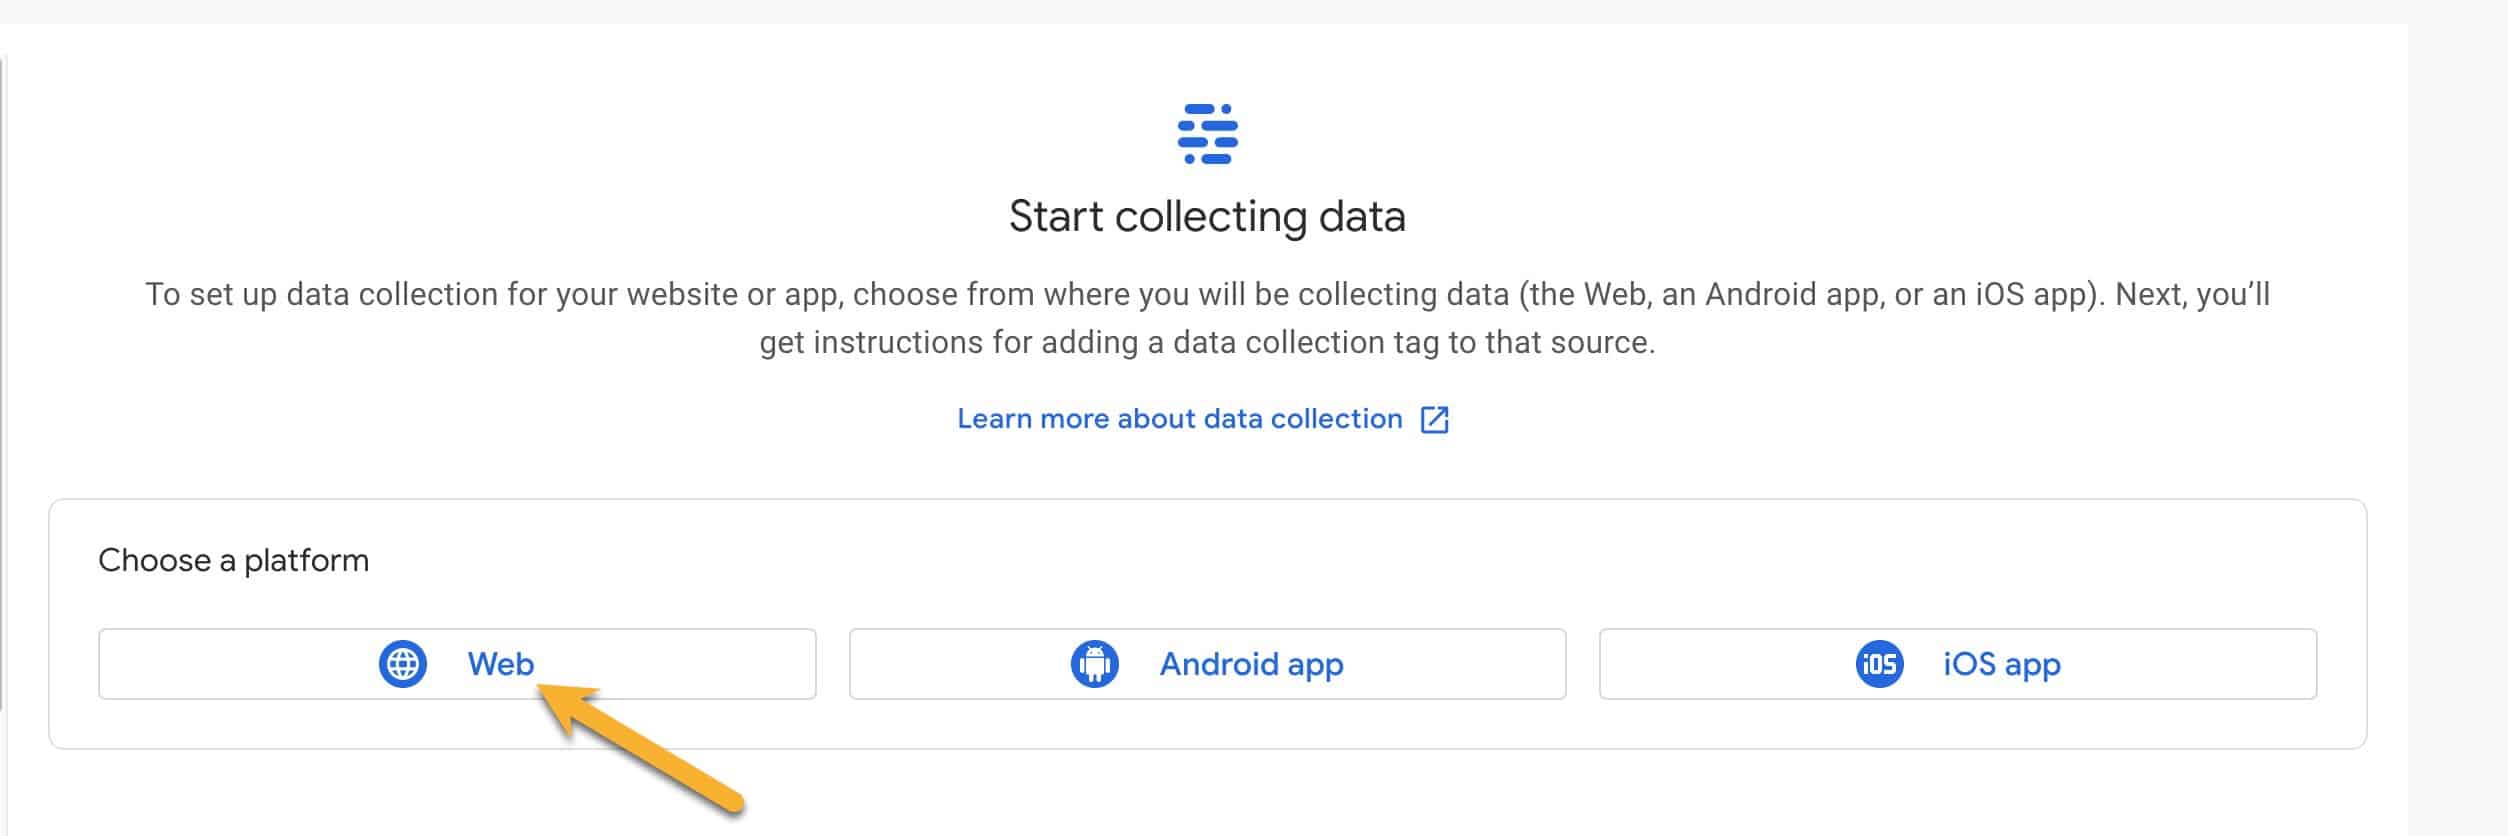
- Next, choose the appropriate type of property. In this case, since it’s for a website, choose Web.
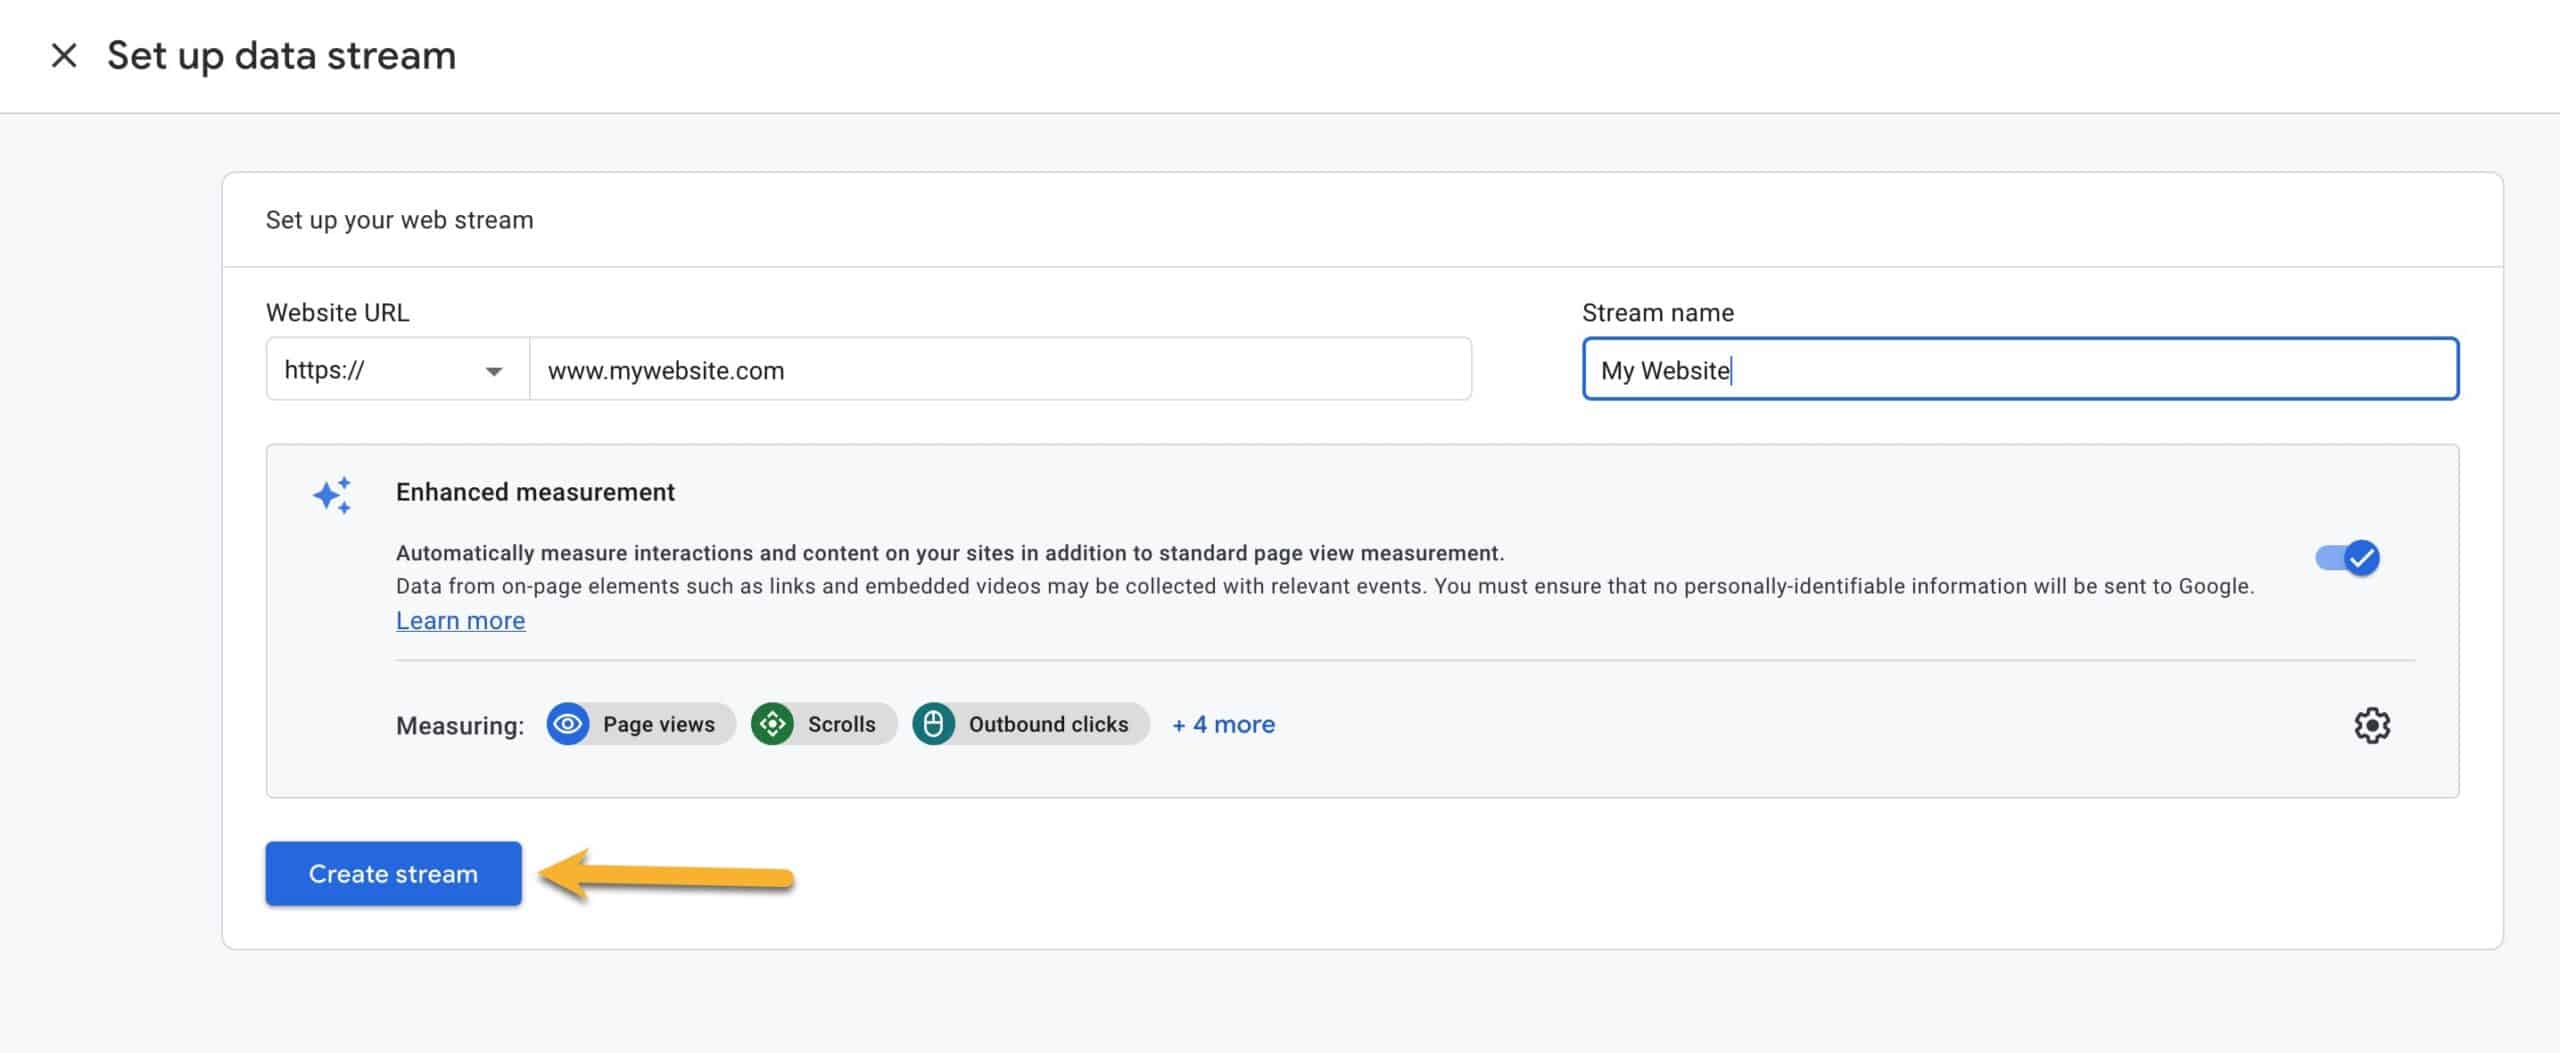
- Enter your Website URL (HTTPS is already included so you don’t have to enter it) and create a Stream Name (typically the site name).
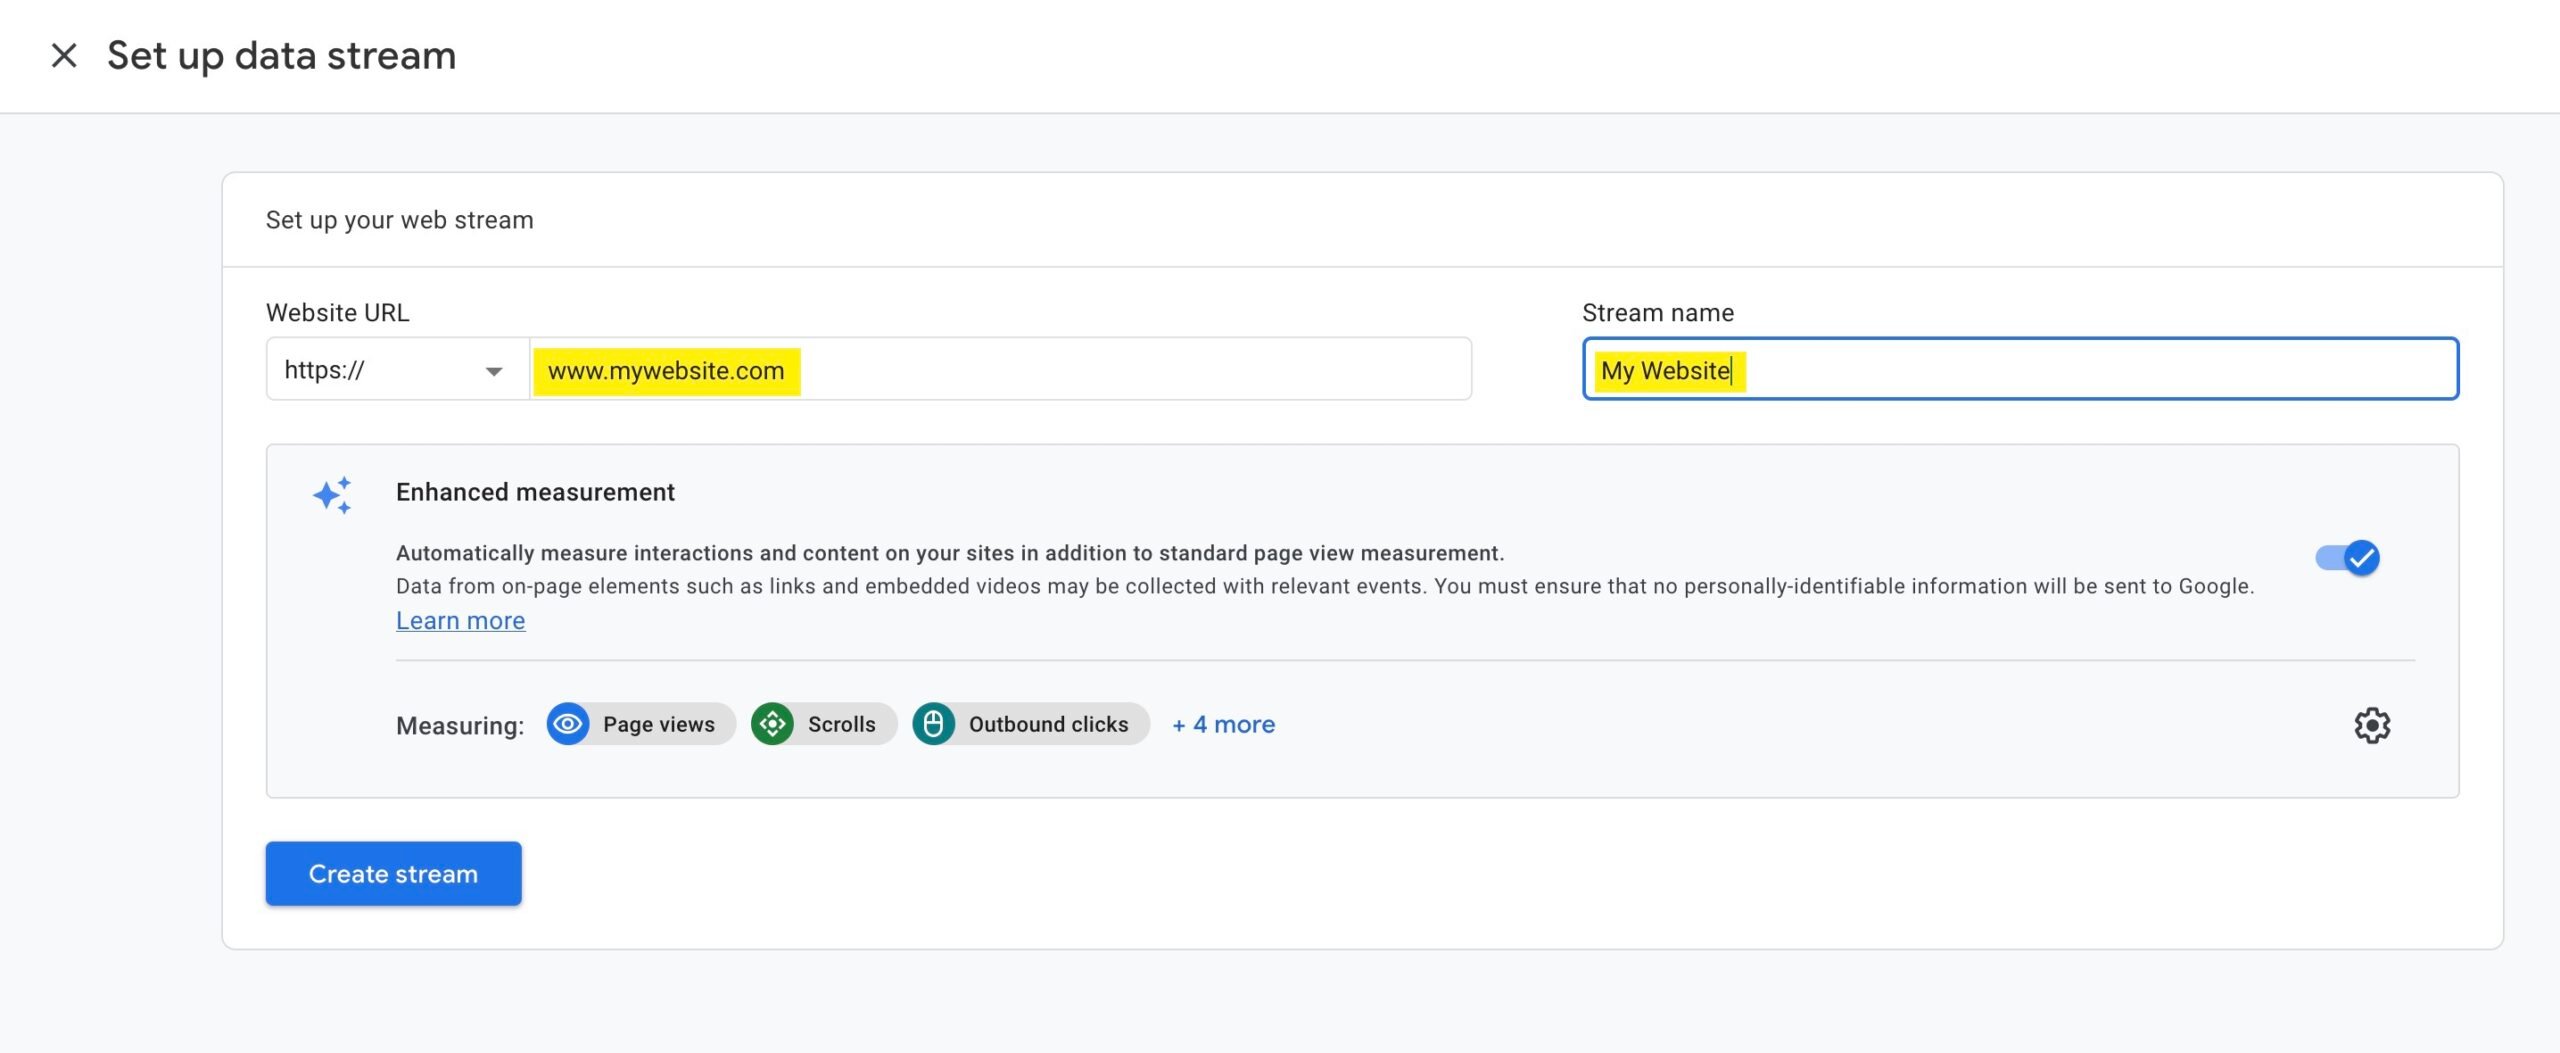
- Google has some Enhanced measurements that measure things like page views, scrolls, etc. You’ll want to make sure this setting is on. Beyond that, we don’t recommend changing the default settings.
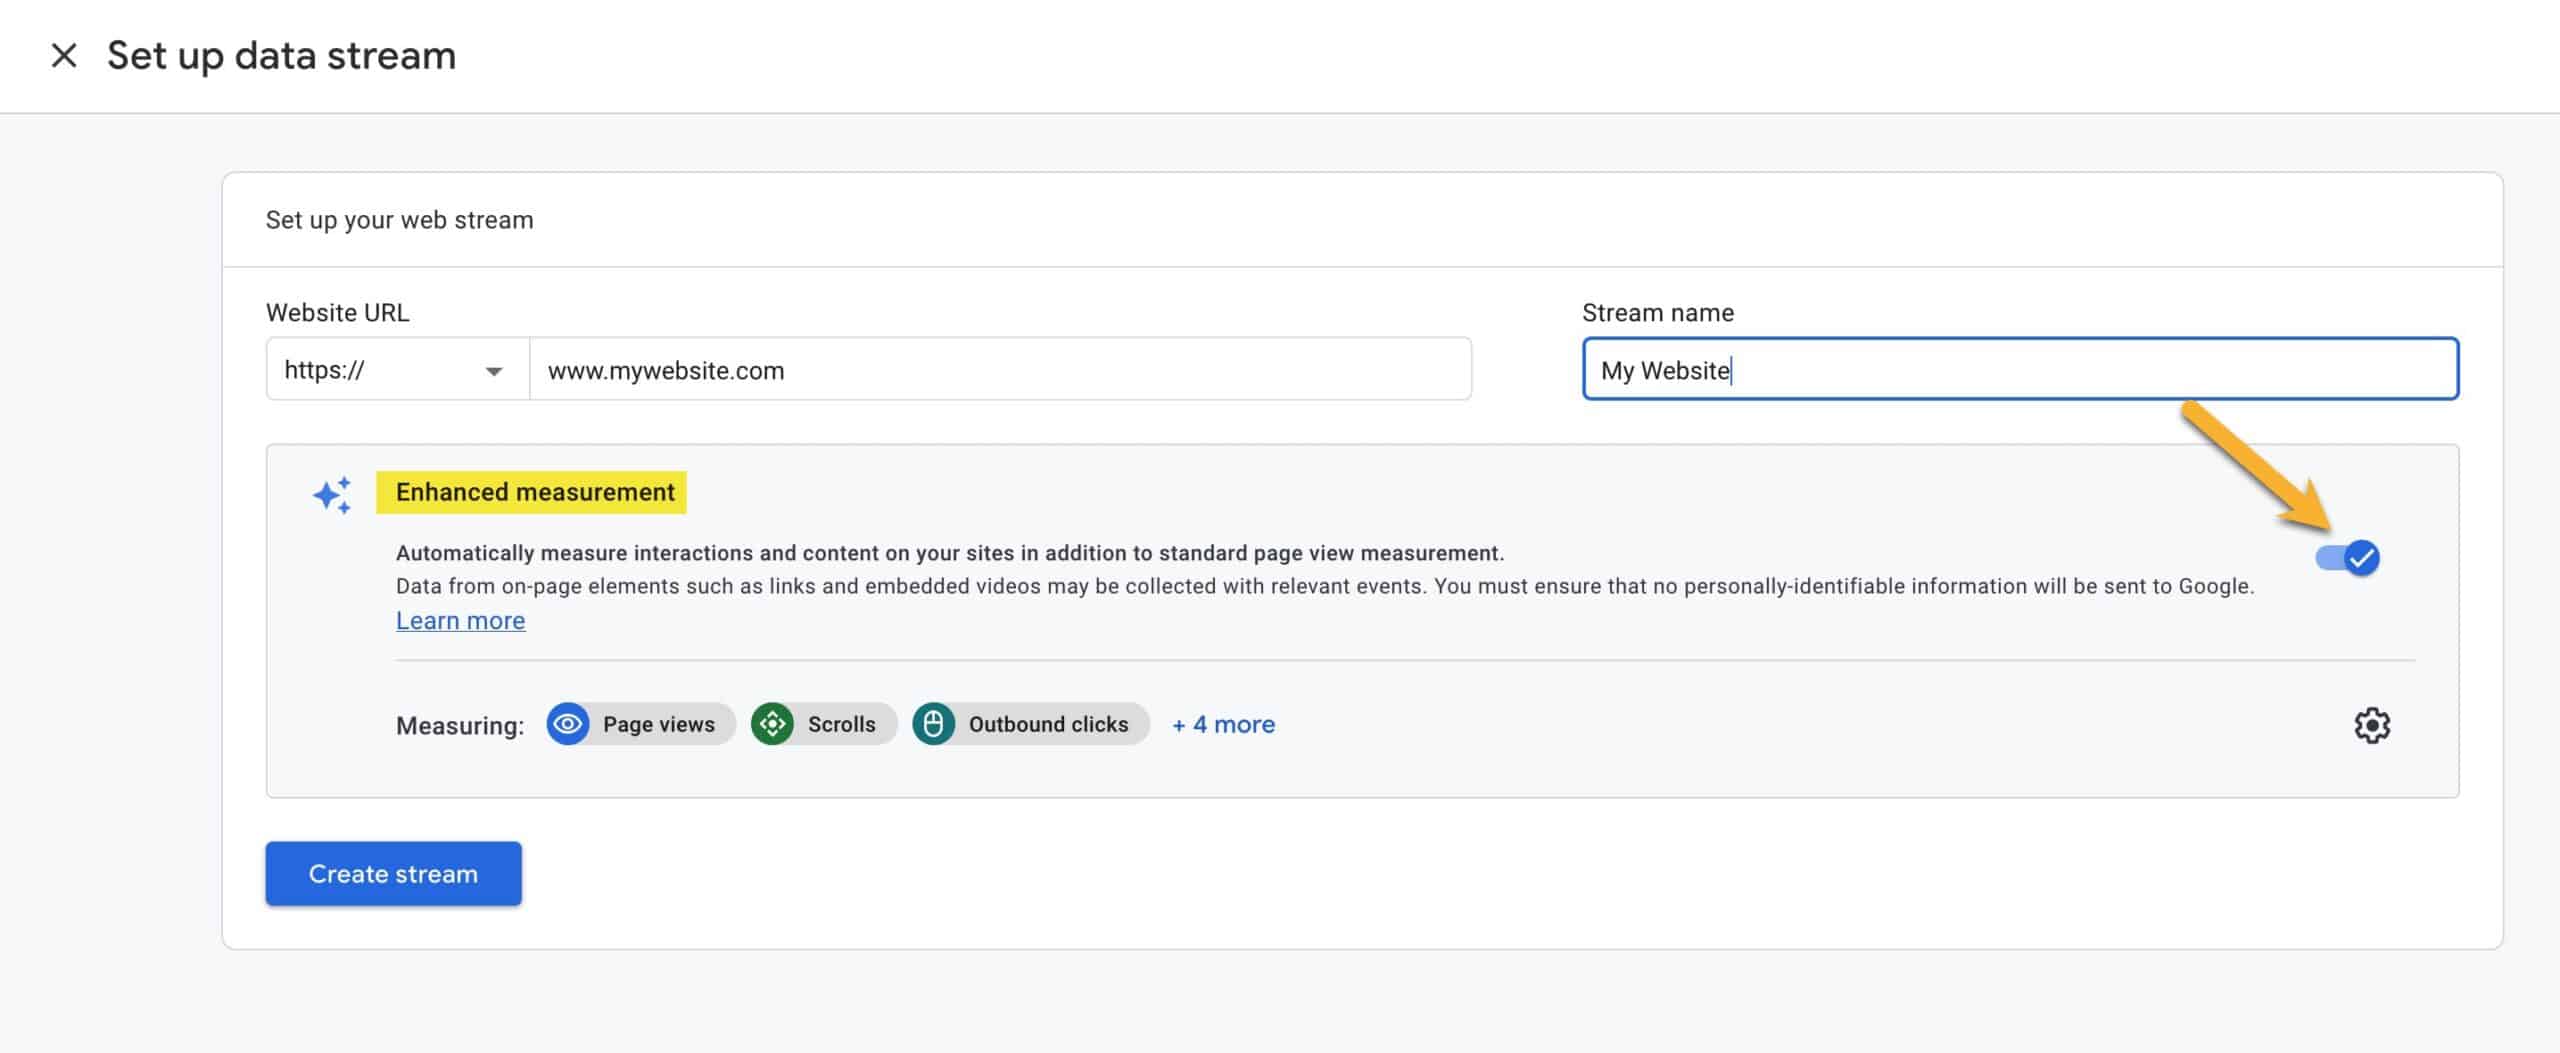
- Click the Create stream button and you’ll have created your GA4 Property. Yay! 🎉
Don’t leave your Google Analytics dashboard just yet. Next, follow the directions below to get your property ID and code.
Get your GA4 Property Tag ID and Code
Now that you’ve created your new GA4 property, there are a variety of ways to connect this to your website so you can start collecting data. We’ll link to various methods below. But first, you’ll want to get your GA4 Property Measurement ID.
- Right after you’ve created your new GA4 property in the Google Analytics dashboard, you’ll be presented with Installation Instructions. You can close that tab.
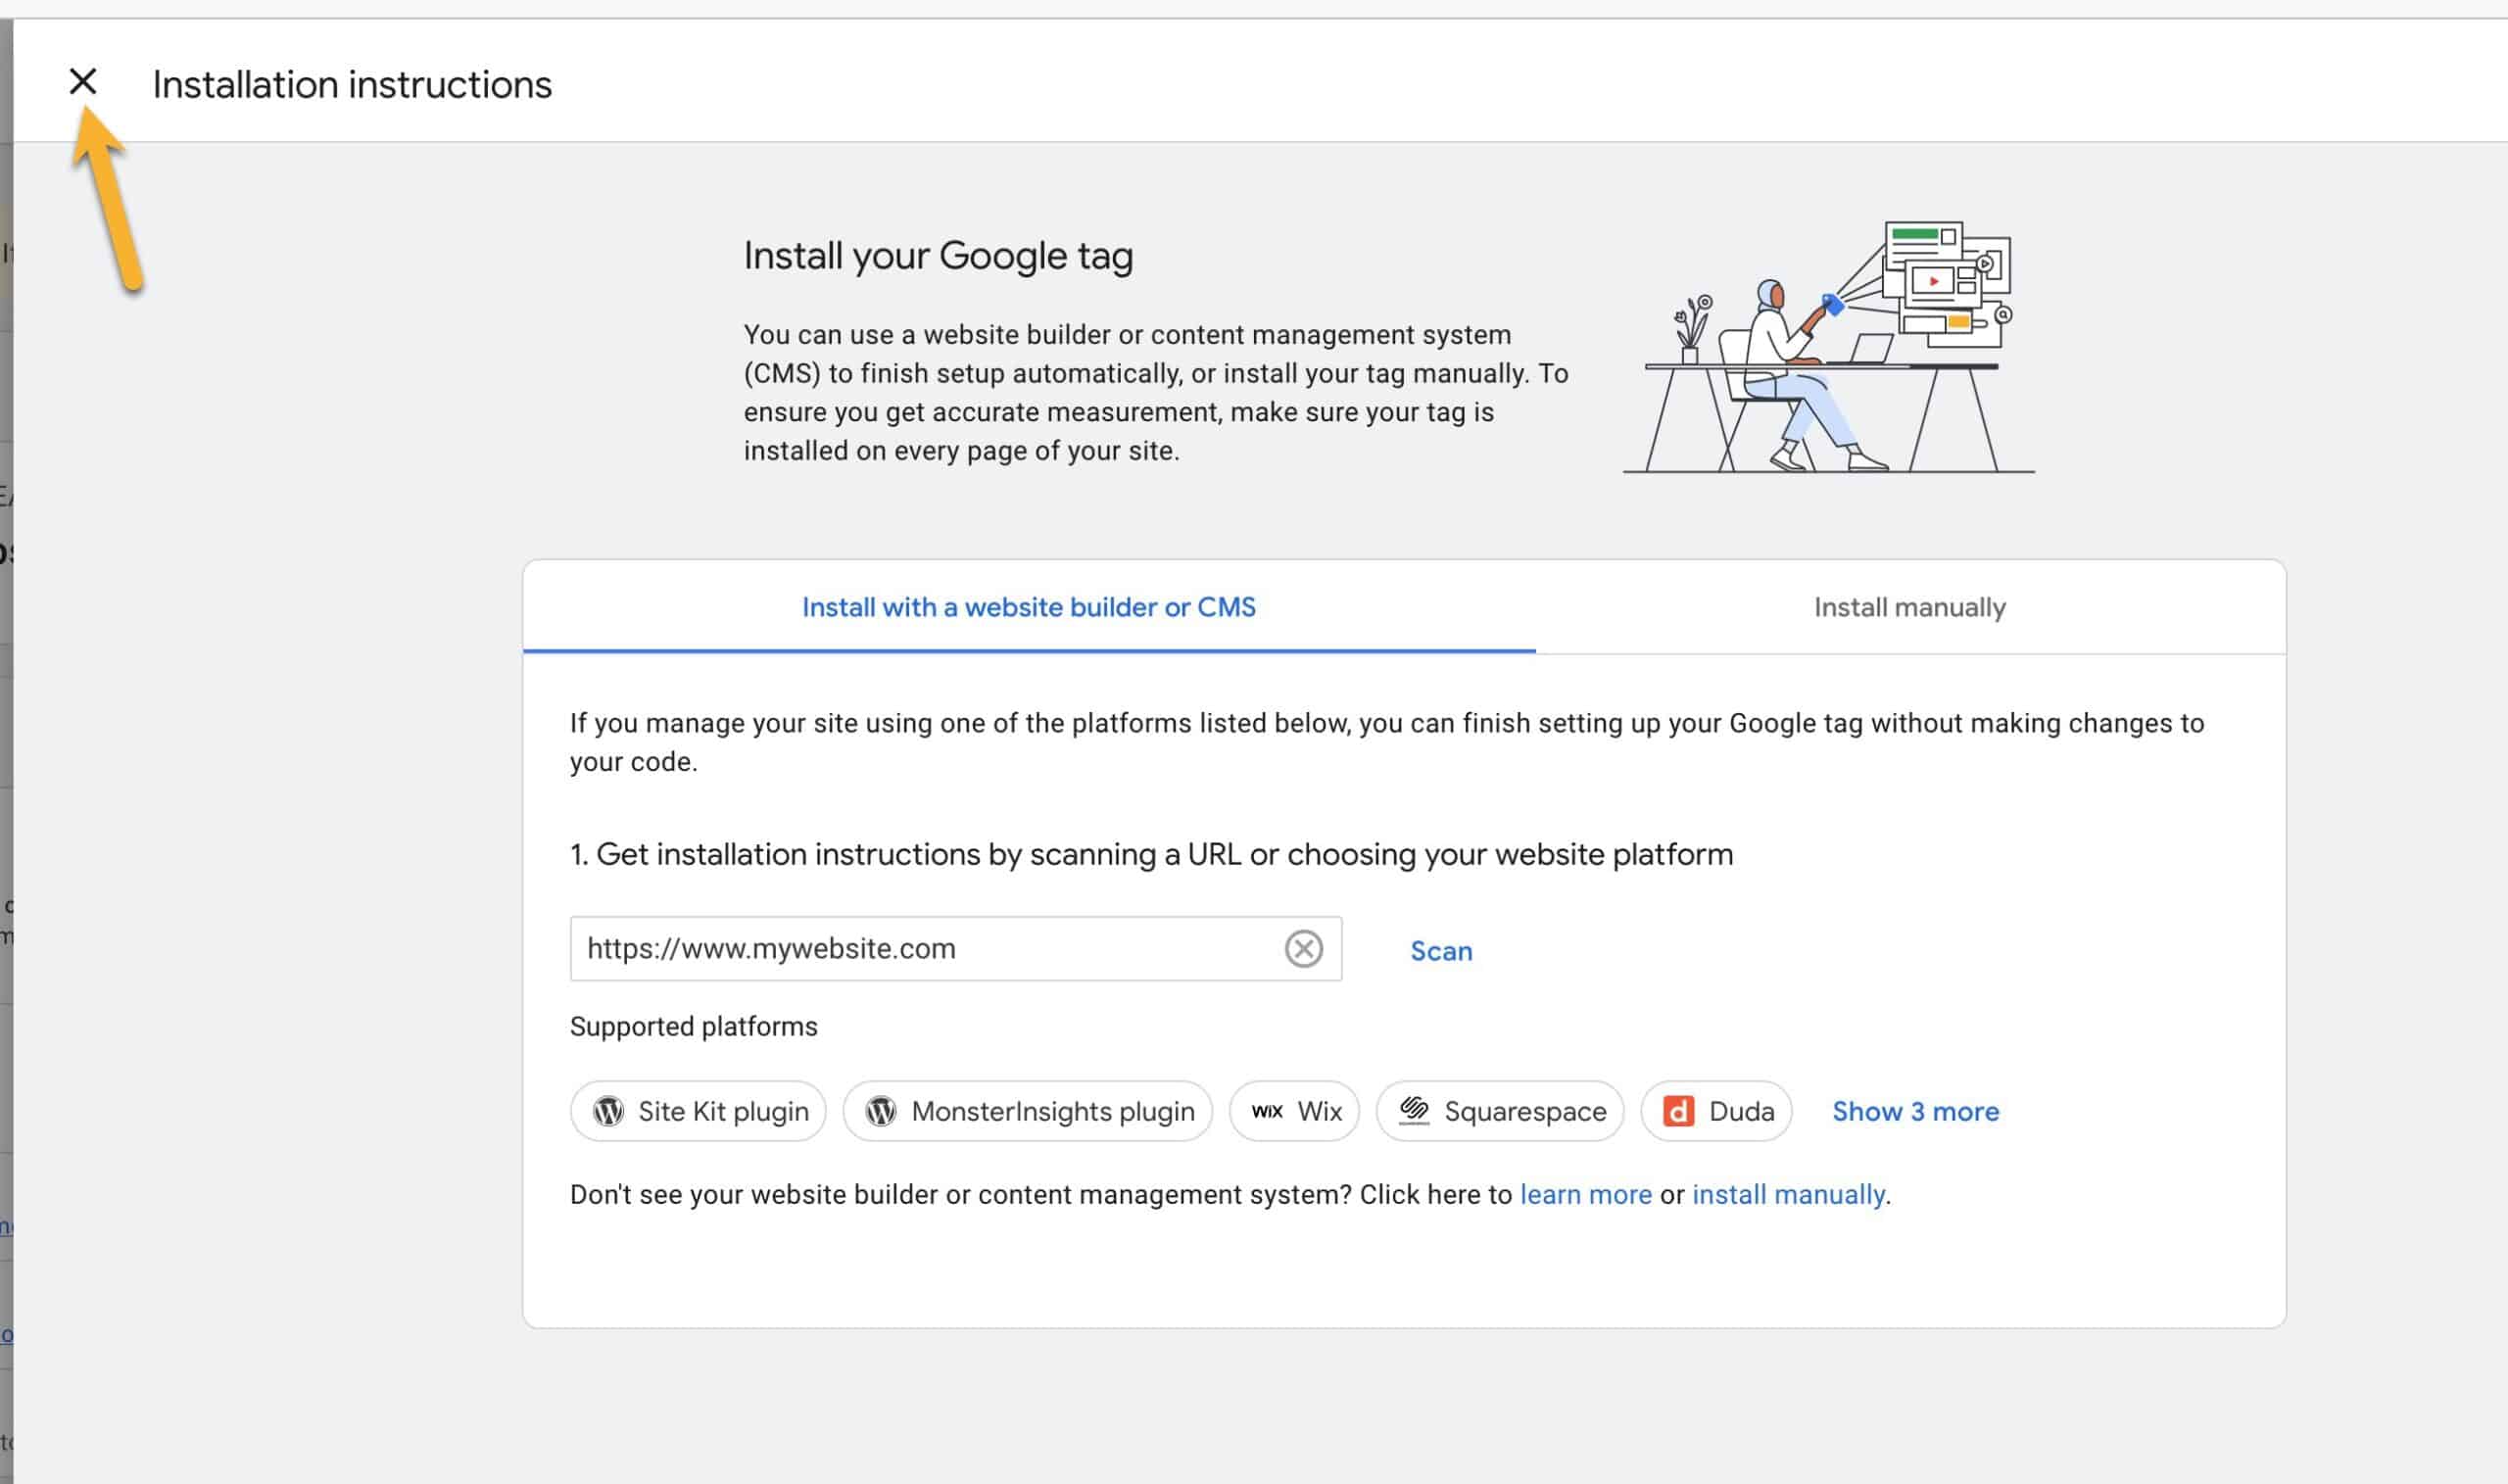
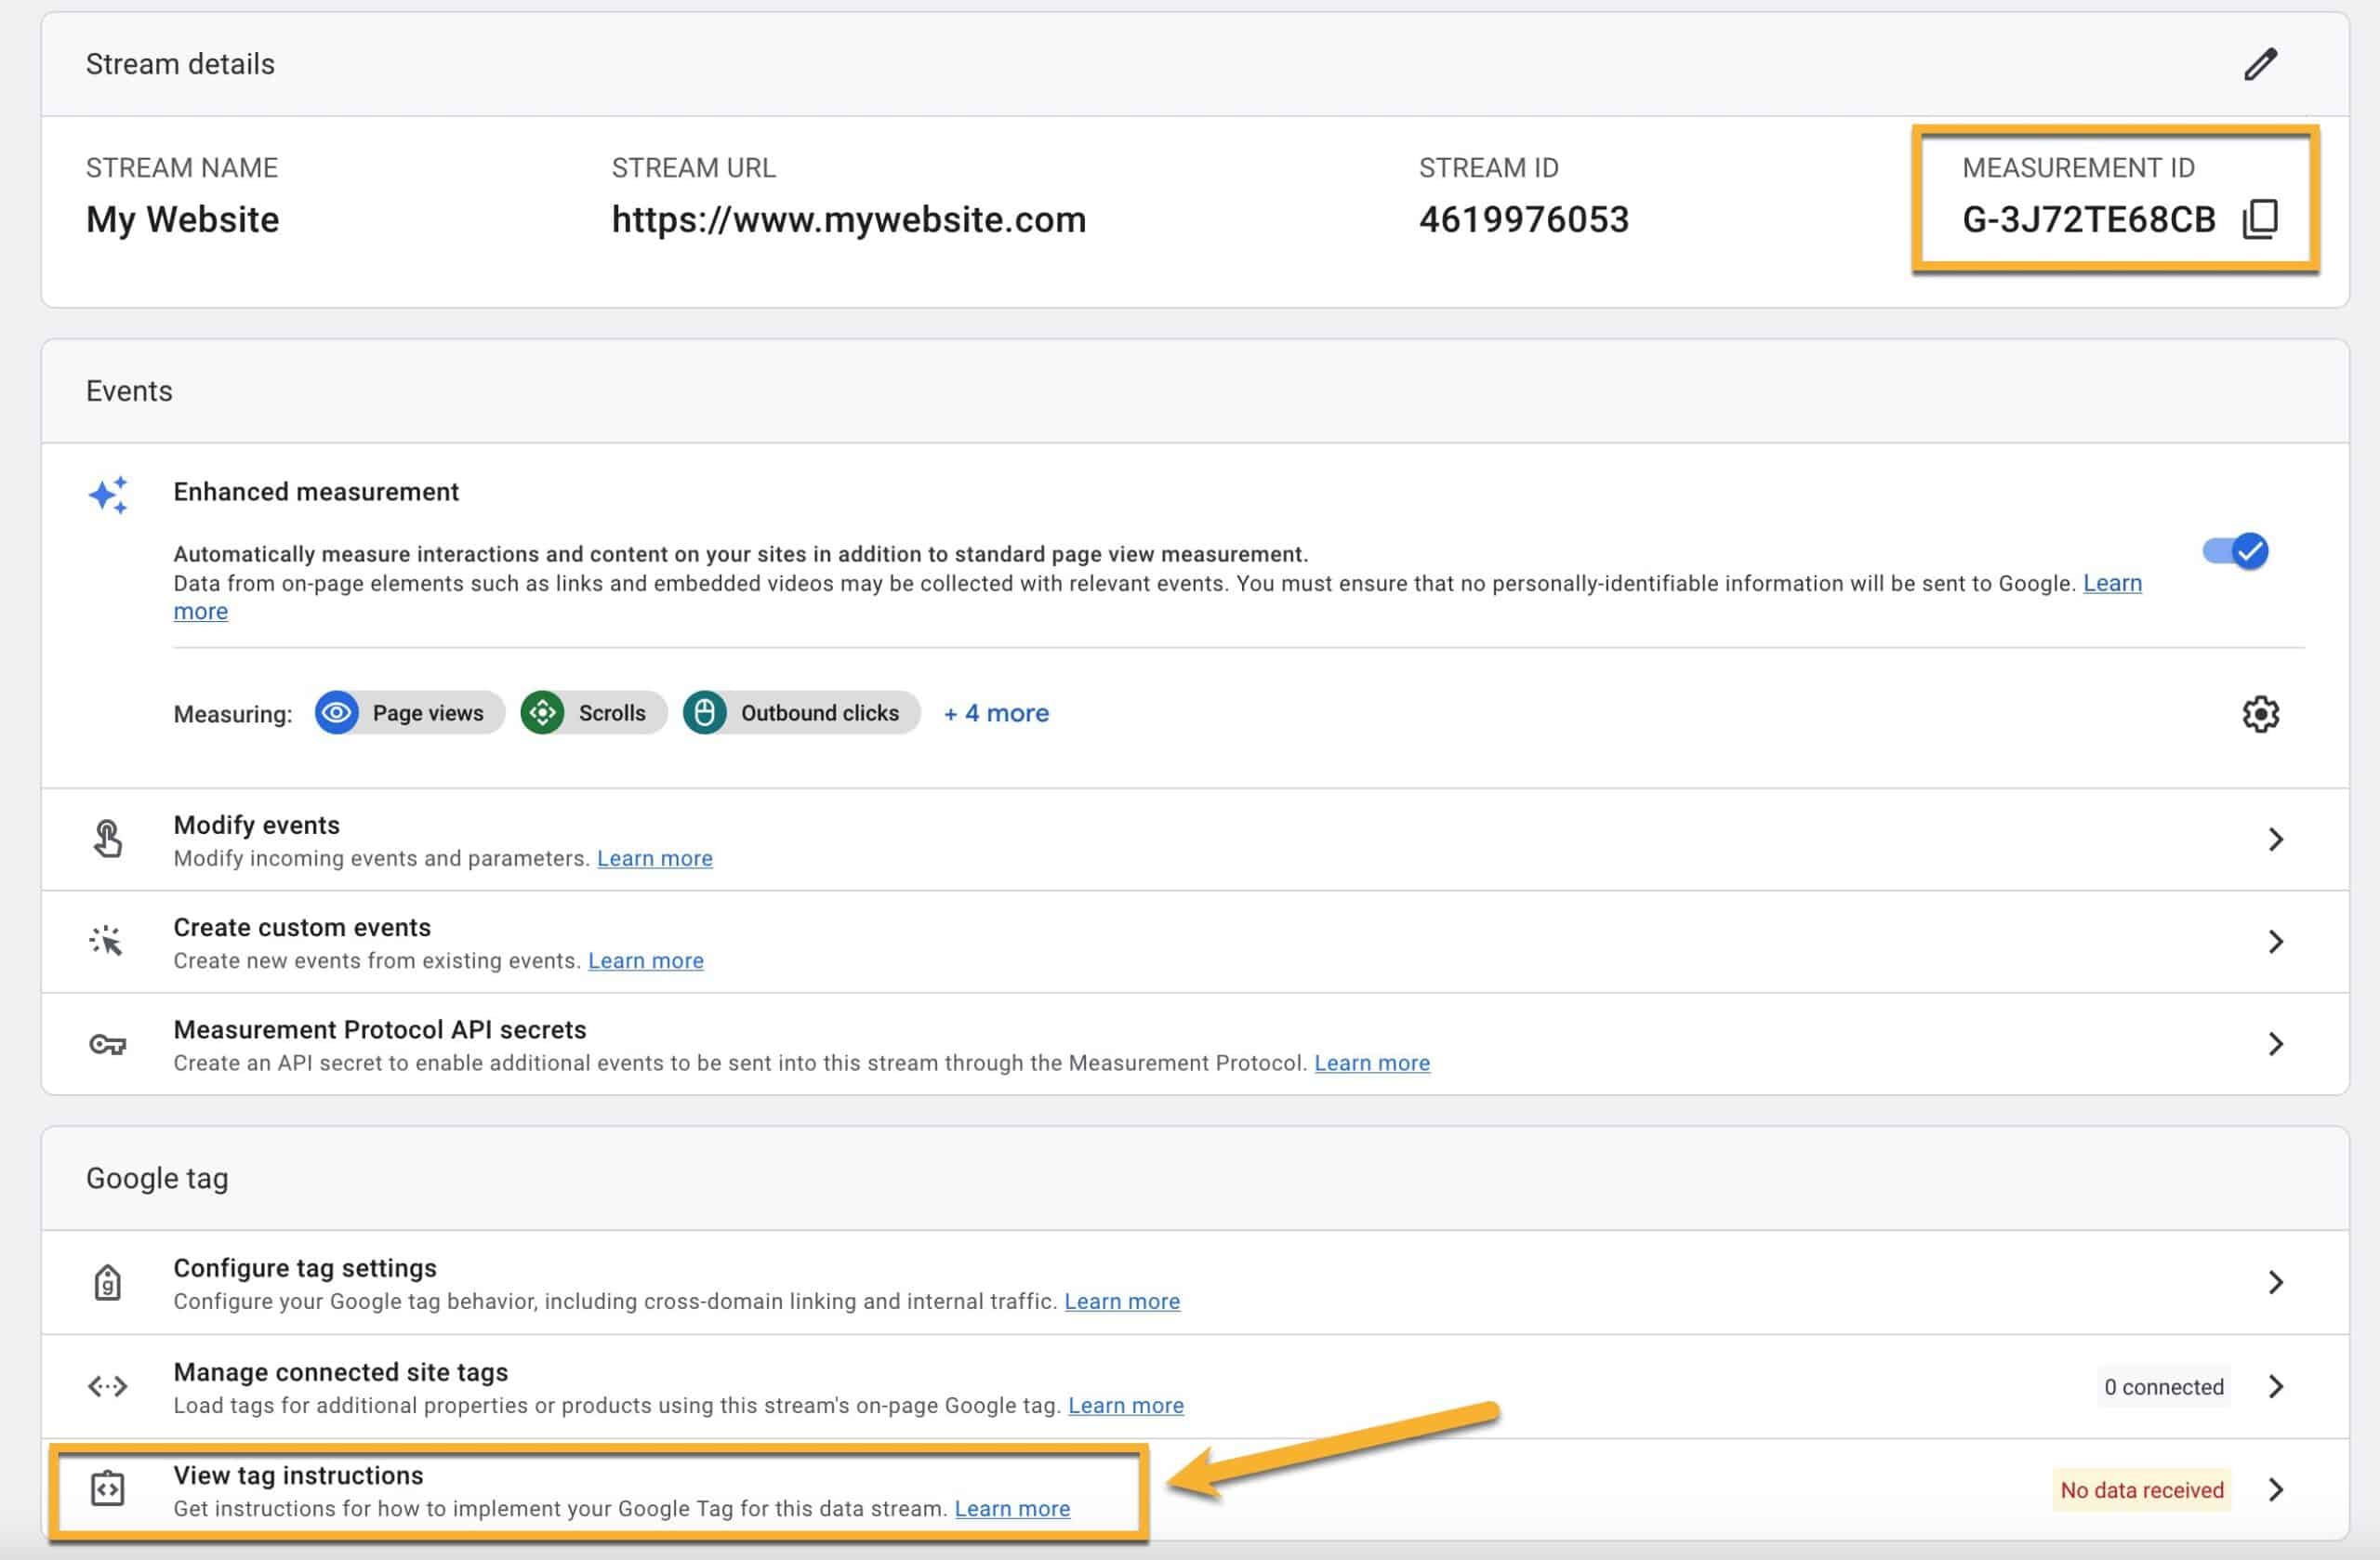
- That will reveal the Web Stream Details, which will give you all the information you need to set up the script on your site, including the Measurement ID and tagging instructions. It’s helpful to keep this information at hand for the next steps.
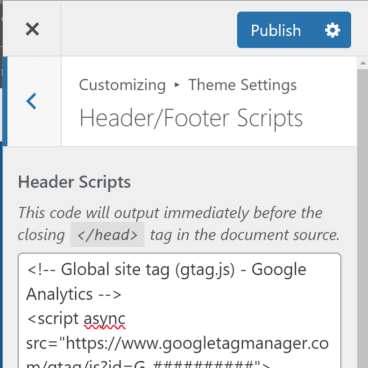
Step 2: Determine how your UA tag has been added to your website
Tracking data won’t start flowing into your new GA4 property until you add the GA4 tracking code to your site.
Based on our experience and conversations with multiple collaborators, we don’t recommend using a tag setup where you “connect” the GA4 property to a UA property (or vice versa) directly in the Google Analytics Dashboard, so the GA4 code will need to be added to your site through the use of a plugin or by directly placing the code on your site.
However, if you’ve already set it up via a “connection” and it’s tracking correctly, that’s fine too. The most important thing is not implement both methods, else it may double-track.
The best method for you will depend on what your current setup with your UA tracking code is. So, first, you need to figure out how your current UA tag code is added to your site. There are several ways this can be done:
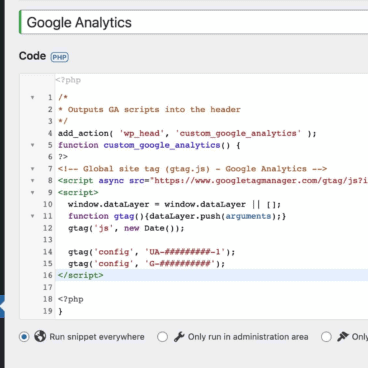
- Via various Google Analytics plugins,
- In the theme settings,
- Or using a snippet or code plugin.
Please see our instructions on finding your existing Google Analytics tag, then come back and proceed with Step 3 below.
Step 3: Add Your GA4 Tag Code to Your Website
Now that you have created a new GA4 property for your site and found the Measurement ID, and figured out how your existing Universal Analytics (UA) tag has been added to your site, you’re ready to update the code on your site to start collecting data with GA4. Check out the articles below for directions on how to add your GA4 tag to:
- The Site Kit Plugin
- The MonsterInsights Plugin
- A code snippet in your theme settings or a code snippet plugin.
Once you’ve added the GA4 tag to your site and confirmed it’s tracking correctly, proceed to Step 4 below.
Step 4: Opt out of the automatic GA4 deployment
Beginning in March 2023, Google will be automatically creating a GA4 property and connecting it to existing UA properties, unless users opted out. Since we do not recommend using the “connected” tags between the two properties, we recommend opting out after you’ve done the above setup.
To opt out:
- In Google Analytics, click Admin.
- Make sure you are in the correct account and Universal Analytics property.
- In the Property column, click GA4 Setup Assistant.
- At the bottom of the page, turn off the Automatically set up a basic Google Analytics 4 property toggle.

Alternatively, click Manage GA4 migration in the yellow informational banner at the top of your Analytics account. Turn off the Automatically set up a basic Google Analytics 4 property toggle.
That should take care of everything! Be sure to check back over the next few days to make sure you’re seeing similar stats in your old UA property and new GA4 property. They likely won’t be exactly the same, but they should be close.
If you’re a client on one of our WordPress Support Plans and have run into any difficulties in this process, please get in touch with our support team and we’ll be happy to help out!

What a great resource. Thanks to you and the team!
Ummmm… so say I selected “Yes” when it asked me if I want to connect my G4 property to another property. Is there a way that I can undo it? And this is why I’ll never do anything without waiting for guidance like this to come out.
Hi Martha here is a way to disconnect tags once they are connected. To do so:
1. In Admin, click your older UA property.
2. In the Property column, click GA4 Setup Assistant.
3. Under Connected Property, click disconnect.
4. Go back to the Property column and click Tracking Info then Tracking Code.
5. Click on Connected Site Tags
6. Click on the 3 dots next to the tag and click “Remove Tag”
Then, be sure to follow the rest of the implementation guide, so that both the UA and GA4 property IDs are in your script.