The Google Site Kit plugin can be used to connect your WordPress site to Google Analytics.
If you’re already using the Site Kit plugin to connect your sites to Universal Analytics (UA), this makes it the logical choice to also add the GA4 tag to your site.
This is Step 3 in our tutorial for setting up Google Analytics 4. The directions below assume you’ve already created a GA4 property, and have the Google Site Kit plugin active on your site with your Google Universal Analytics (UA) property set up using this plugin. (Go here if you’re not sure how your existing UA tag is being added to your site.)
Table of Contents
Video Walkthrough
How to Add Your GA4 Tag to the Site Kit Plugin Settings
- In your WordPress dashboard, go to Site Kit >> Dashboard.
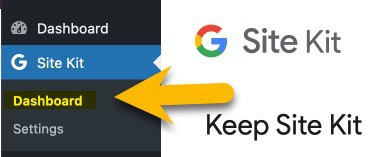
- At the top of the page, you should see a banner prompting you to connect your GA4 Property to Site Kit.

- Select your GA4 Property from the Google Analytics 4 Property drop-down.
- Once you select a property, your GA4 property will be connected and you will see the message below.

For NerdPress clients, make sure to clear your site caches (WP Rocket and Cloudflare or Sucuri) so that your plugin settings updates will go live on the front end of your site.
A note about GA4 statistics and Site Kite: Right now, GA4 statistics are not reported in the Site Kit dashboard within WordPress. GA4 statistics can be viewed in your Analytics account. However, adding GA4 data to Site Kit’s dashboard and reporting is in Site Kit’s roadmap. For more details, see this GitHub issue.
What If You Don’t See the GA4 Connection Banner on the Settings Page?
If you have connected Analytics through Site Kit in the past without adding GA4 or you have deleted a previously connected GA4 property you may not see the banner.
To connect GA4 in Site Kit, visit the Site Kit > Settings > Connected Services section. A Connect Google Analytics 4 button will be displayed in the Analytics section.

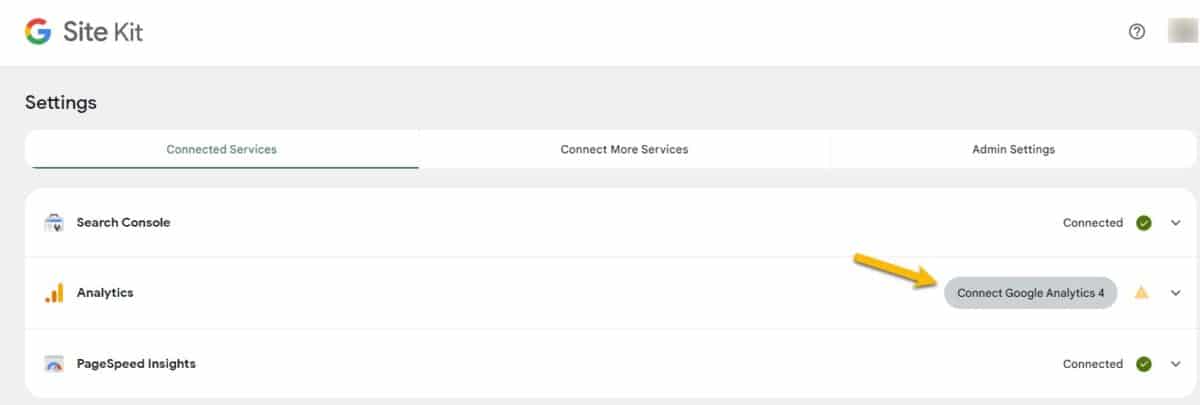
If you already have existing GA4 property/ies in your Google account, they will be listed in the Google Analytics 4 Property dropdown menu, where you can choose to use an existing GA4 property or create a new one.

After you click your GA4 property from the drop-down, click the Confirm Changes button.
Check the Site Kit Settings
If you’re a bit paranoid like me and like to confirm all the things, once you’re used successfully connected your GA4 property in Site Kit following the method above, you can check to make sure that your GA4 property is showing up correctly in the Site Kit settings and that the snippet has been enabled.
- Go to Site Kit >> Settings.

- Under the Connected Services tab, click on the Analytics section to expand it.
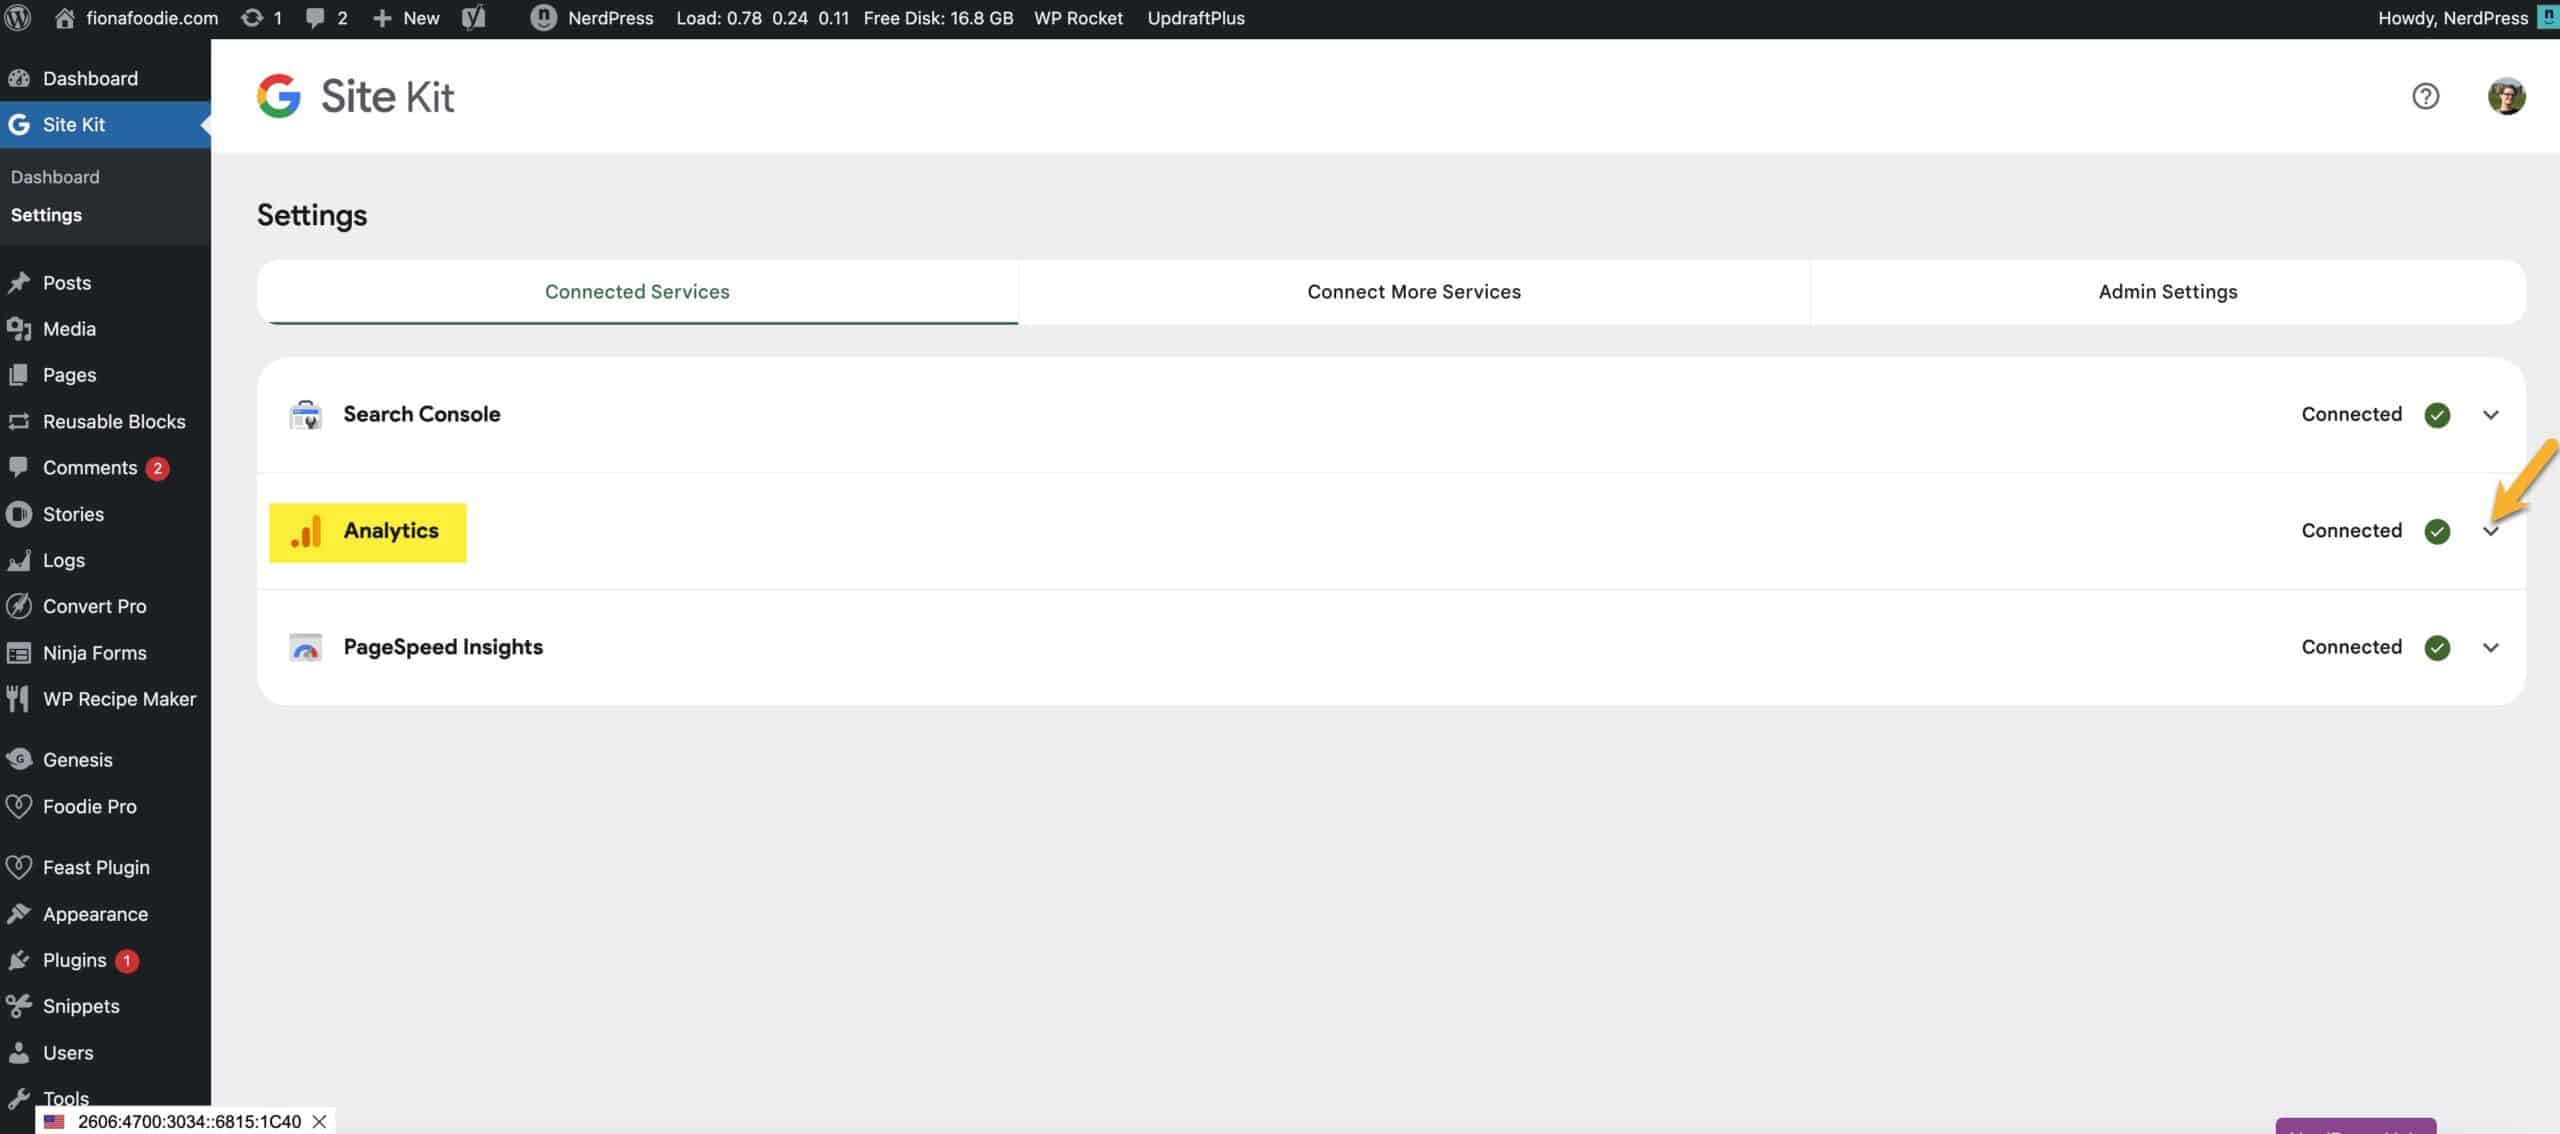
- Under the Analytics settings make sure that you see both a UA and a Google Analytics 4 property listed. Under each property, the option to place the analytics code should be toggled on as seen in the screenshot below.
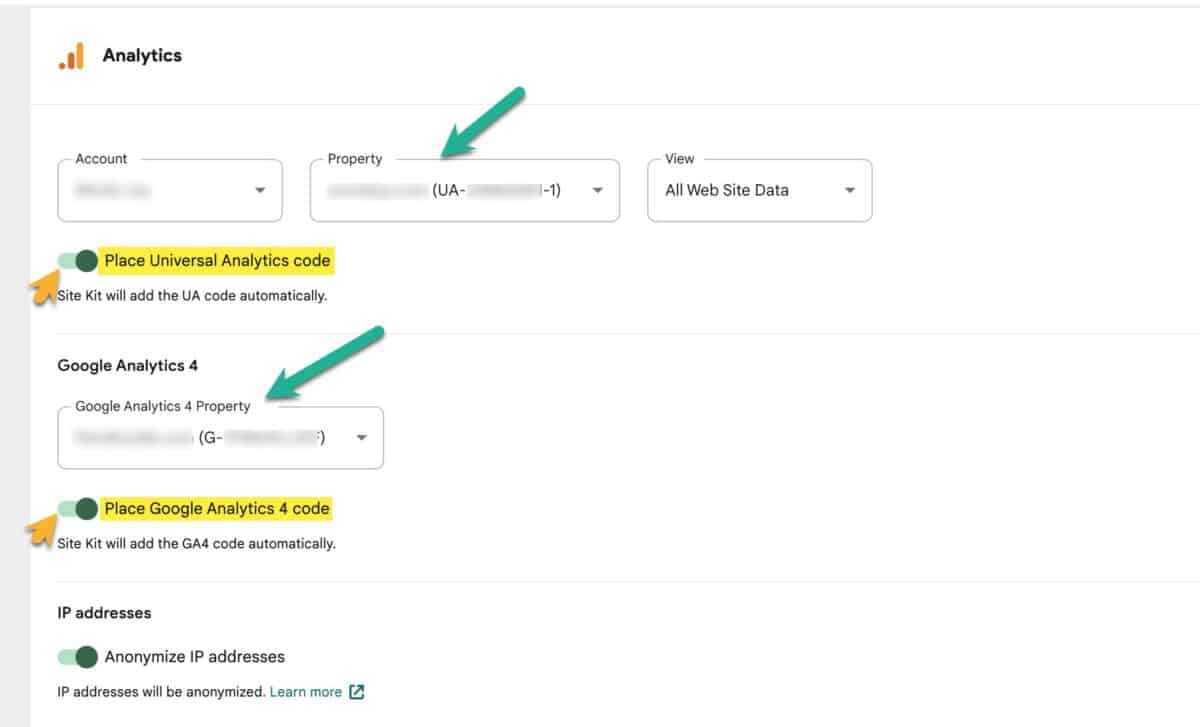
If these settings look good, data should start showing up in your GA4 dashboard within about 24 hours.
To check that your Google Analytics tags are set up correctly, we recommend using the Google Tag Assistant website.
👉 Once you’re sure they’re added correctly, proceed to Step 4: Opt out of the automatic GA4 deployment.



Once Google Analytics 4 is installed, are we ok to delete the complete UA tags that we had under our WordPress theme admin?
Hi Eric,
UA will keep collecting data until July and most of the ad networks are still using UA. So, we’d recommend you keep UA in place alongside GA4 for now. Then in July, you’ll want to export your UA data before you delete anything. Google has said they’ll keep that data for at least six months, but it will be a good idea to download that info once UA is sunset. So, for now, the answer is, we don’t recommend deleting or removing anything.