Get key takeaways:
We were recently approached by our friends at ThermoWorks with an interesting technical dilemma. They design, manufacture, and sell high-quality thermometers and timers (I love my Thermapen!) — and they’re currently moving their affiliate program to a new platform. As a result, all of their affiliates need to swap the existing affiliate links on their sites.
Rightfully, the publishers are concerned about both the workload of changing links and any potential SEO impact of editing high-ranking posts — since any change on a site can cause Google to re-crawl, re-index, and ultimately re-rank the content. 😬
While we can never control what Google does (if only!), there are steps you can take to minimize the risk — while also making it easier to change the links. 🎉
Minimizing the likelihood of an SEO hit involves two key strategies:
- Don’t update the “Last Modified” date on the post or page.
- When changing the link, don’t change anything else!
Below are a few different ways to achieve this.
Table of Contents
Generally, we recommend displaying both the original “Published” date and the “Last Modified” (or “Last Updated”) date at the top of your blog posts. This gives readers context of not only how old the content is, but also how fresh it is.
Even if you’re not displaying the Last Updated date to your visitors, search engines will likely see both dates in the page code. The last modified date will also be included in the Sitemap generated by your SEO plugin, signaling search engines to re-crawl the content.
Option 1: Change the links manually.
If you have only a few links to swap, the easiest method is edit the post (or page) and change the link.
In this case, we recommend you use the Change Last Modified Date plugin. This gives you an option to “Freeze” the Last Modified date on the post when updated, thereby avoiding signaling to Google (or your visitors) that any edits were made.
Resist the temptation to make any other edits unless you have significant improvements to make and are willing to risk search engines re-ranking the post!
Option 2: Use the Broken Link Checker plugin
The Broken Link Checker plugin can be used to bulk edit links without modifying the post date (in addition to helping you find and fix broken links, of course).
This option is best if you already have the plugin installed (or are fine installing it), have many different links to change, or can’t remember where the existing links are.
BLC offers both “Cloud” and “Local” versions (available once installed); we prefer the Local version since you don’t need an account on a third-party site.
Important: Before changing the links, double-check the plugin settings to be sure that it will not change the Last Modified date. Go to Link Checker > Local [old] > Settings > General, and make sure Disable post modified date change when link is edited is checked:
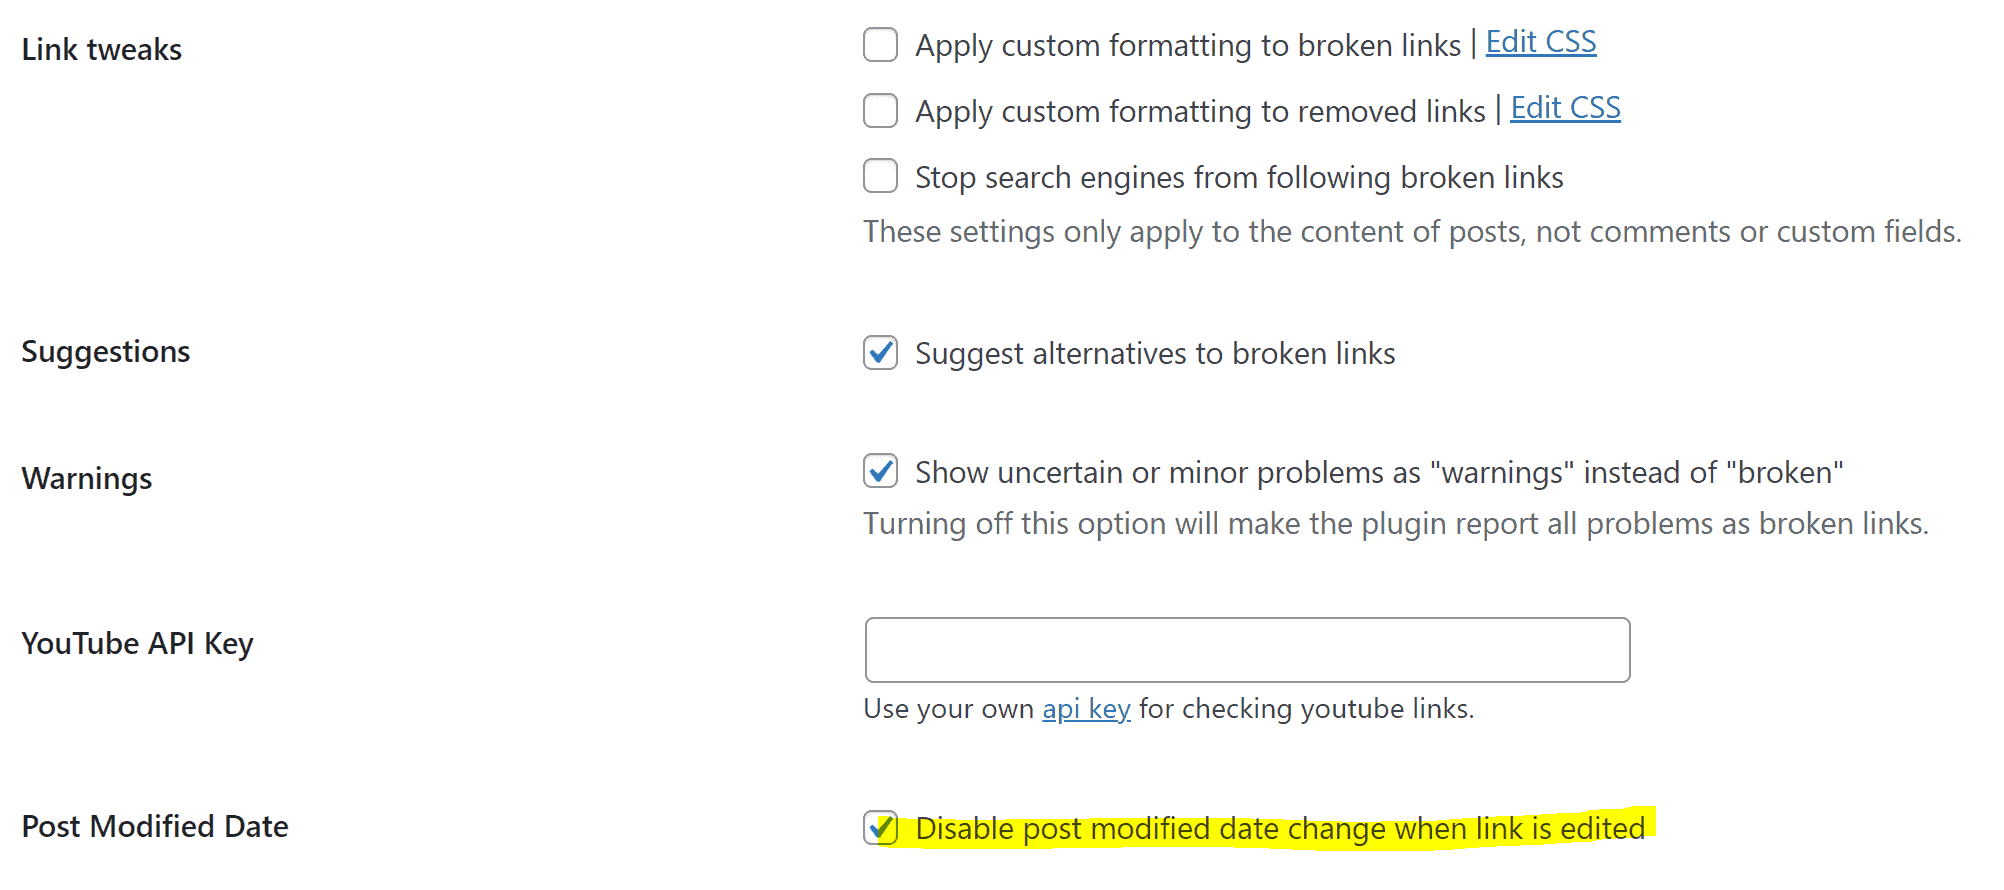
Bonus tip: I like to disable “Apply custom formatting to broken links” to keep it from adding strikethrough to your links on the front end. This is especially important for any false positives (if BLC is blocked, for example, but the link actually does work).
1. If you’ve just installed BLC, it will need a few hours to discover all the links on your site. It shows updates at the top of the settings page. (Be patient!)
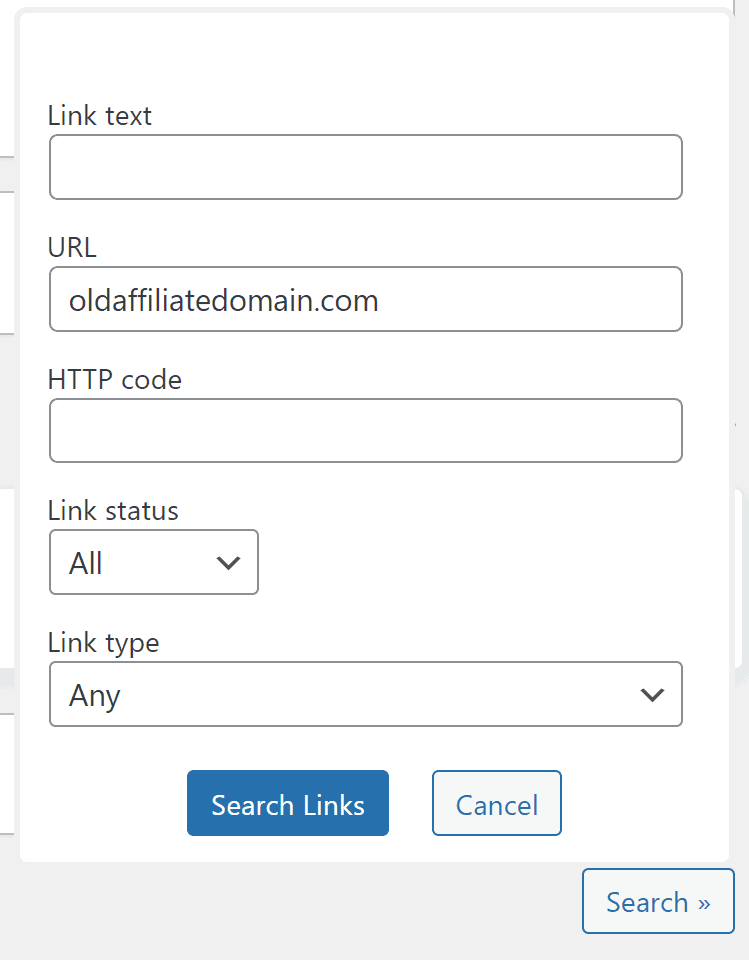
2. Then, on the main “Local” screen, you can search for all the links that point to the old affiliate domain. That will give you a list of the URLs needing changes. (Tip: You can then “Save this Search As a Filter” to save time in the future.)
Before proceeding, please take a fresh backup of your site — including the database — since this is a global operation that directly edits the database!
3. From that list, hover over a link to reveal the “Edit URL” button:

4. Clicking it gives you an inline form to replace the link:

Note: Changing a link in the BLC list will change it everywhere that same exact URL is used.
5. Double-check to be sure it worked.
6. Repeat for every old link, and then you’ll be all set!
Option 3: Use a Search & Replace plugin
If you’re faced with updating a large number of identical links and are comfortable with a slightly more hands-on approach, using a Search & Replace Plugin might be right for you. So if Broken Link Checker isn’t appealing to you, this method can be a practical way to swap links directly in the database without altering the Last Modified date on your posts. Just be mindful; this option carries a bit more risk, so proceed with caution.
To use this effectively, you will need to know the exact URLs you’ve used previously and what the corresponding new URLs will need to be — and then run a search/replace for each before/after pair of URLs.
Again, take a fresh backup of your site — including the database — before proceeding!
We recommend the Better Search Replace plugin. Follow these steps:
- Install the plugin (and make an extra backup!).
- Go to
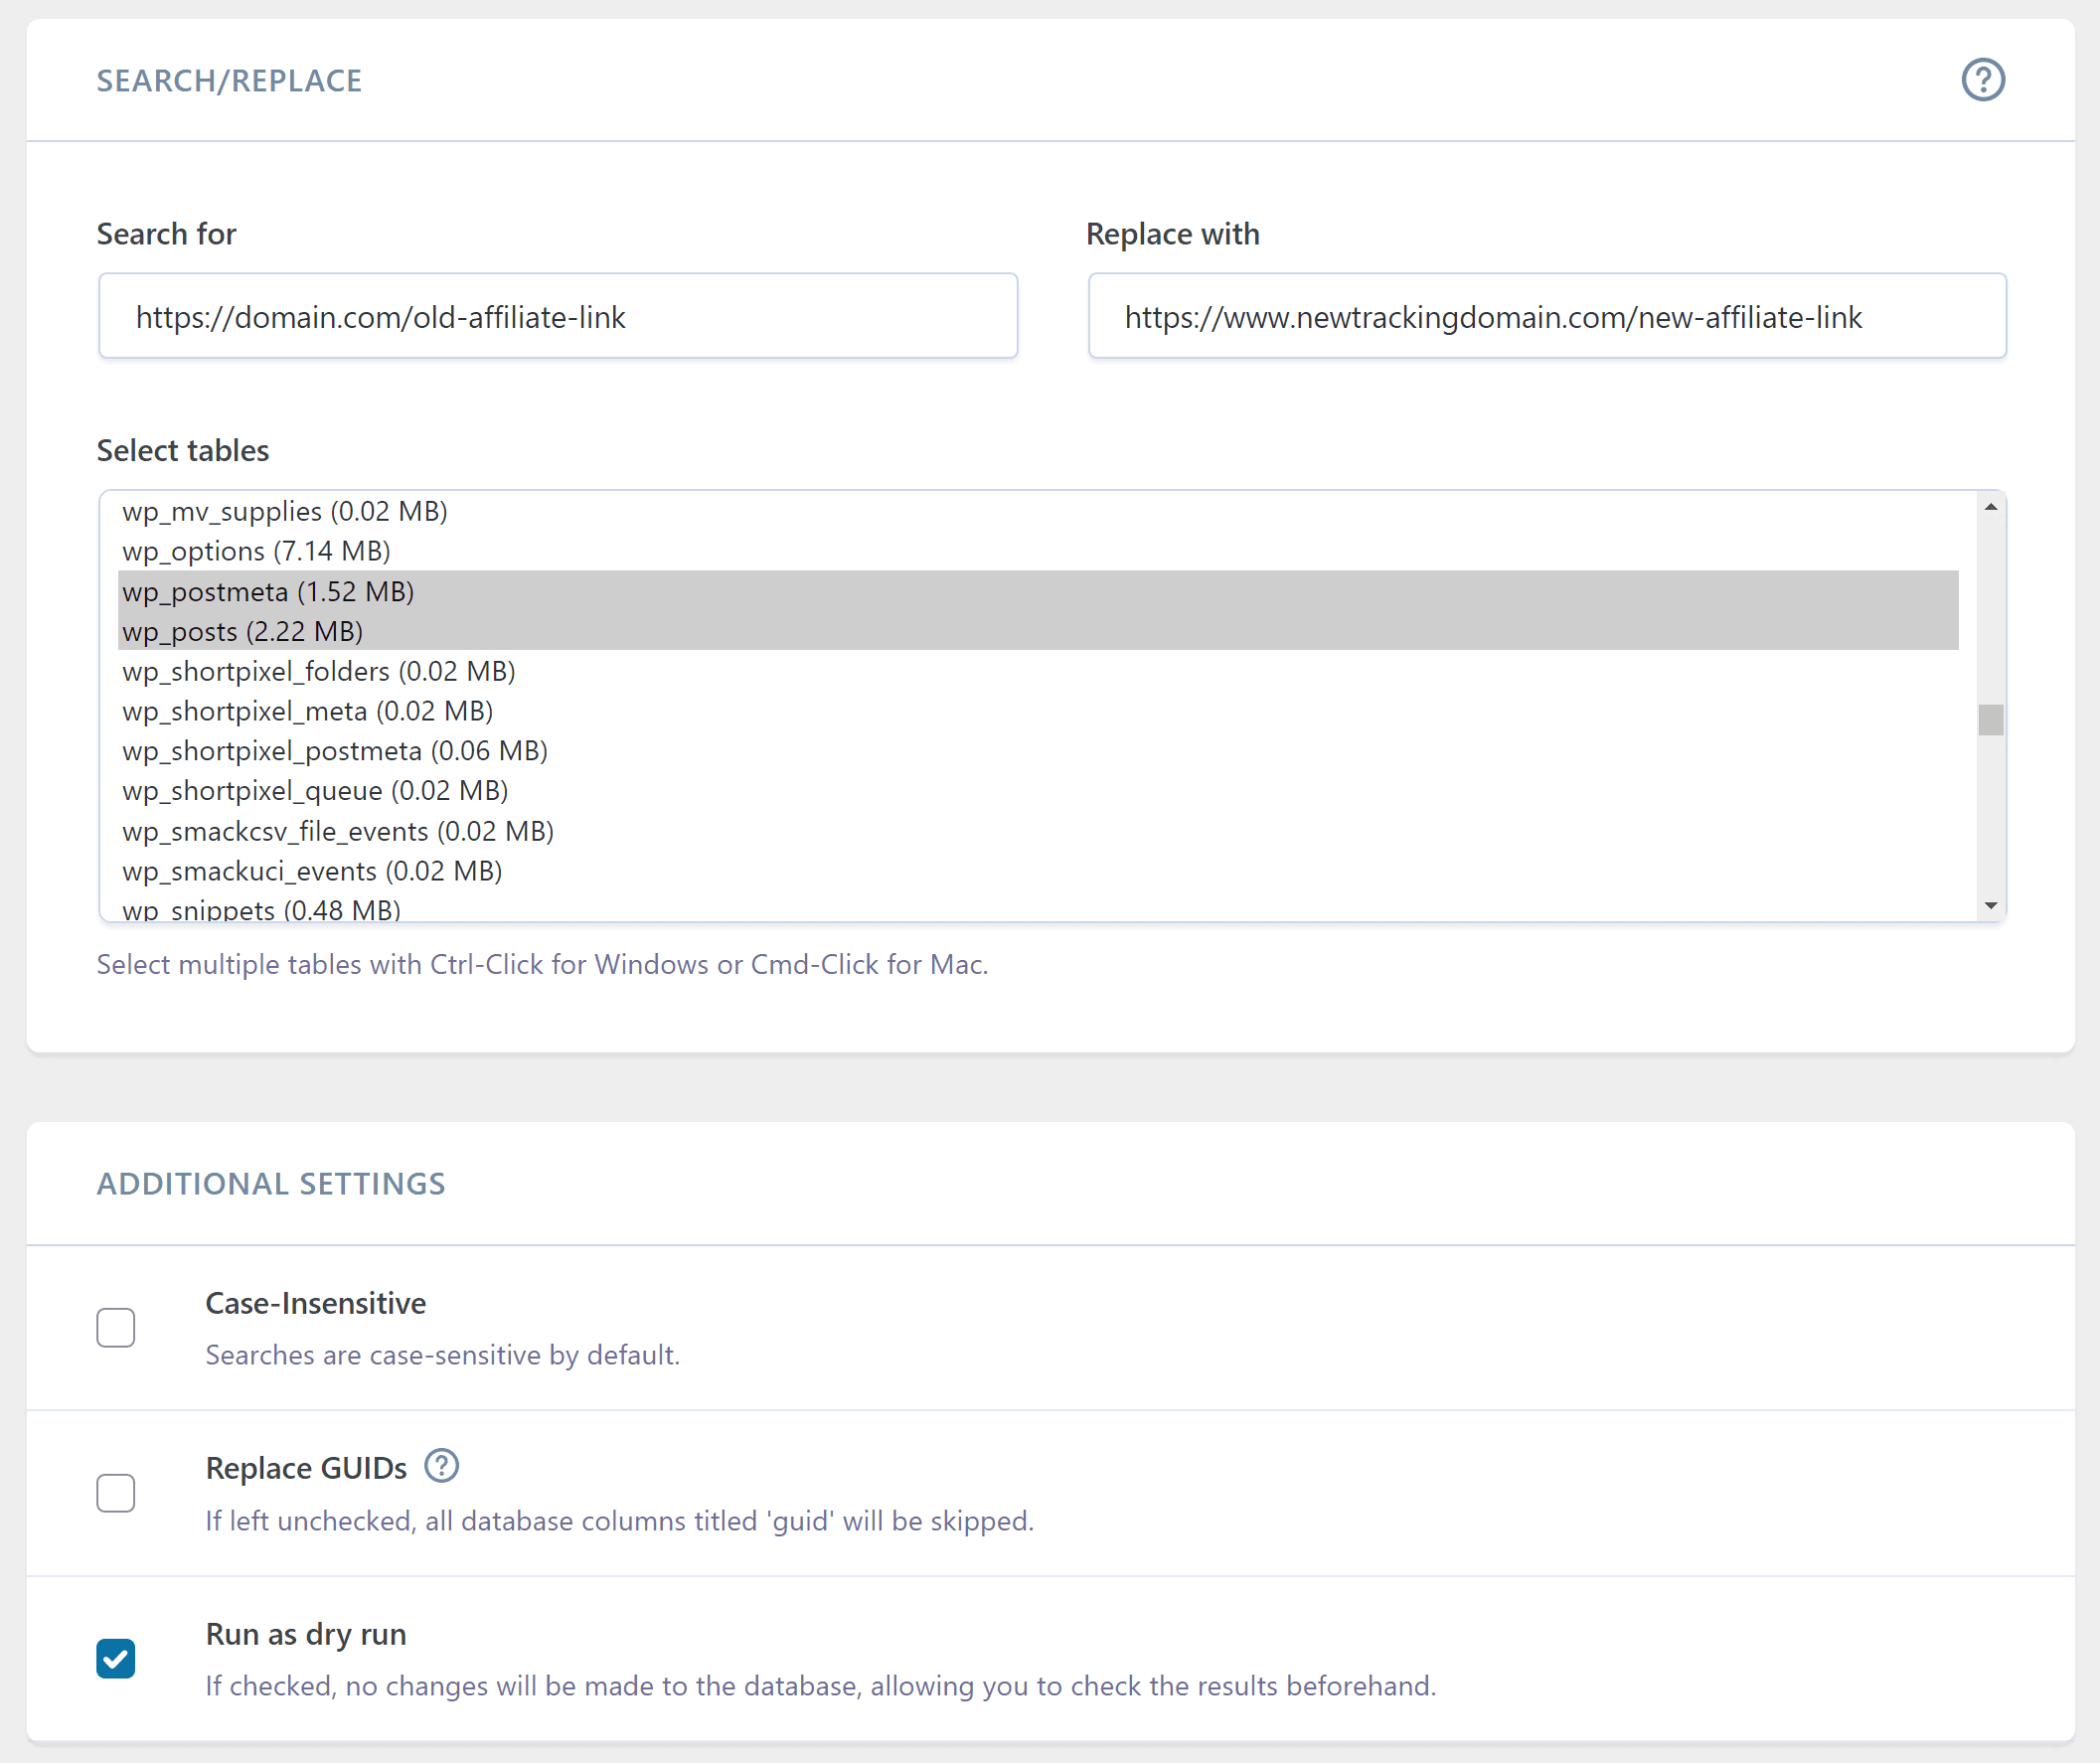
Tools > Search & Replaceand enter the old and new domains - Select the tables to search. For consistency, it’s easiest to select all tables (this will ensure supplemental tables, like Yoast Indexables, will also get updated — but if that takes too long, selecting
wp_postsandwp_postmetais probably fine. Also includewp_commentsandwp_commentmetaif you have any links in comments to change. - Do NOT check
Replace GUIDs. - By default it will run as a “dry run” — we definitely recommend doing this first, to see how many links will be changed in each table.
- Once you’re ready to do the actual change, re-run the search/replace with Dry-Run un-checked.
- Check your content to make sure the links updated correctly.
- Repeat for every before/after link pair.
Bonus Tip: Use a Redirection or Affiliate Link Manager Plugin
While you’re updating links, you may want to consider changing them to “redirectable” links on your own domain. This way you’ll never need to update them directly in your content again.
For example, you can set the link in your content to https://www.nerdpress.net/thermapen (choosing a “slug” on the URL that is memorable or clear to you), and then use a redirection plugin to have it redirect to the corresponding affiliate link. Then, if the link needs to change in the future, you can simply change the redirect target — and it’ll redirect to the new location, no other changes necessary.
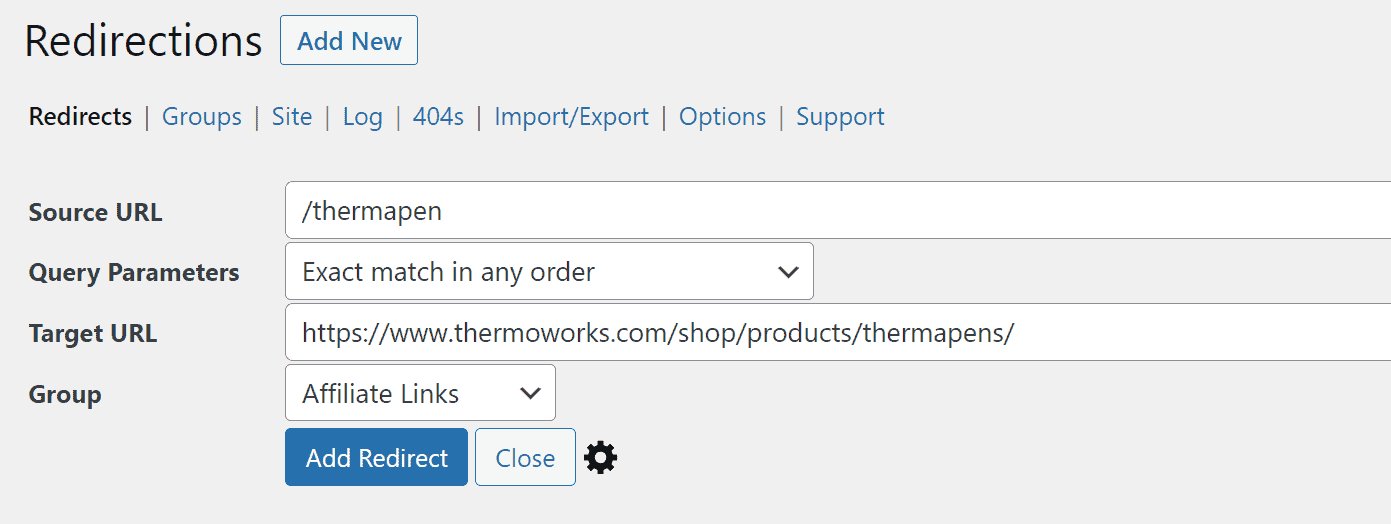
We love the excellent Redirection Plugin for this. It’s fast, reliable, free, and has other great features, such as logging 404s to help you track down other issues on your site.
Casey Markee also recommends the Easy Affiliate Links plugin, noting that “it has an integration with WP Recipe Maker that works flawlessly.”
Make sure that the “Source URL” links you choose are unique and don’t conflict with any existing content on your site — since they’ll take priority over any blog posts or pages.
Wrapping Up
Changing affiliate links may seem daunting, but with careful planning and the right tools, you can do it efficiently while making it much less likely you’ll negatively impact your site’s SEO…and if you switch to your own custom redirects, you won’t ever need to jump through these hoops again!
And remember, always back up your site before making changes! 😎