Get key takeaways:
Your DNS records connect your domain to your website, where it lives on a server hosted by your web host. They also help connect your email and can be used to verify accounts like Google Analytics and Pinterest.
DNS Records can be managed through your domain registrar or through a third-party system like Cloudflare. (Cloudflare also offers additional features like firewalls for security and caching to make your site faster.) At NerdPress, we’re fans of Cloudflare’s offerings and modern interface.
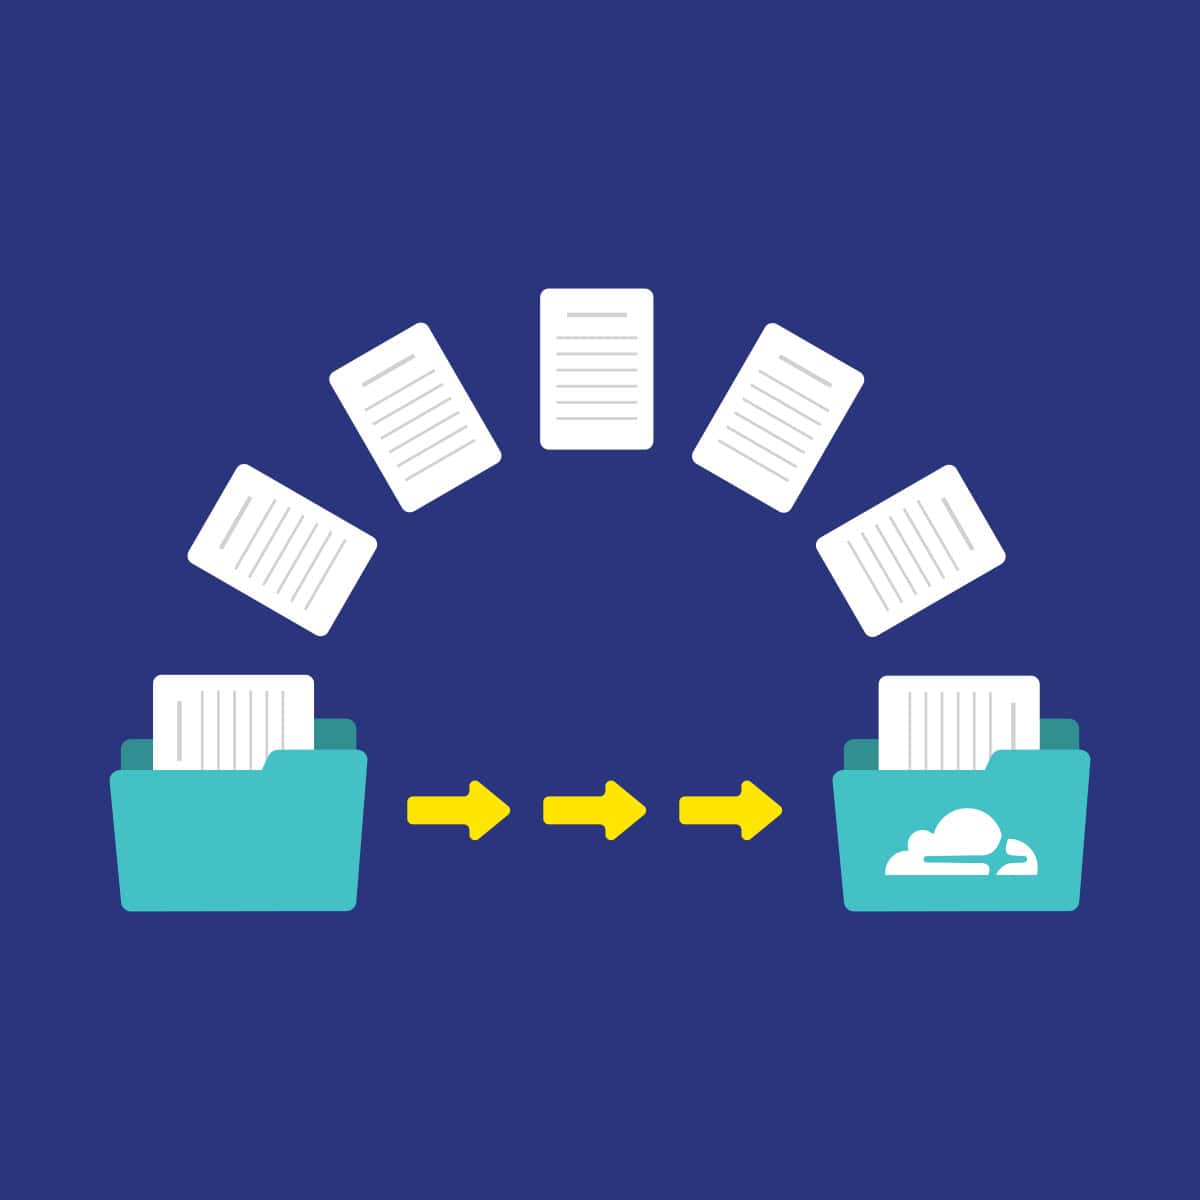
If you don’t currently use Cloudflare to manage your site’s DNS records but want to transfer your site’s DNS over, we’ll walk you through the process.
Accounts for Cloudflare DNS management are totally free, although they offer premium plans with more advanced offerings related to security and site speed.
How to transfer your DNS management to Cloudflare
- Create a free Cloudflare account.
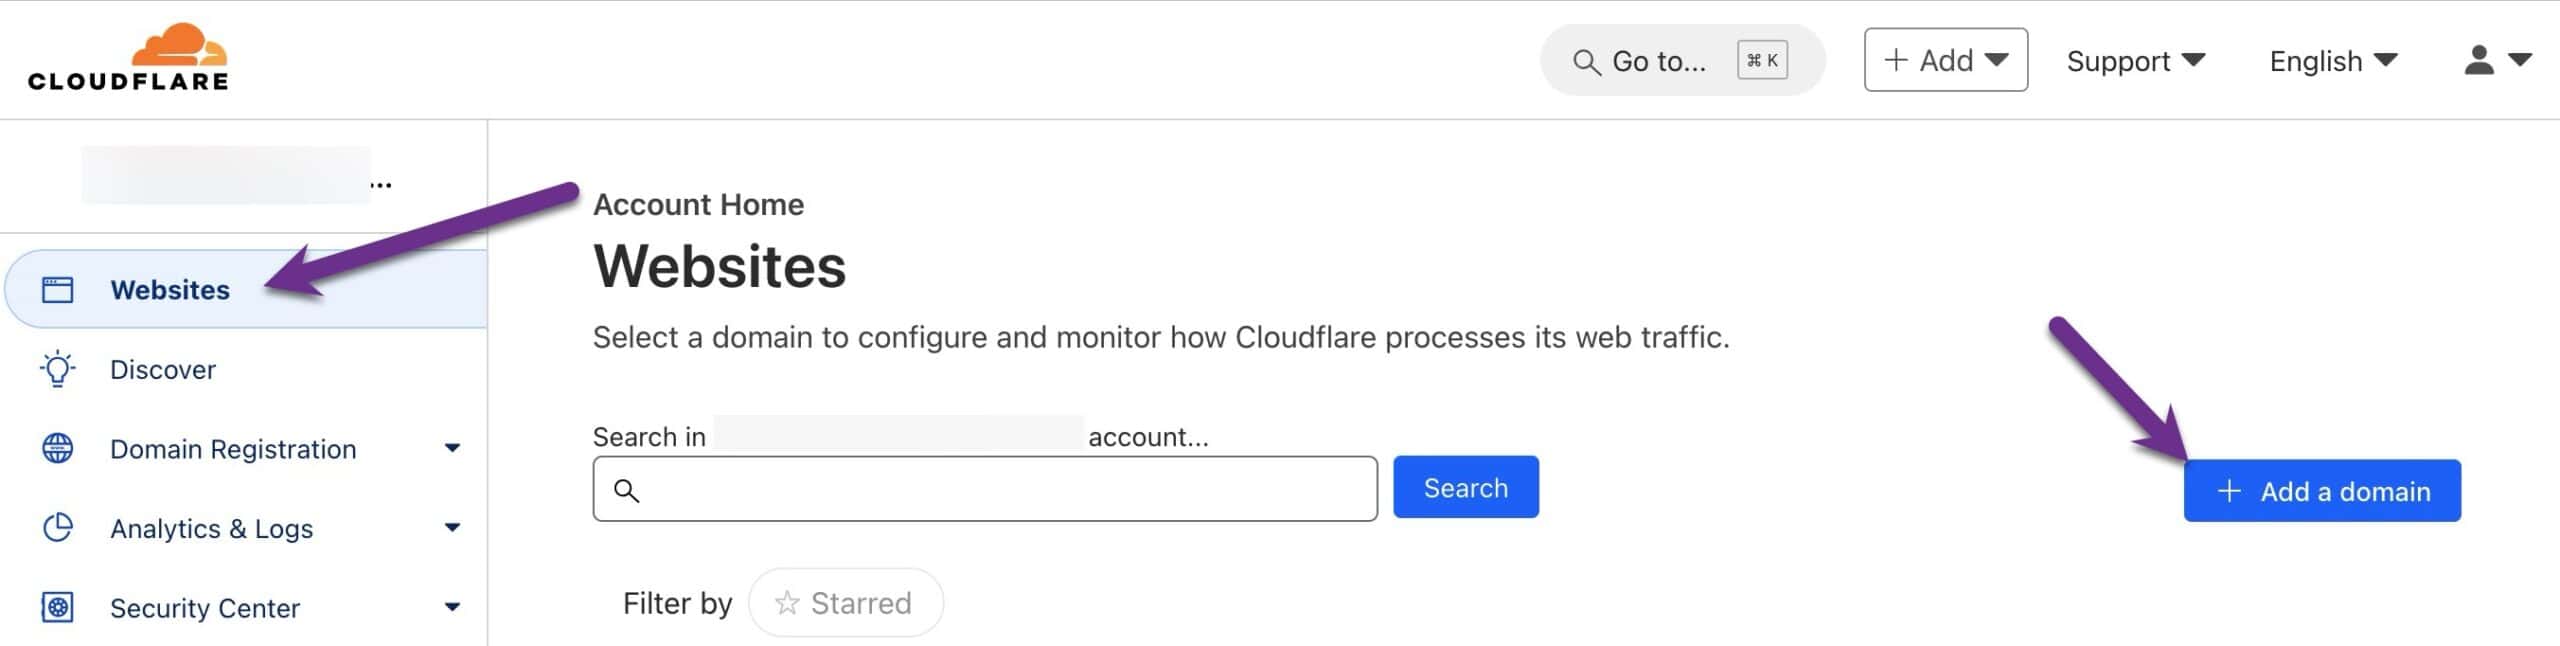
- While logged into your Cloudflare account, on the Websites page, click the +Add a domain button.
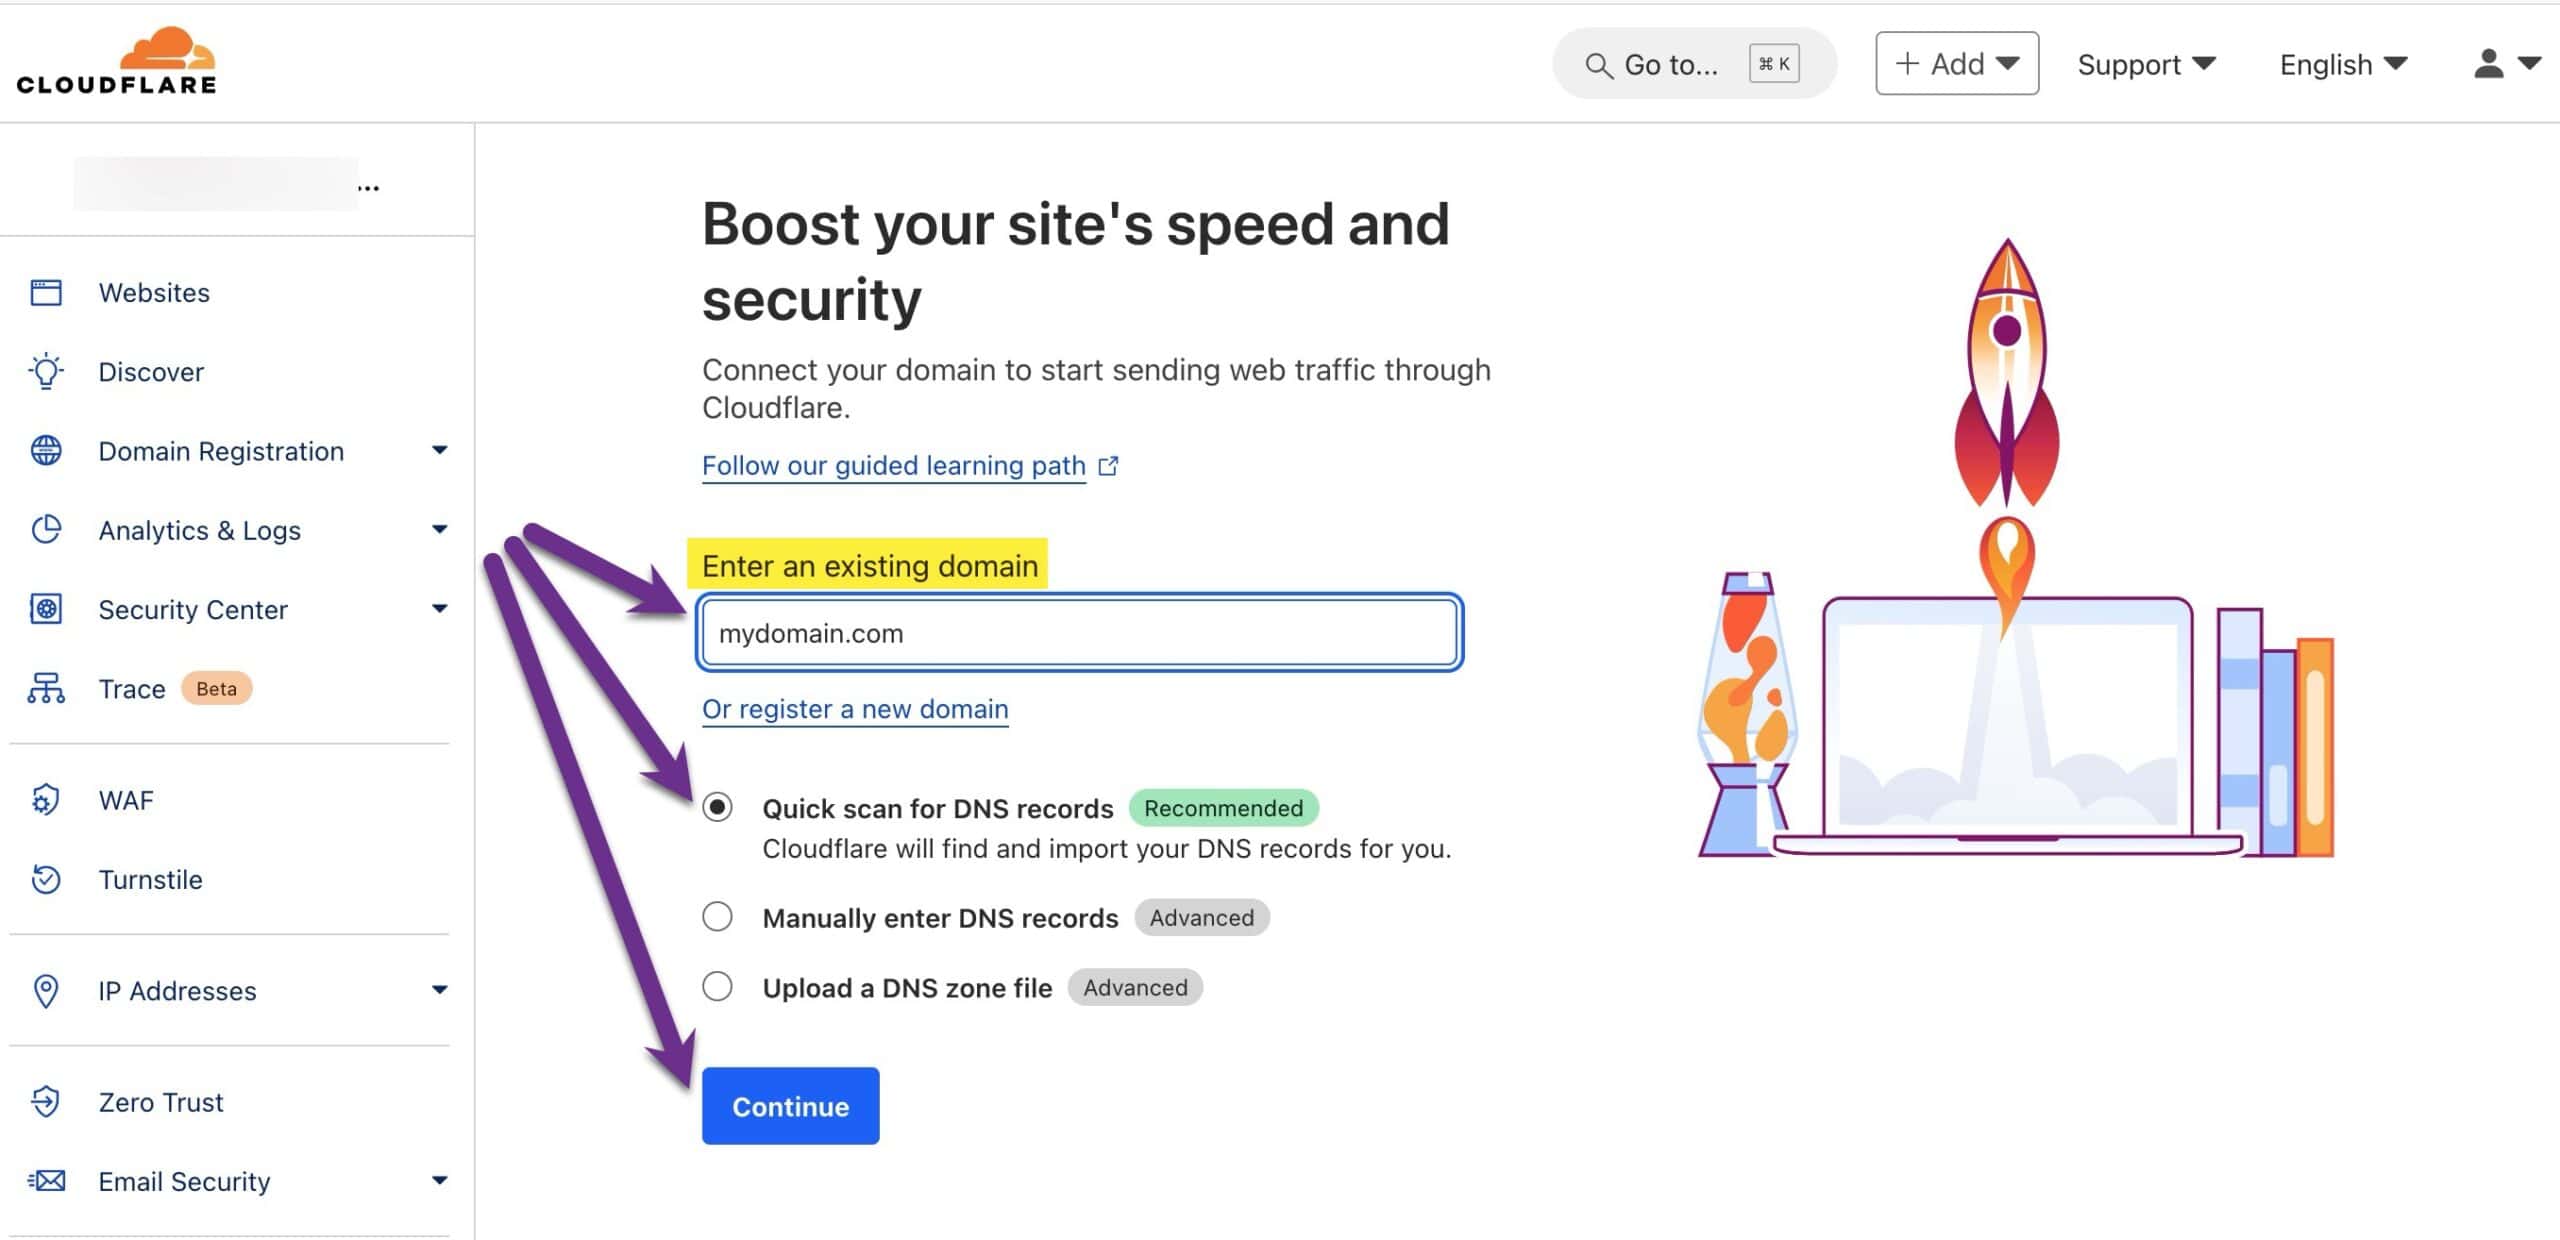
- In the Enter an existing domain, enter your apex domain (no “www” needed). Leave the option for Quick scan for DNS records selected and click the Continue button.
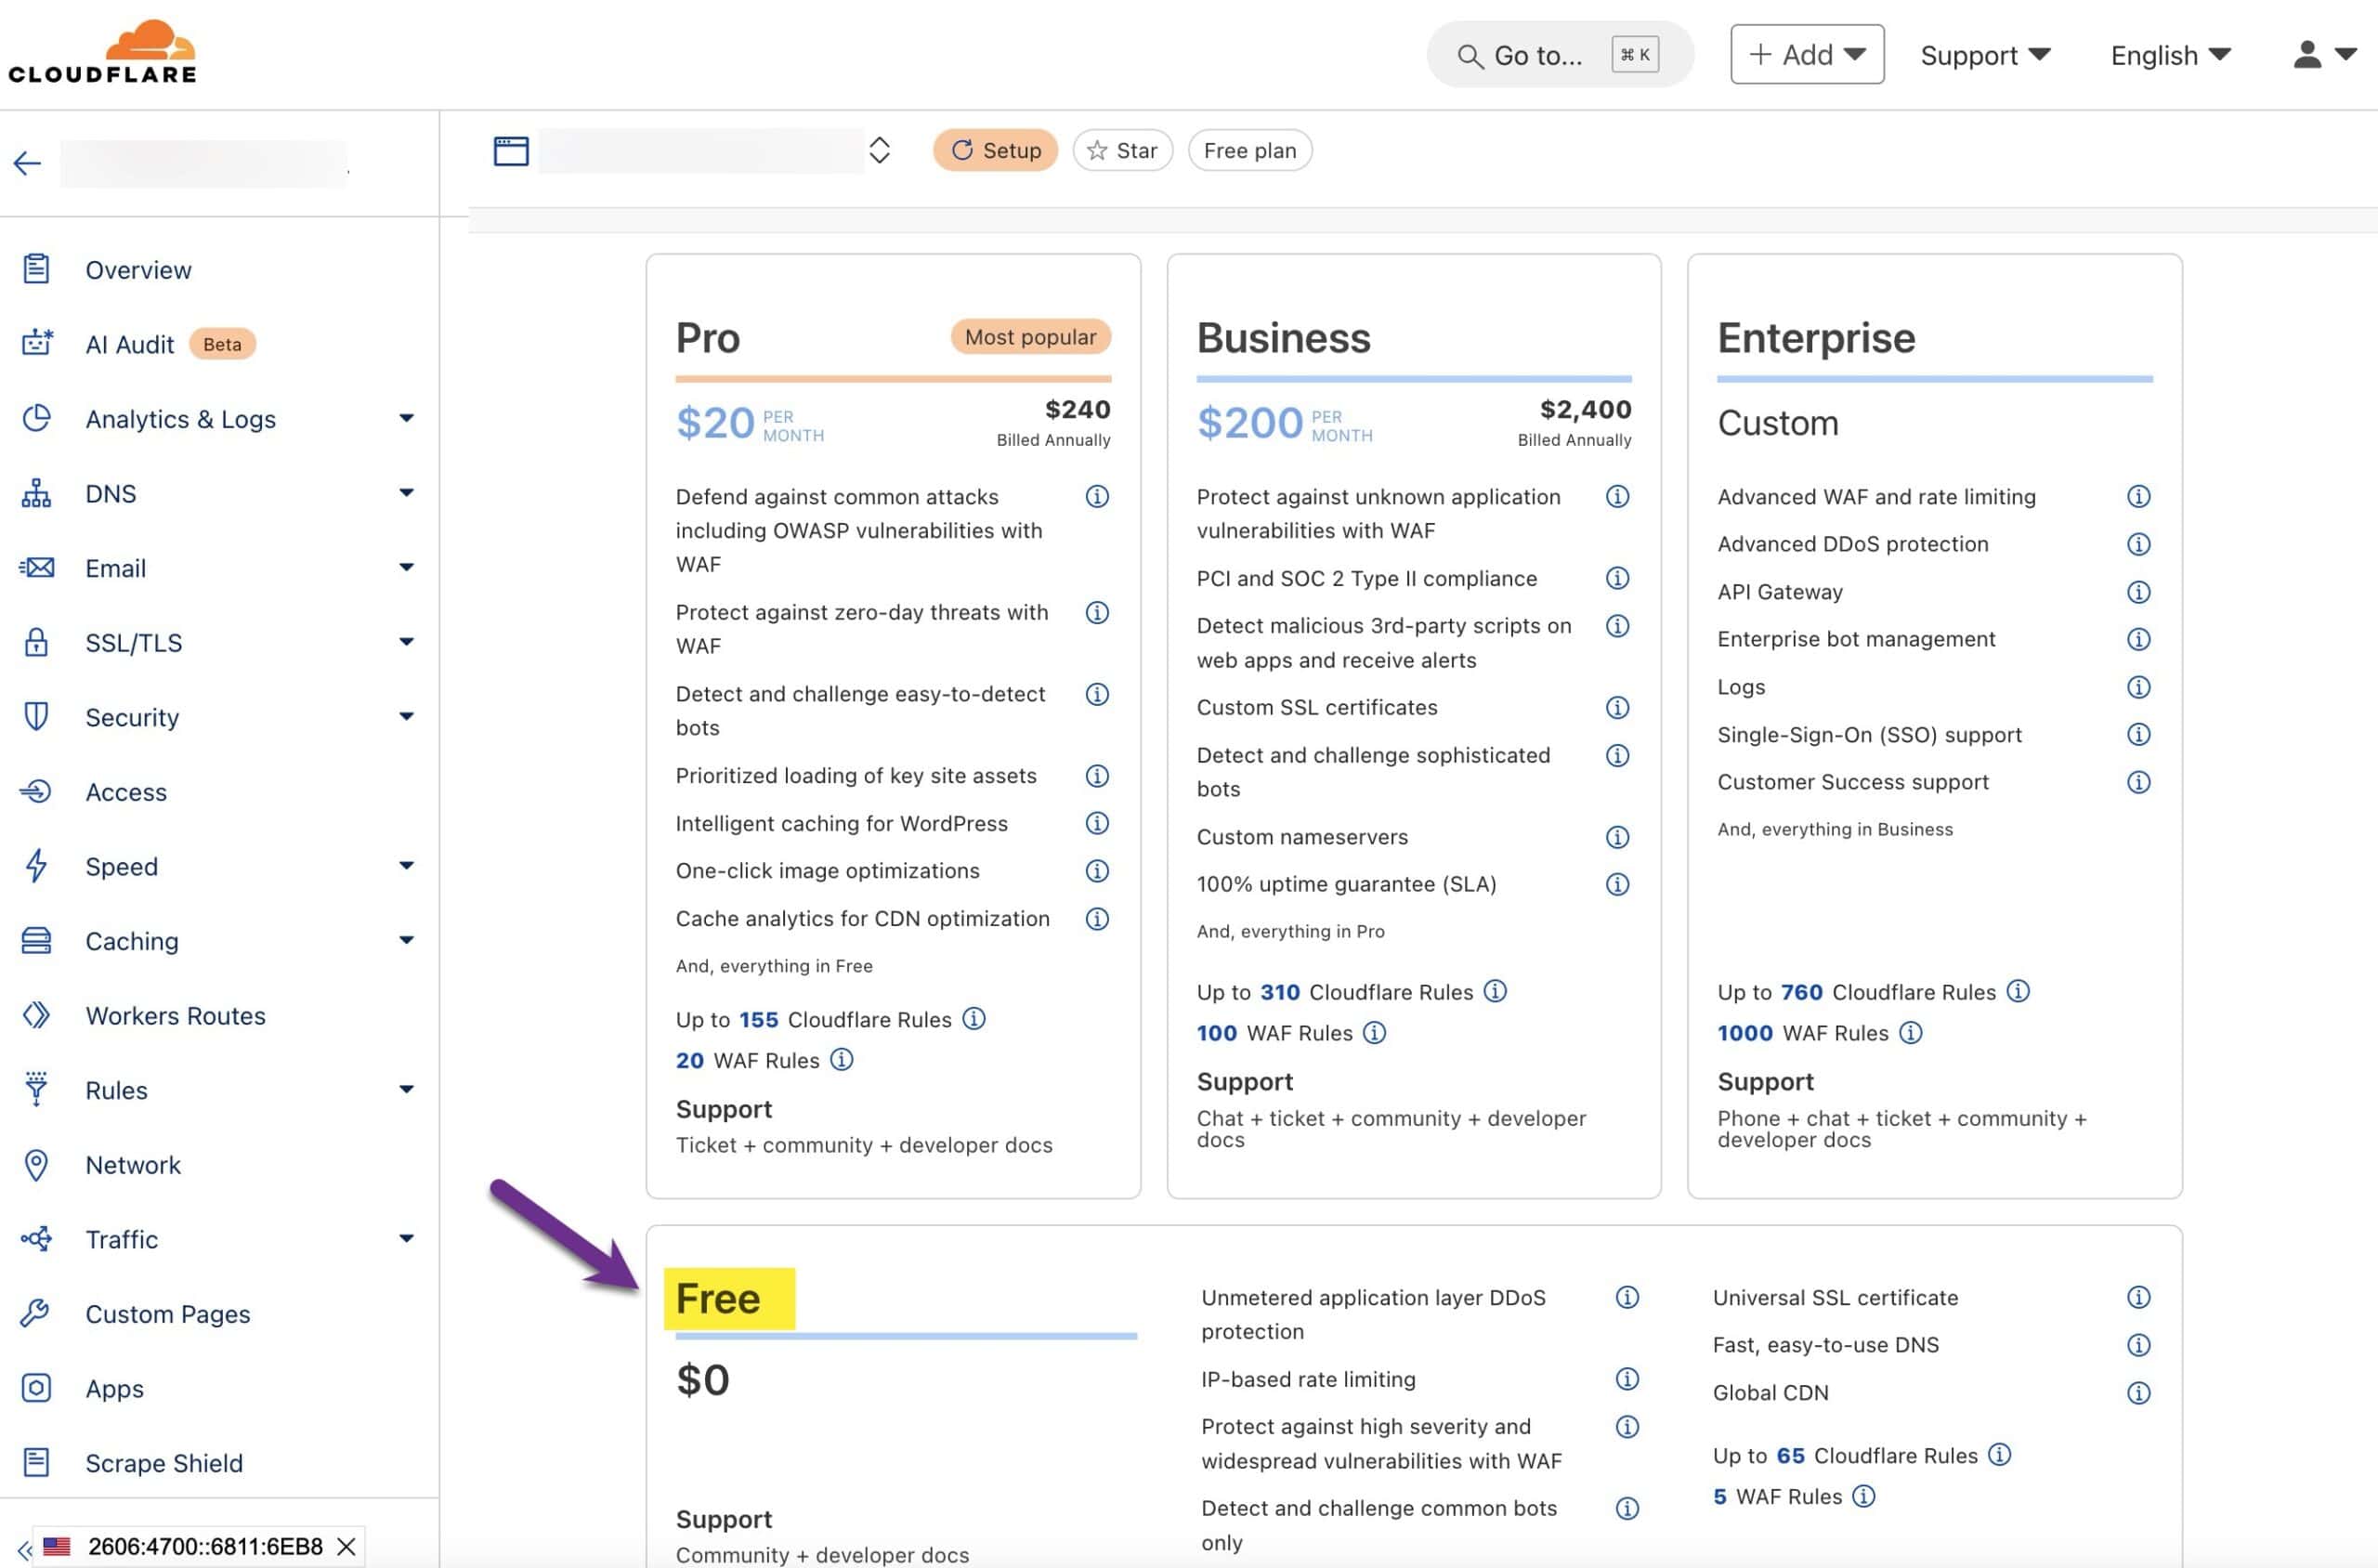
- Next, you will be asked to select a Cloudflare plan for the domain. Select the Free plan at the bottom of the page (a paid Cloudflare firewall and caching plan is not required to register a domain with their services–the free plan works just fine). Then click the blue Continue button.
- The next screen will display the DNS records that Cloudflare has automatically detected for your site. It is vitally important to confirm these DNS records against the existing DNS records listed in your current registrar account. Go through each type of record to ensure they have all been imported and imported correctly. Here’s directions on where to find your existing DNS records for the most common registrars:
If any records are missing, you may need to add them manually by following these Cloudflare direction on how to add a DNS record.
- Once you’ve verified the imported DNS records, click the blue Continue to activation button at the bottom of the page.
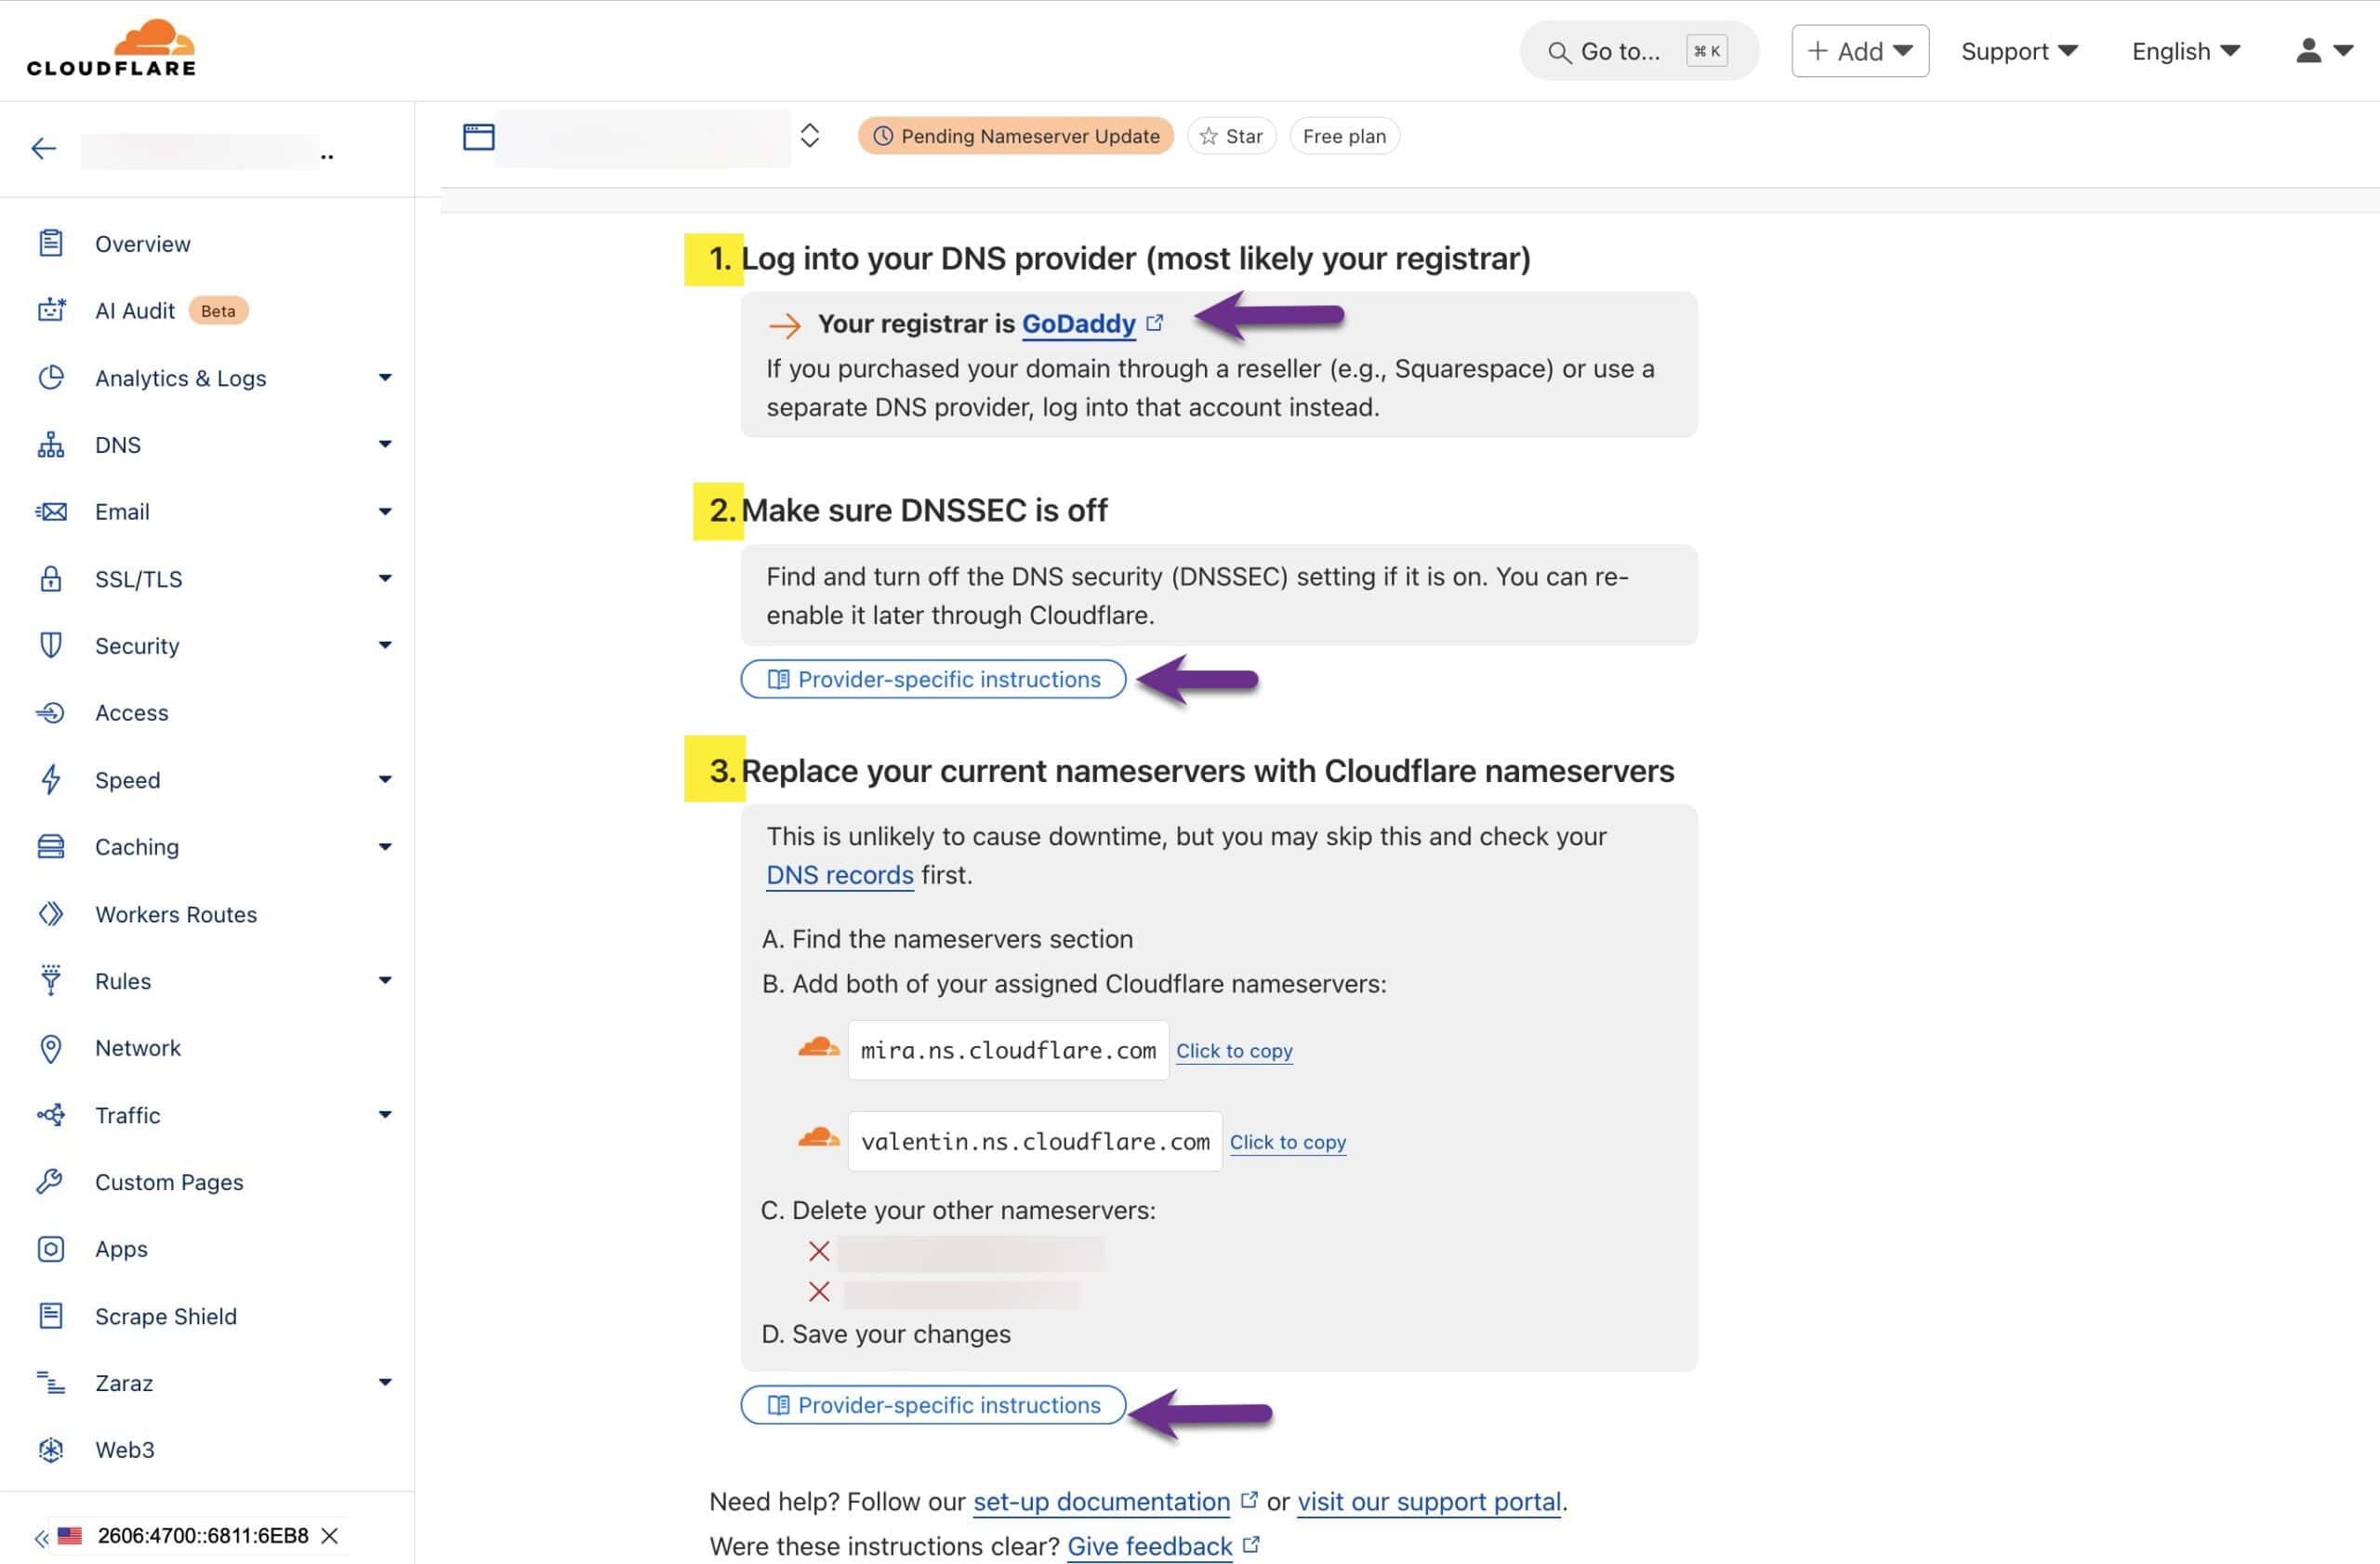
- Next, you’ll need to change the nameservers in your current registrar account. On the next screen, Cloudflare will give you details on who your current registrar is, along with a link to log in to that provider. It will also list provider-specific directions on how to disable DNS Security (DNSSEC) if enabled. And it will list the nameservers you need to change to, along with a link to provider-specific directions on how to change your nameservers.
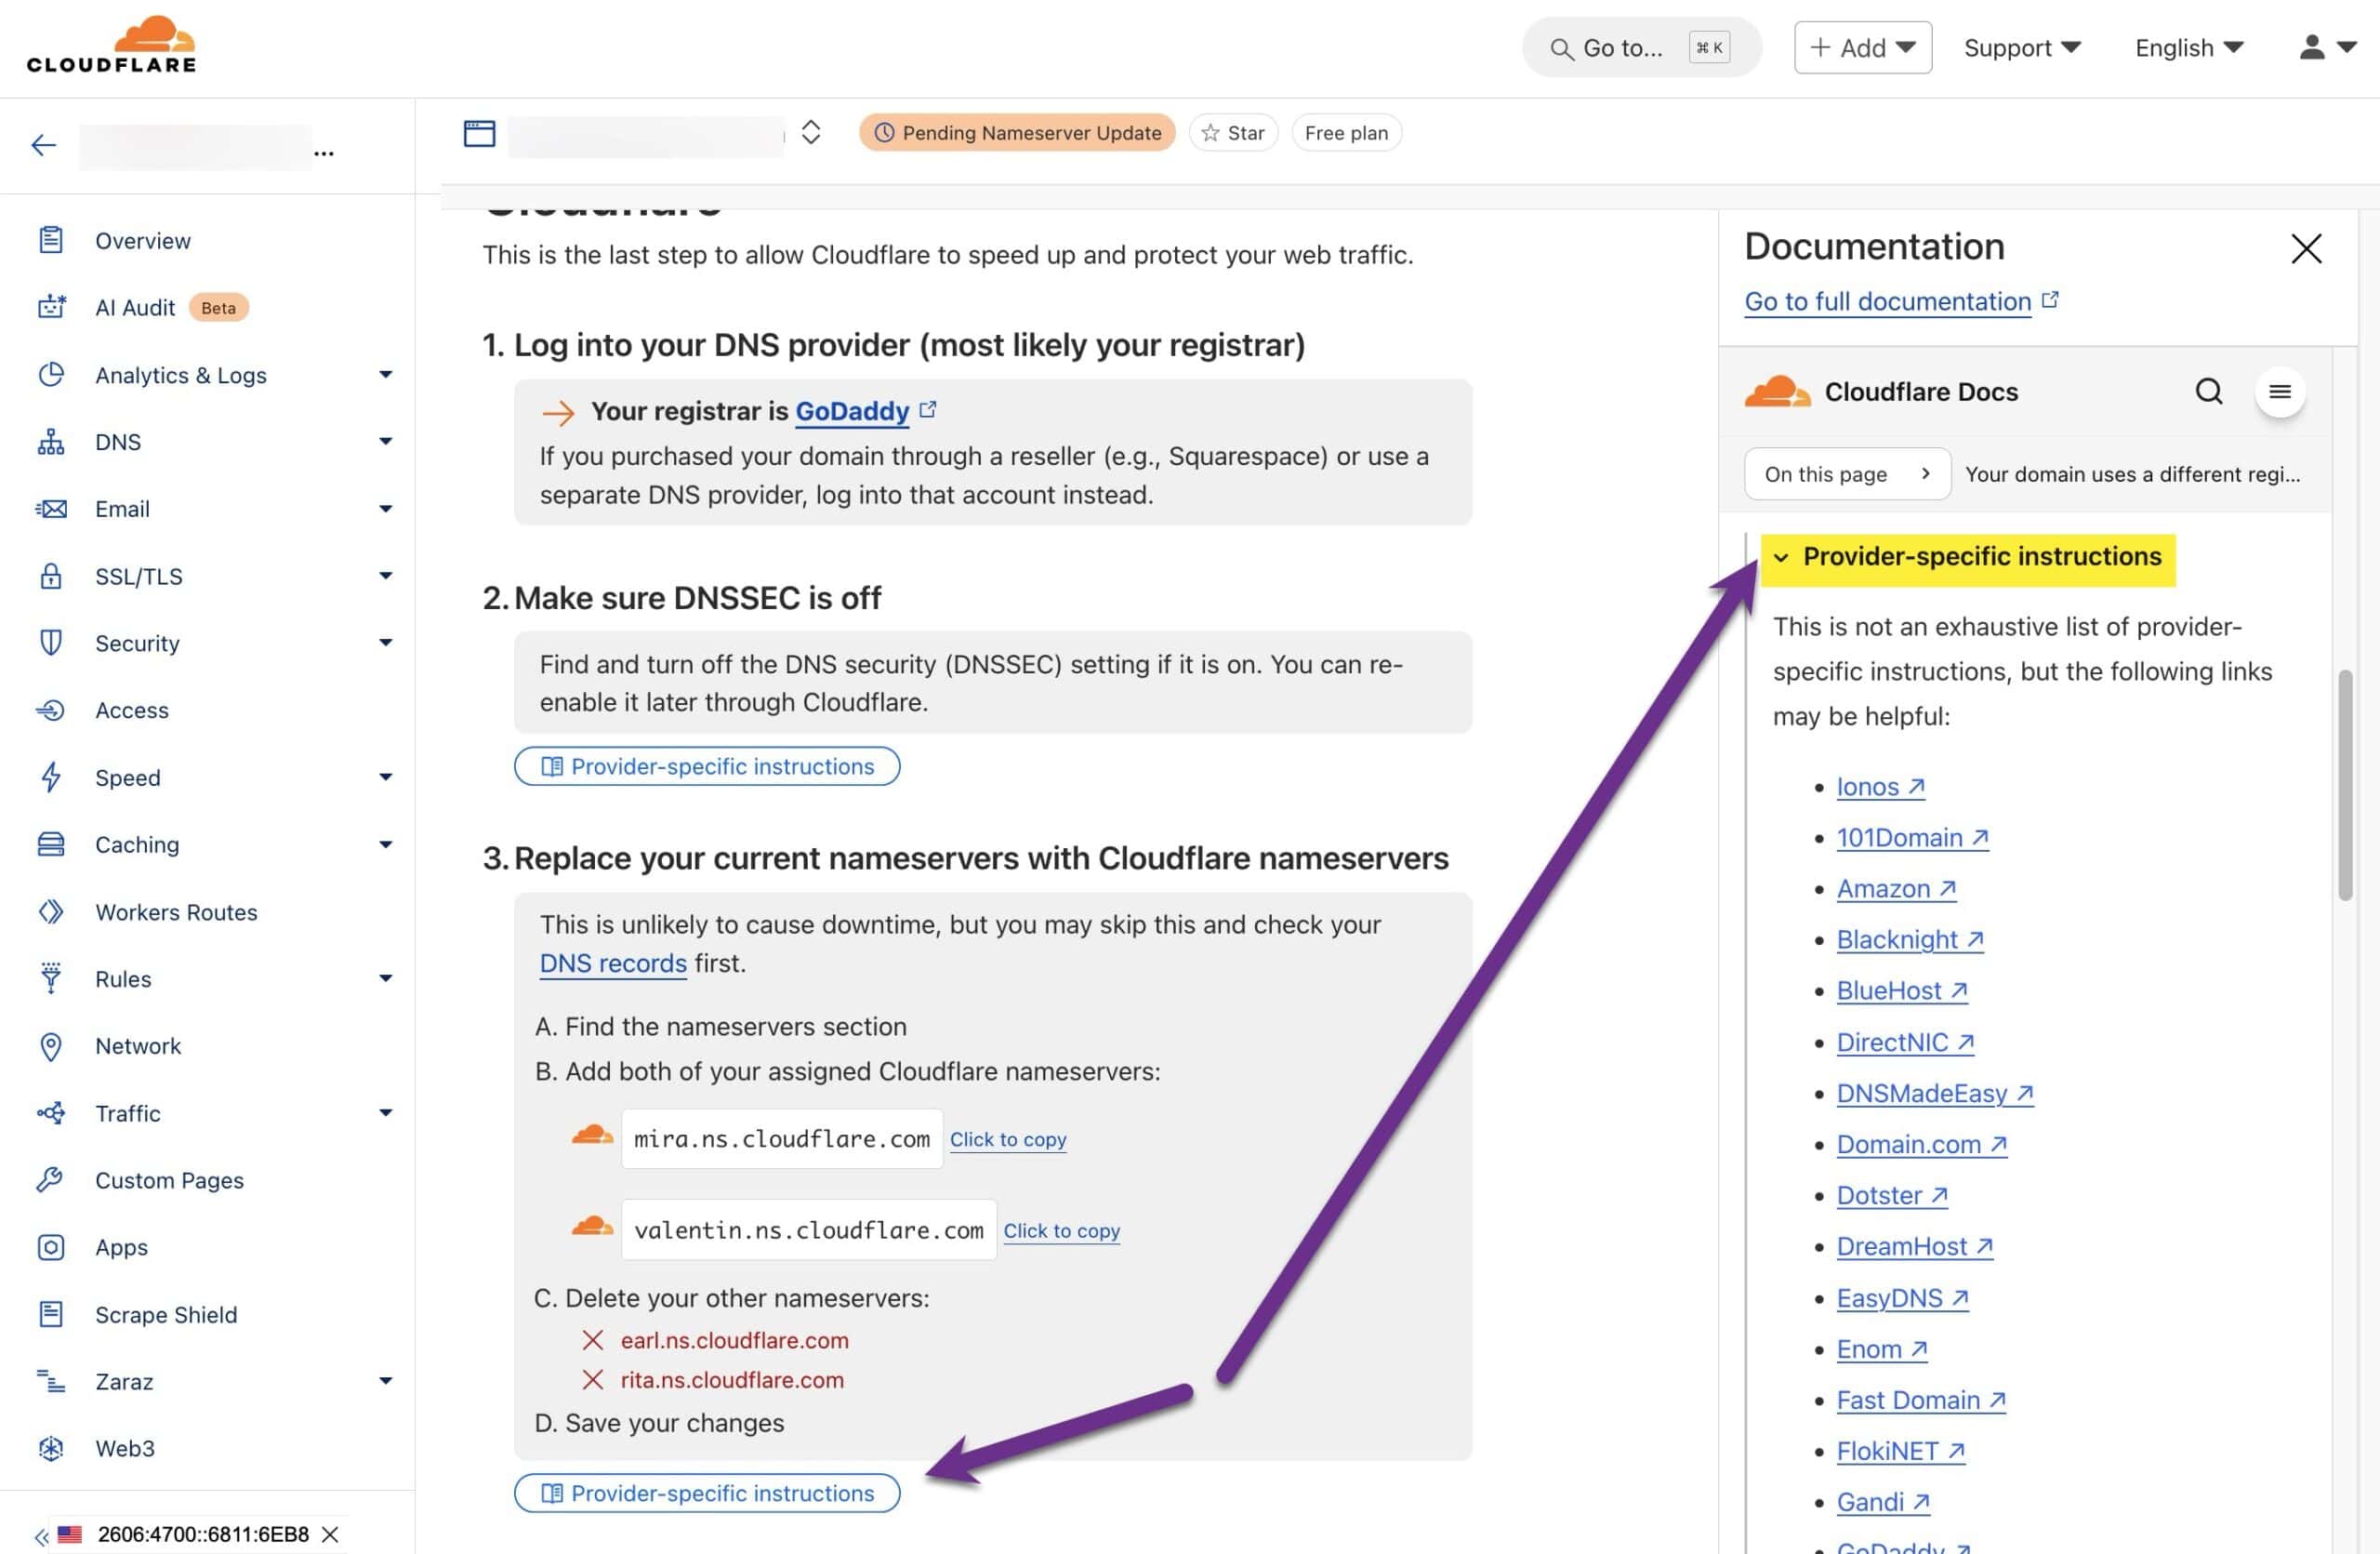
To access the links for provider-specific directions, click on the Provider-specific instructions link to open the sidebar documentation. Scroll down to the Provider-specific instructions heading in the sidebar and click on it to expand the list of links:
- Once you’ve completed all three steps, click the Continue button below.
- It may take a bit (several hours up to a day or more) for Cloudflare to confirm your updated nameservers. While the verification is pending, Cloudflare will show the status tag Pending Nameserver Update next to your domain in the Cloudflare dashboard.

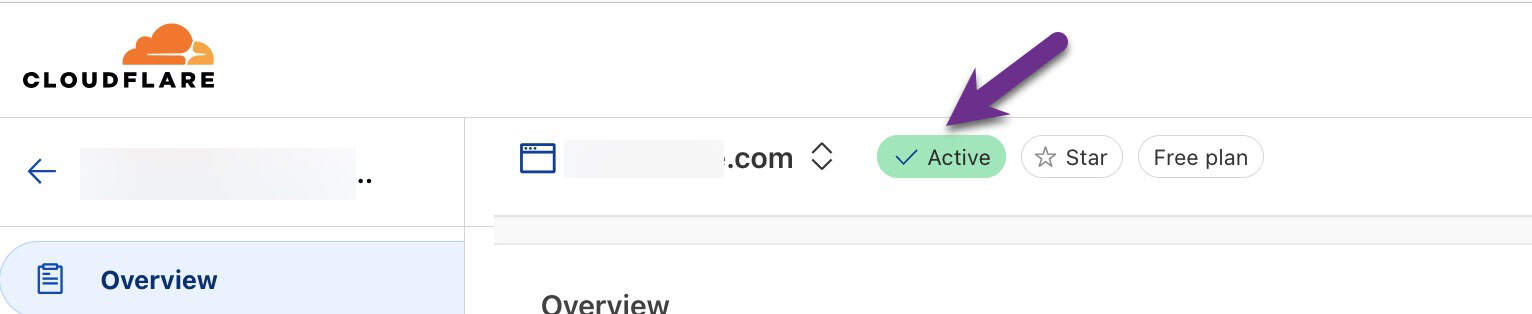
- Once Cloudflare has verified the nameserver change, your site will be active with Cloudflare, and the Active status tag will appear next to the domain.
Resources: https://developers.cloudflare.com/fundamentals/setup/manage-domains/add-site/
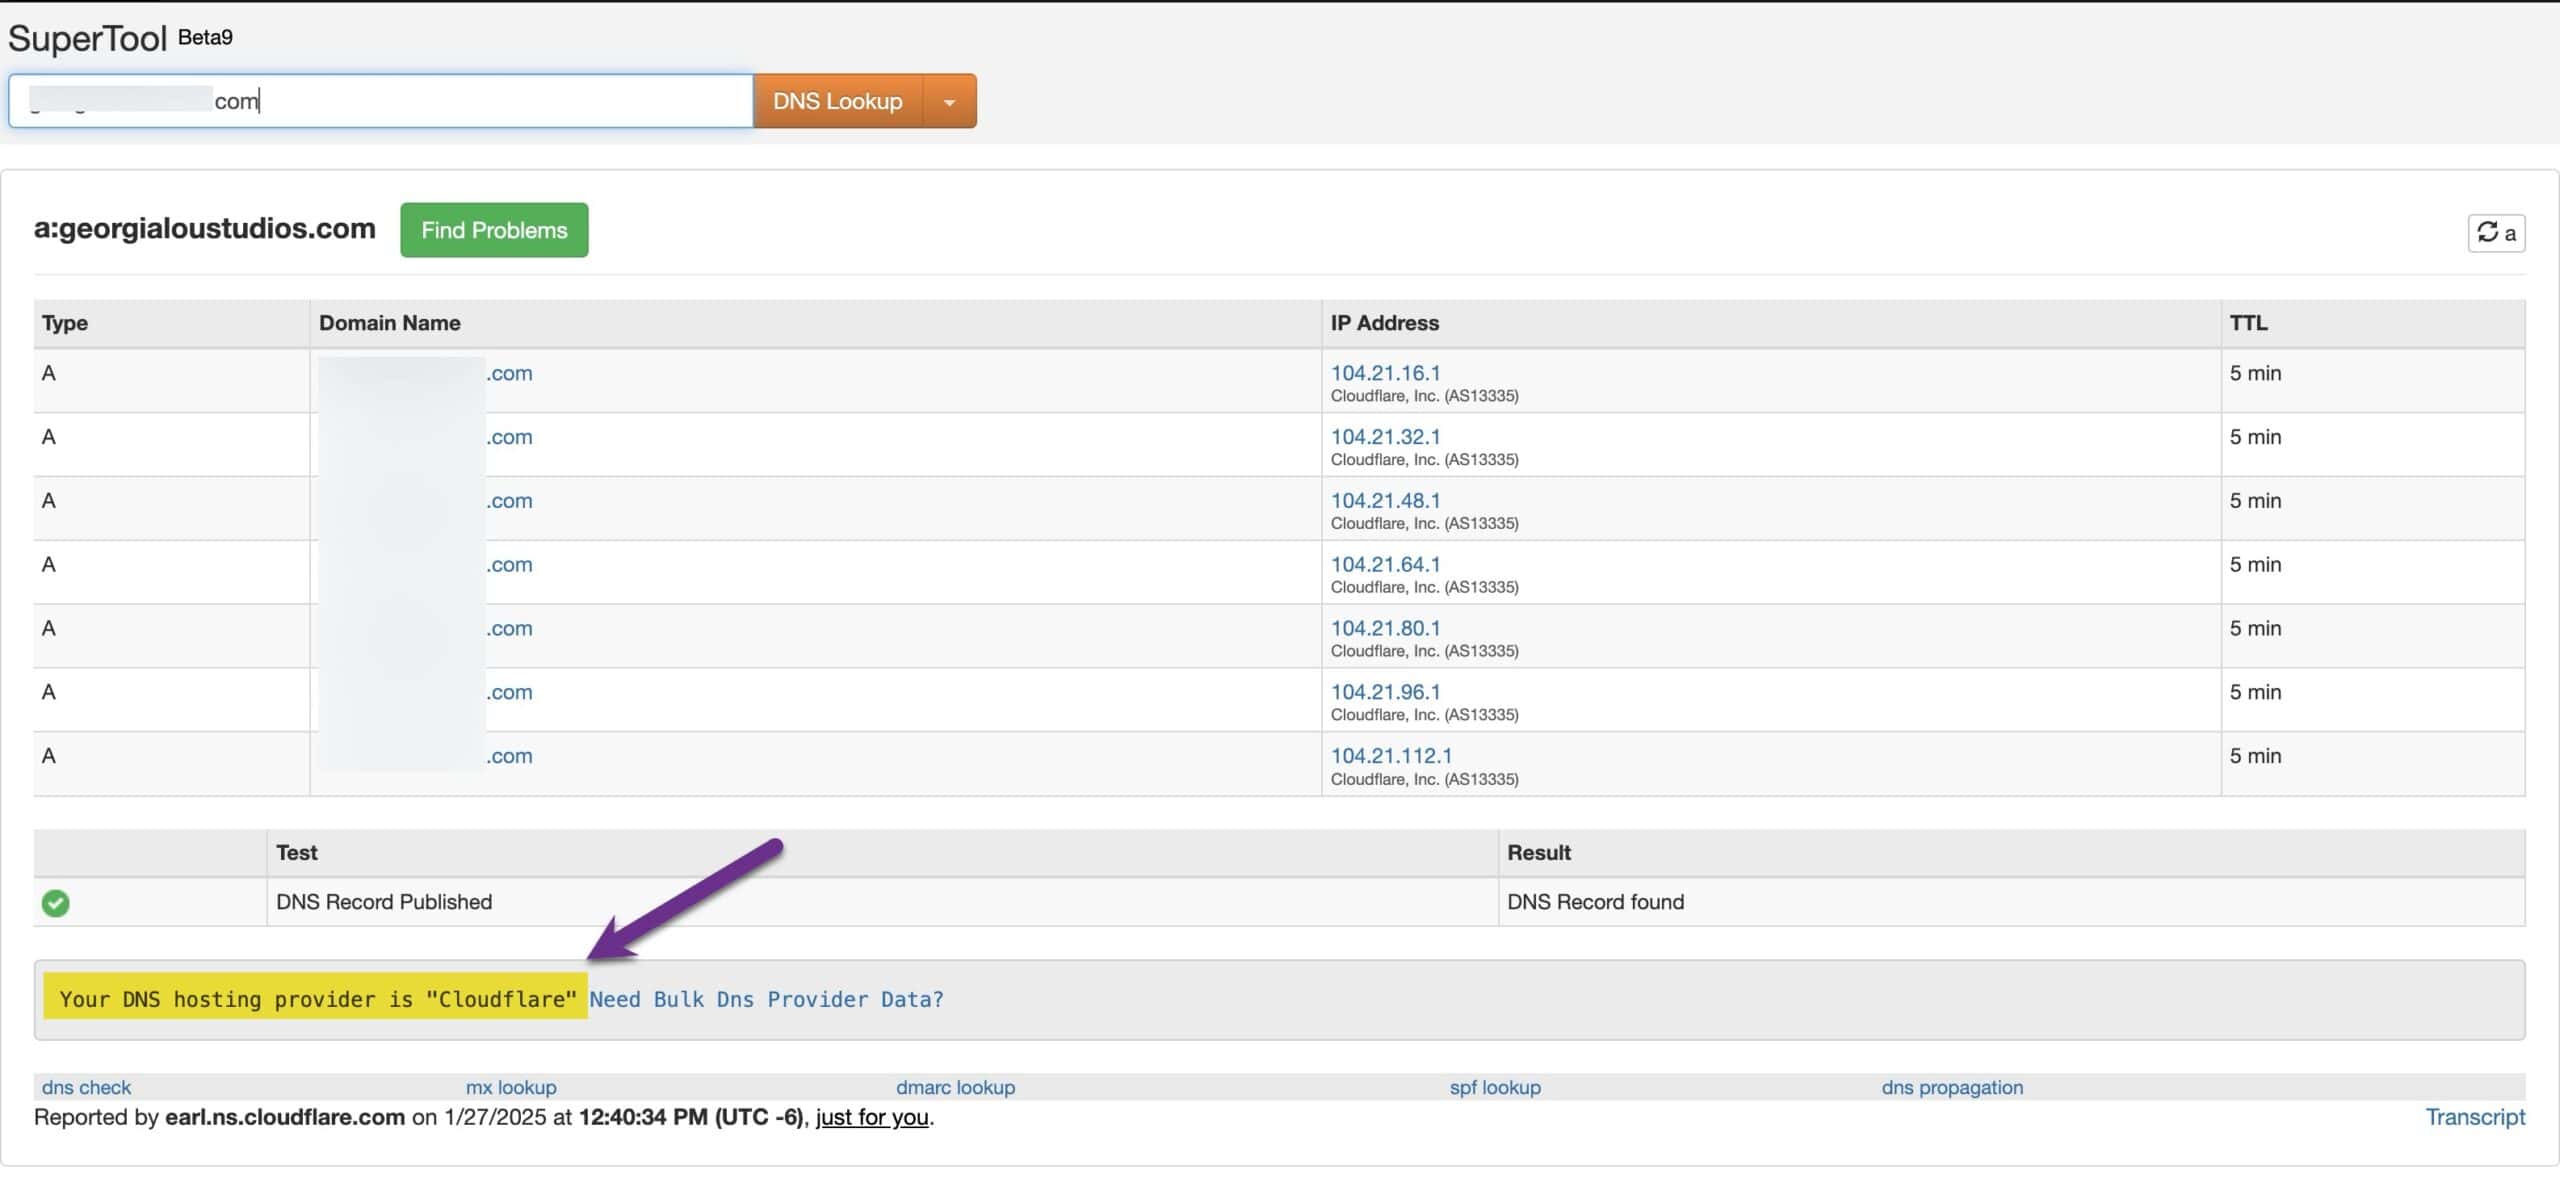
Bonus Tip: If you want to make extra sure that your DNS is now being managed by Cloudflare you can drop your domain into the MX Toolbox Supertool.
Enter your apex domain into the Lookup anything… field, then under the orange button dropdown, select the DNS Lookup option and click the button.
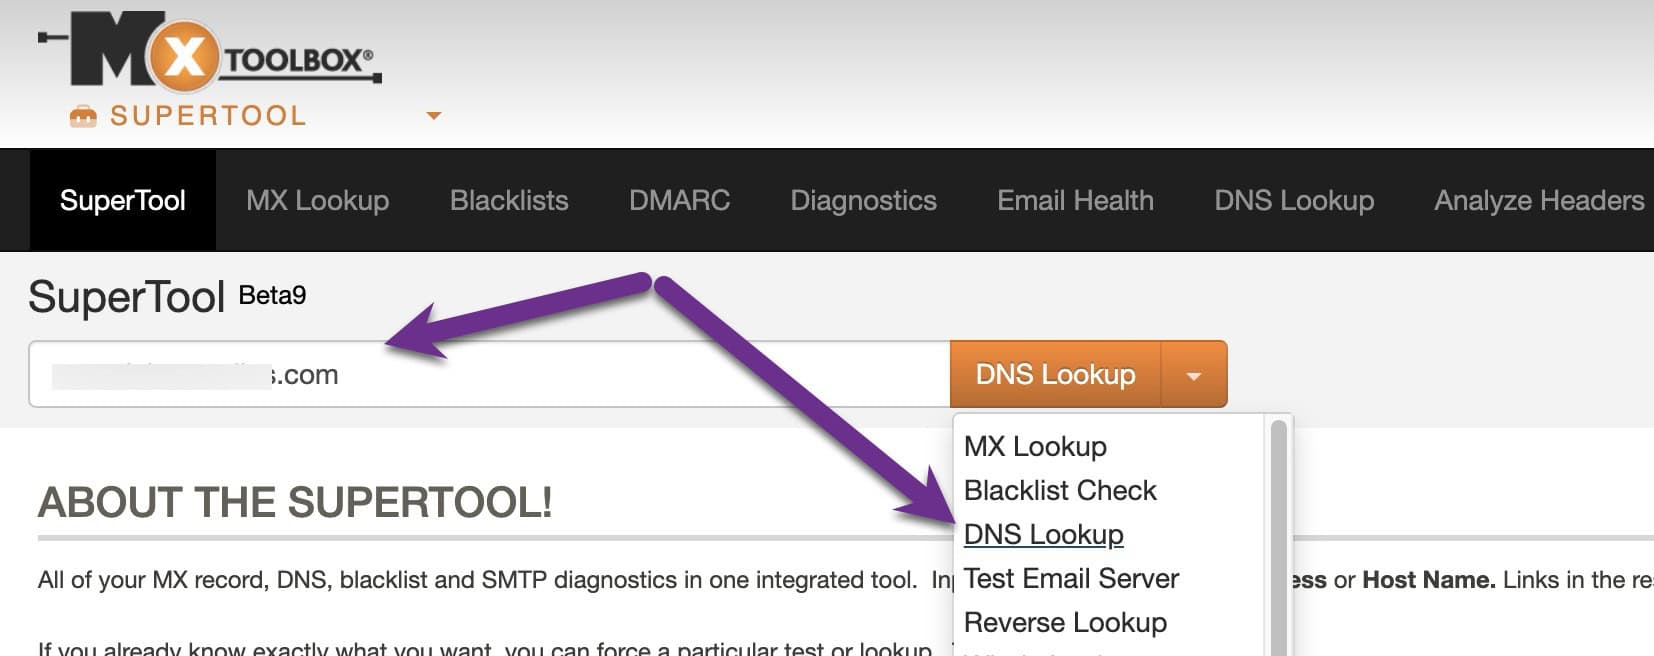
Once the report runs, you should see your DNS hosting provider listed as “Cloudflare”.
All Done!
At this point, you’ve successfully transferred your DNS management to Cloudflare! Now you can use the Cloudflare interface to add, edit, or delete DNS records for your site as needed.