Get key takeaways:
WordPress 6.3, released on August 8, 2023, was the second major core release of the year. This update included many changes in the Site Editor interface, and revamped two parts of WordPress formerly known independently as “Patterns” and “Reusable Blocks.”
Other notable changes included modifications to the interface when creating links in content, the addition of two new blocks, aspect ratio settings for image blocks, and a change to how the Featured Image displays in the block editor.
Table of Contents
Goodbye Reusable Blocks, Hello Synced and Unsynced Patterns!
Reusable Blocks, prior to version 6.3, were blocks or groups of blocks that could be saved and reused on other posts or pages. These blocks were globally synced, so any changes made to a Reusable Block were applied to all instances site-wide.
Patterns, too, were a premade group of blocks — but these blocks could be added to pages and edited without affecting the same pattern elsewhere on the site.
However, there was previously no way to create a Pattern in the WordPress dashboard without specialized plugins or custom PHP files. As a workaround, some publishers used Reusable Blocks as a sort of Pattern that they converted into regular blocks, but this process was a bit clunky.
With WordPress 6.3, Reusable Blocks have become Synced Patterns. Patterns are now Unsynced Patterns. These new naming conventions are a lot more semantic. When you make changes to a Synced Pattern, every instance of the pattern will be updated site-wide, while Unsynced Patterns act more like a template you can use as a starting point and edit individually for each instance.
With the nomenclature changes come interface changes with how Patterns are created and where you’ll find them.
Where to Find Patterns
Accessing Patterns In the Editor
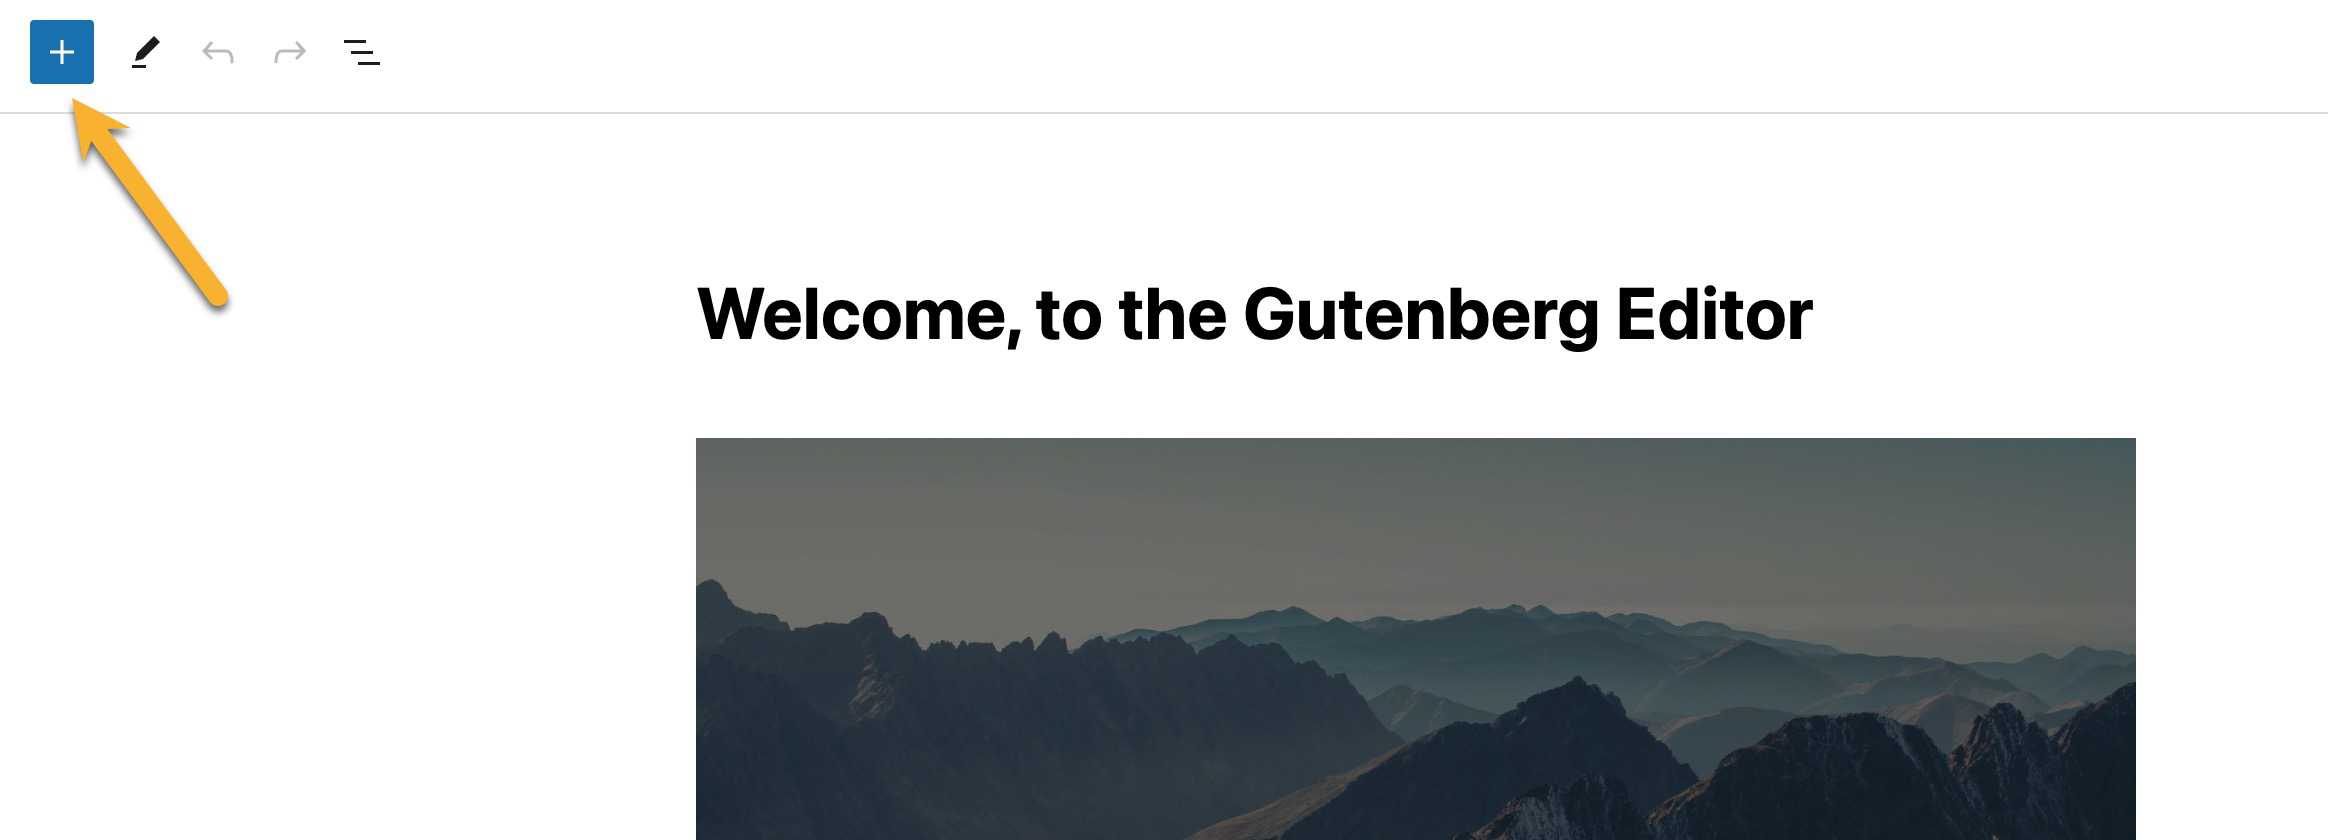
- In the post or page editor, click the blue “plus” icon (
+) at the top left to toggle the block inserter.
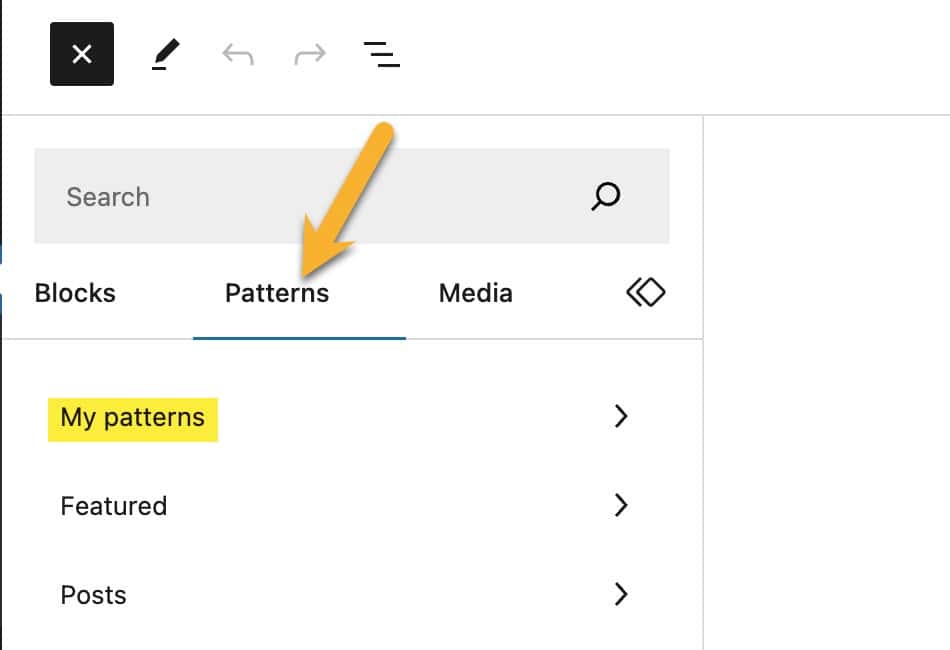
- In the Patterns panel, you’ll find the Unsynced Patterns. Any custom Unsynced Patterns that you create will be in the My Patterns section. The rest of the sections contain patterns from the WordPress Pattern Directory.
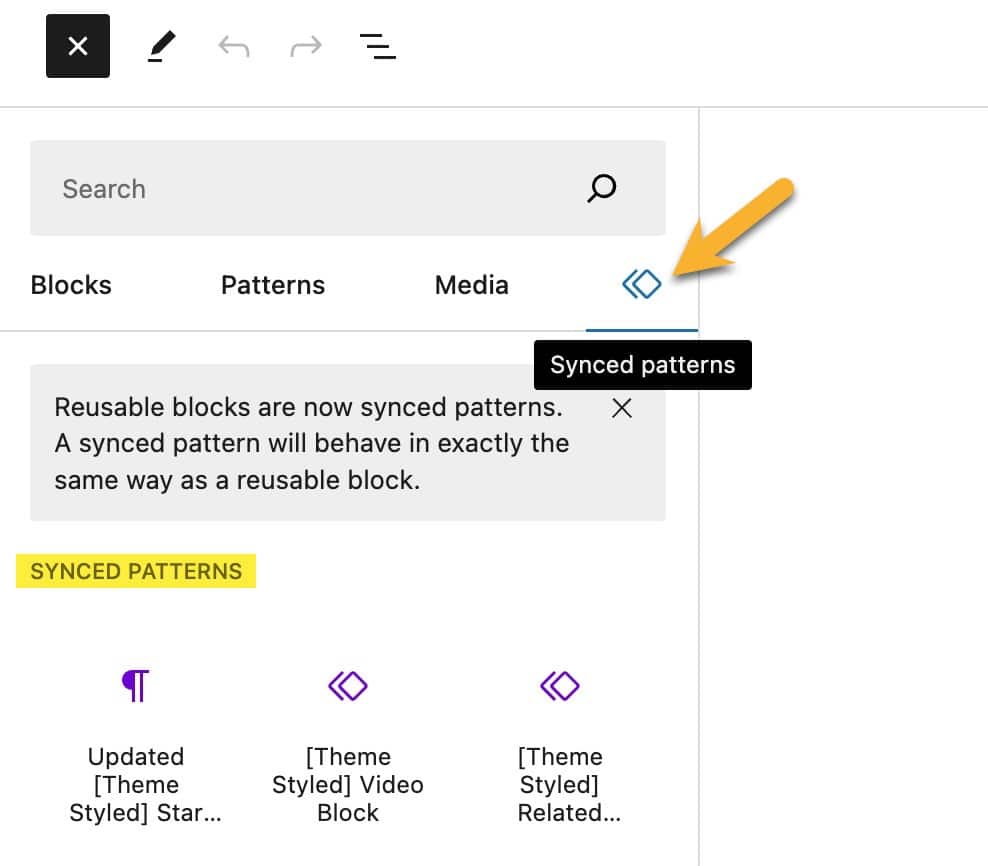
- The Synced Patterns section can be accessed by clicking on the double diamond icon. Synced Patterns also have purple icons in the block inserter to differentiate them.
Accessing the Patterns Page
In the Patterns page, you can see the complete list of all your Synced and Unsynced patterns and create and edit Patterns.
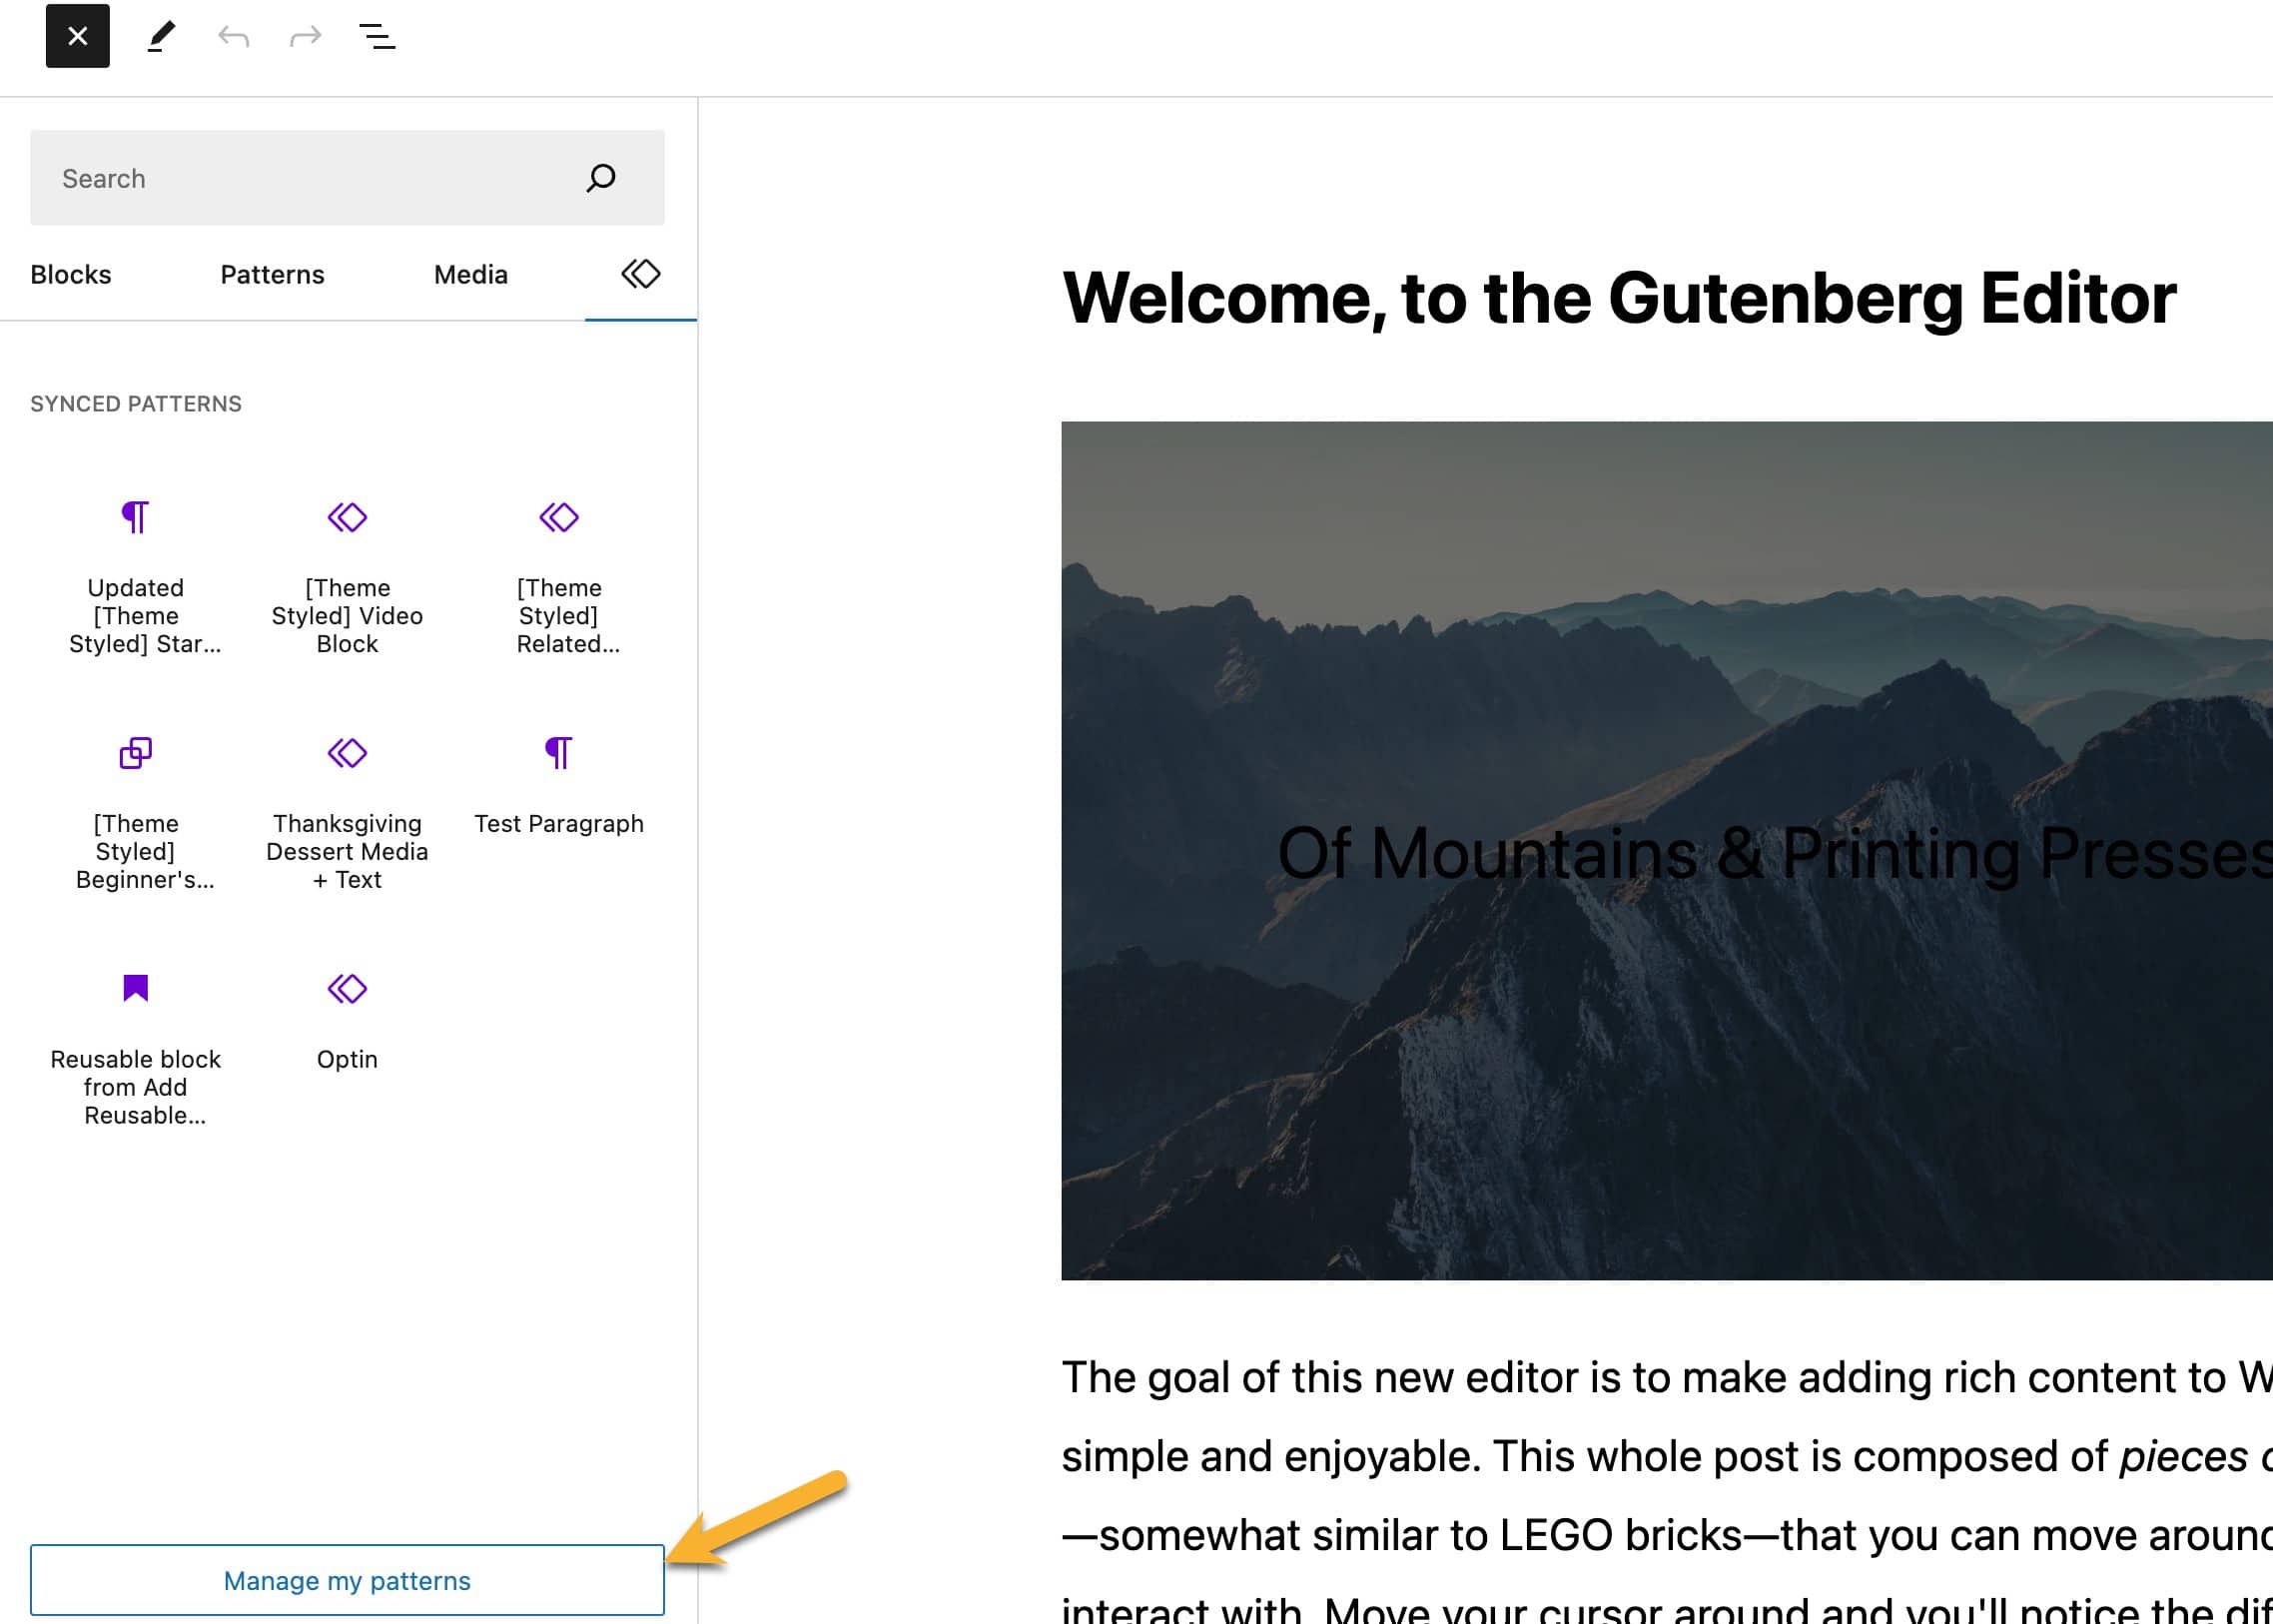
To open the Patterns page, click the Manage my patterns button at the bottom of the Synced Patterns panel in the block inserter.
The Patterns page will display a list of all of your Synced and Unsynced Patterns. Currently, there is no indication in this view of whether a specific Pattern is Synced or Unsynced.
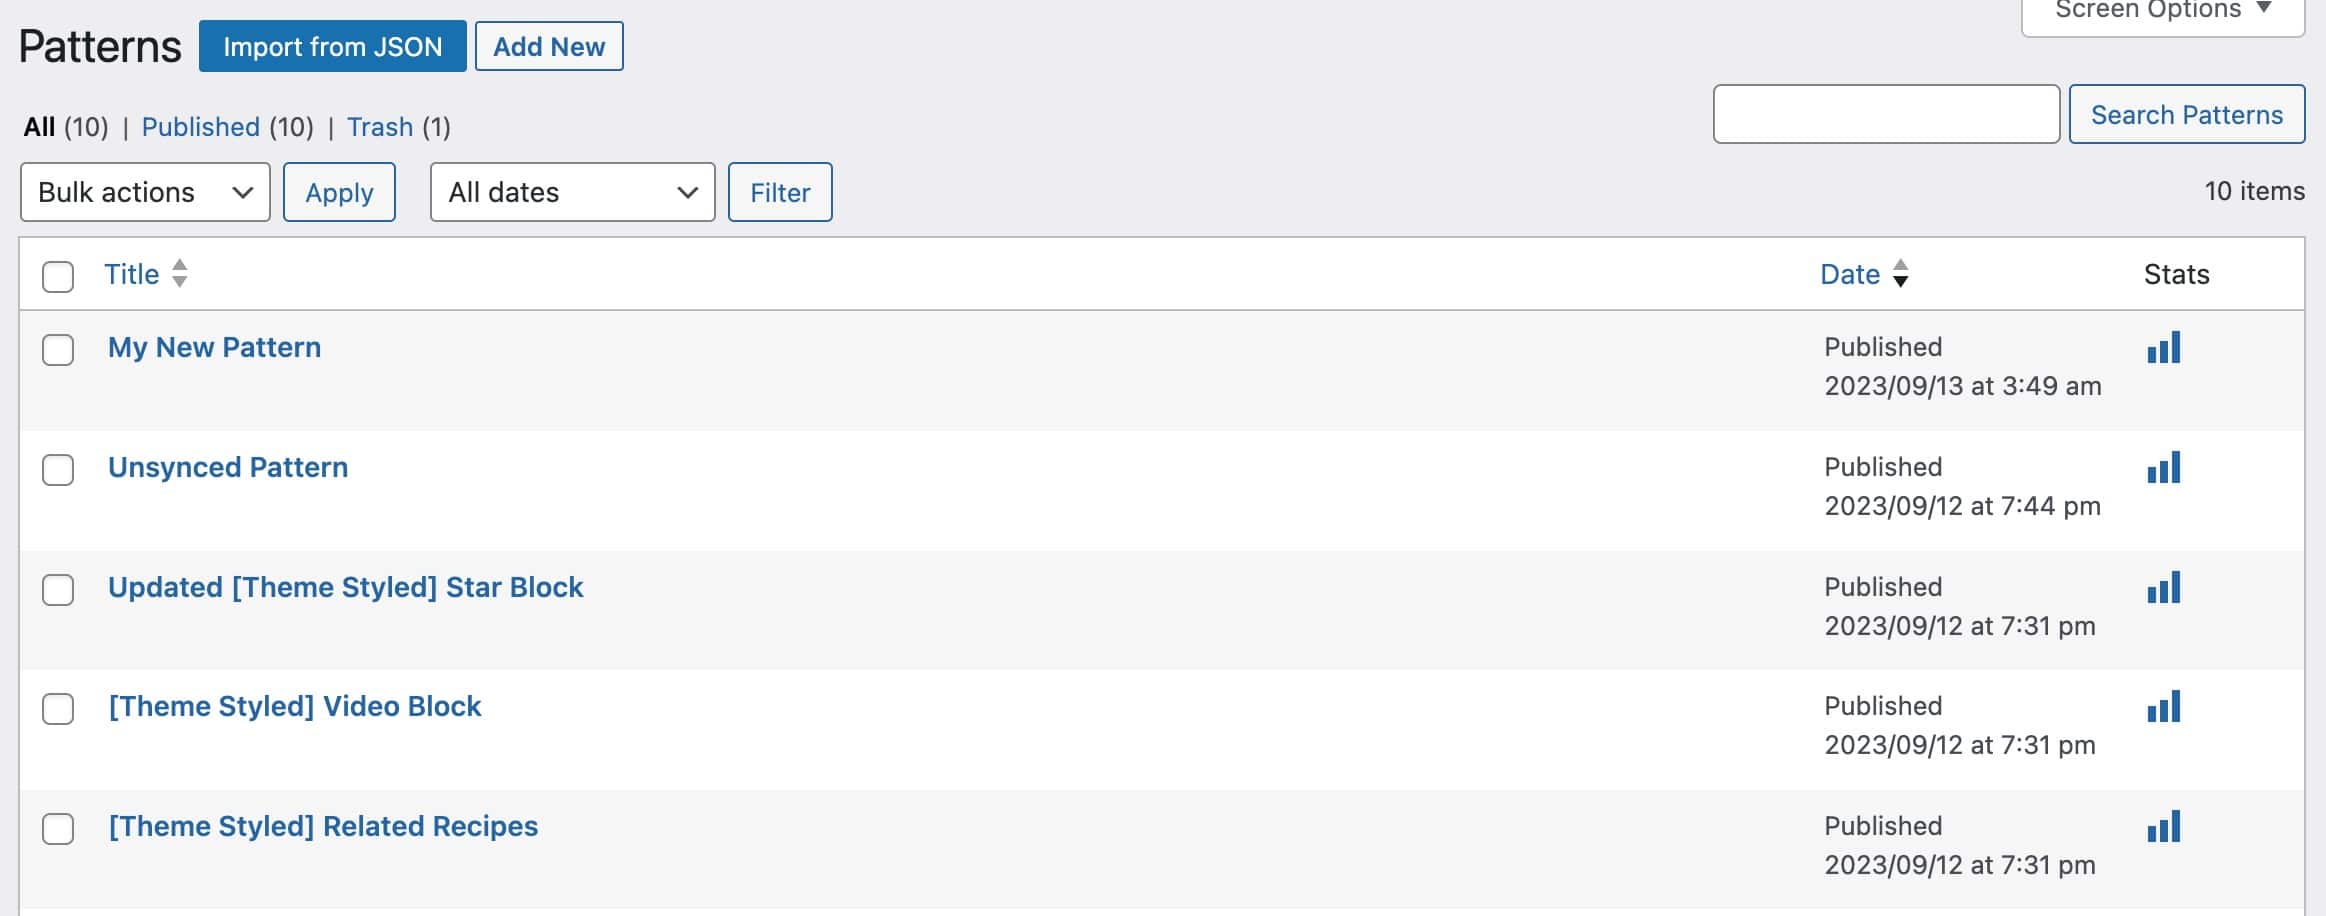
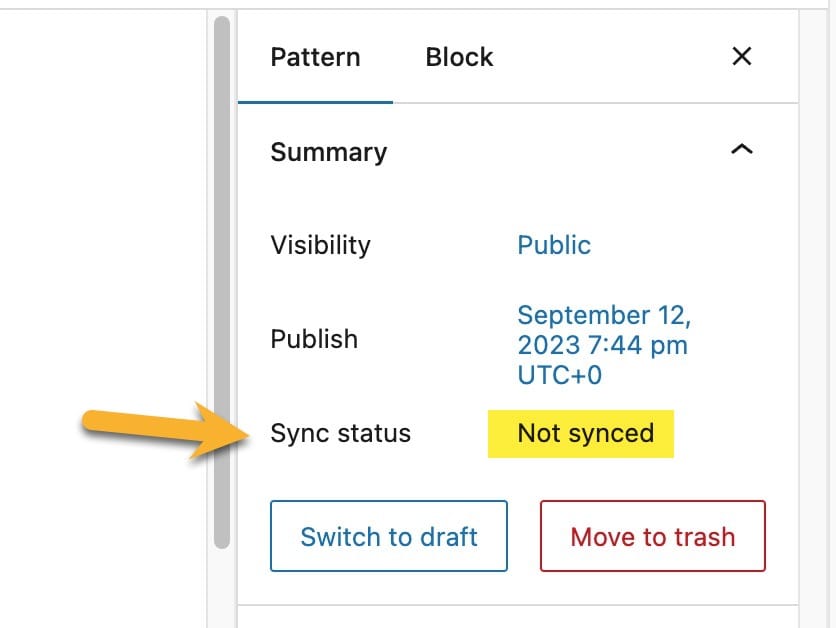
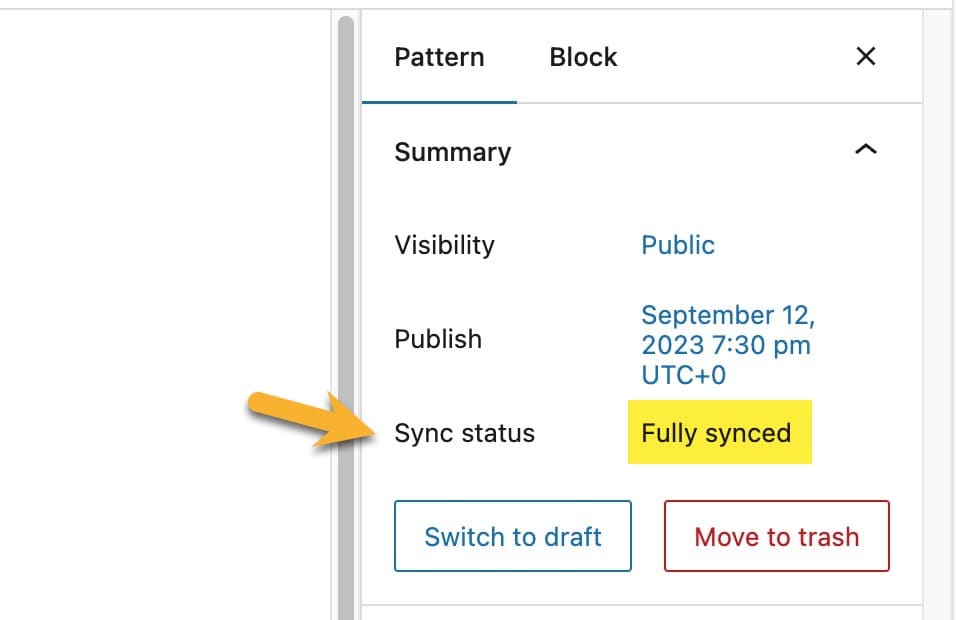
To check if a Pattern is Synced or Unsynced, click the Edit link below the name of the Pattern to open the Pattern editor. In the right sidebar, the Pattern details will show the Sync status as “Not synced” (Unsynced) or “Fully synced” (Synced).
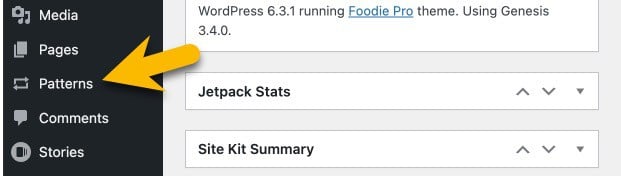
The Feast Plugin has a feature to add a quick link to the Patterns page in the WordPress dashboard admin menu. To add this quick link to your dashboard, enable the Add a “Patterns” option to the sidebar feature in the plugin settings.

How to Create a Pattern
Create a Pattern in the Editor
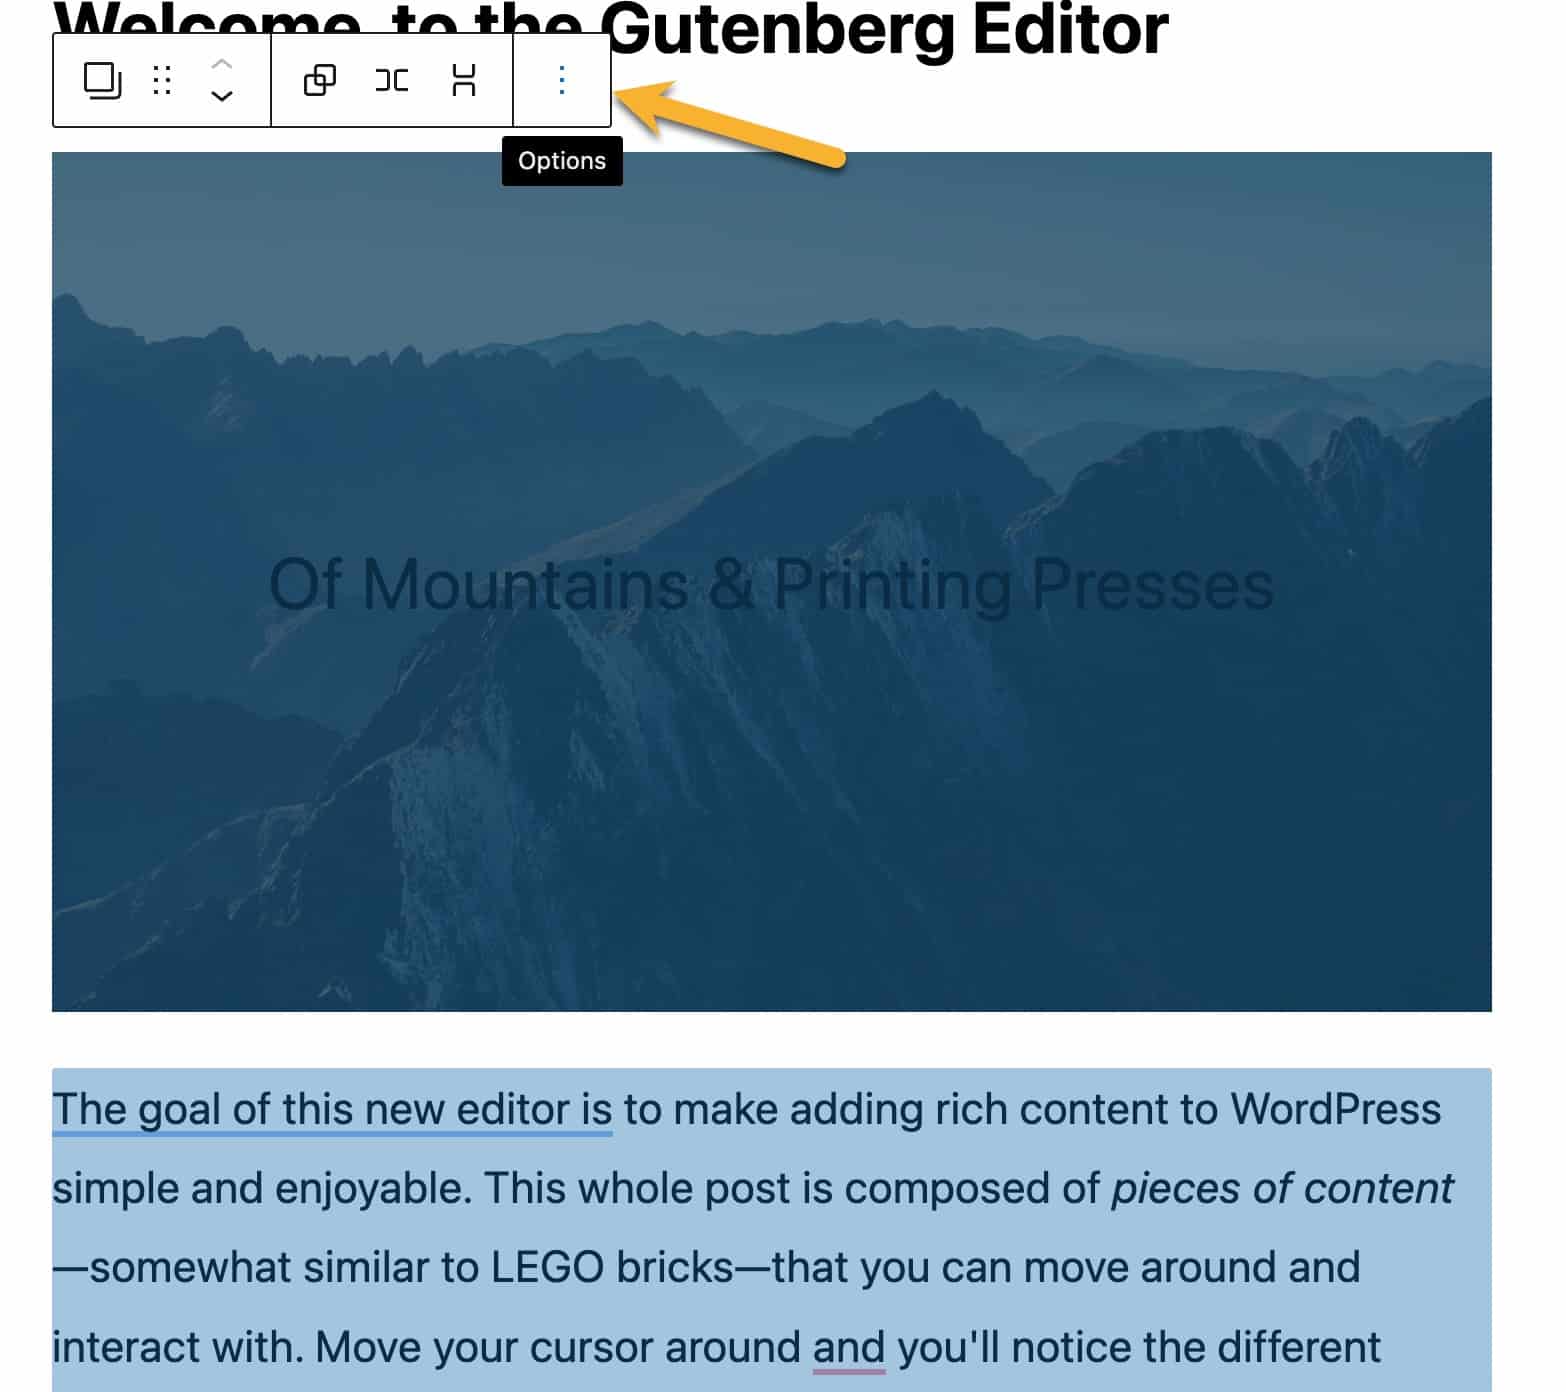
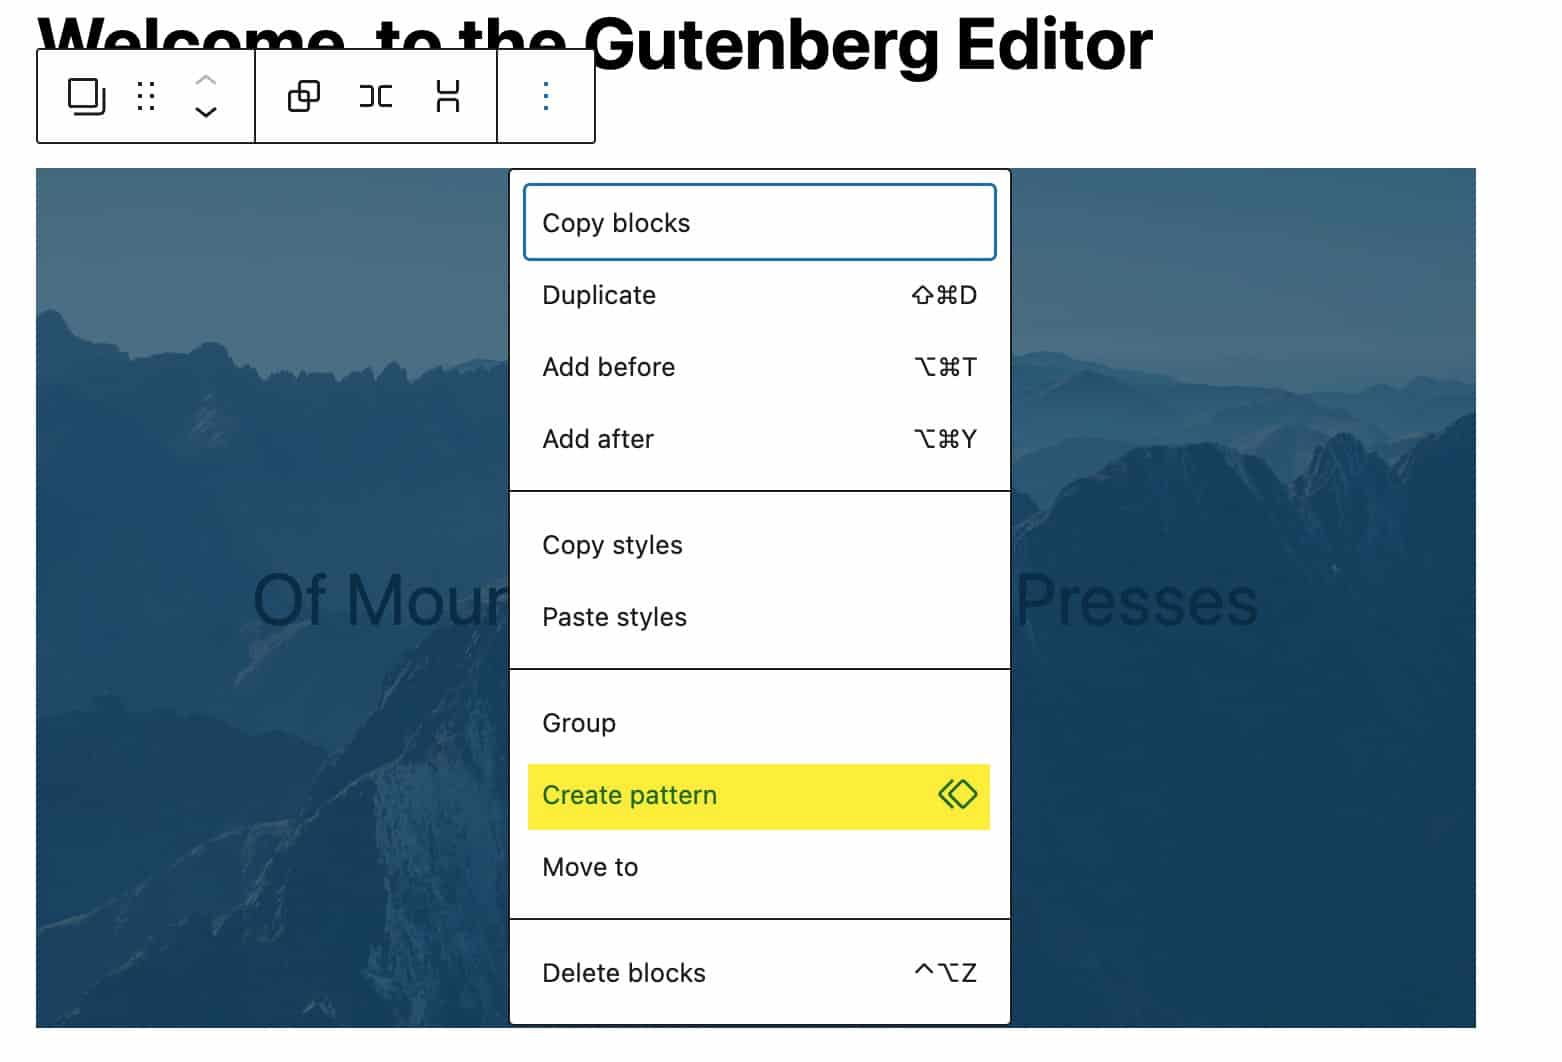
- In the post or page editor, select the block or blocks you want to turn into a pattern. In the block toolbar, click the three-dot icon to open the Options menu.
- From the menu, choose the Create pattern option.
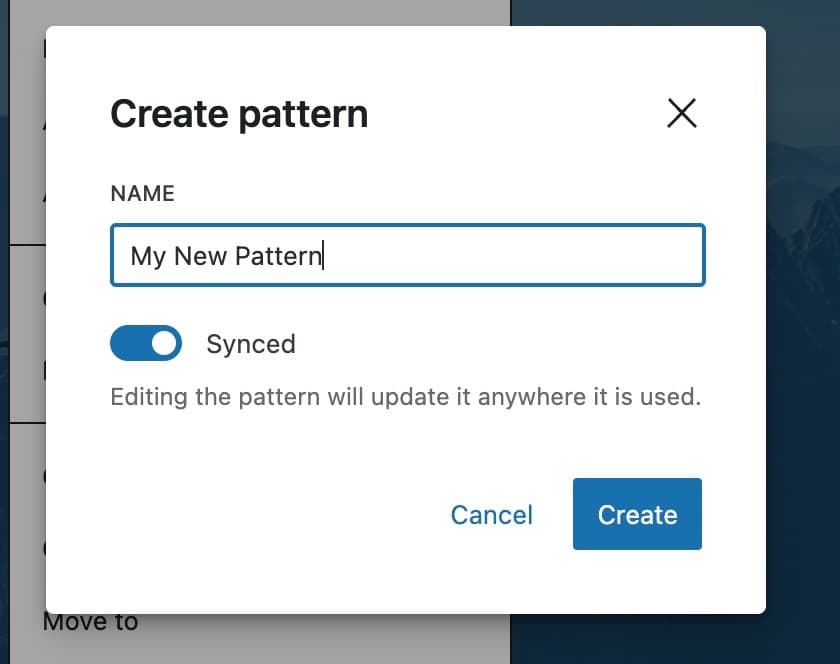
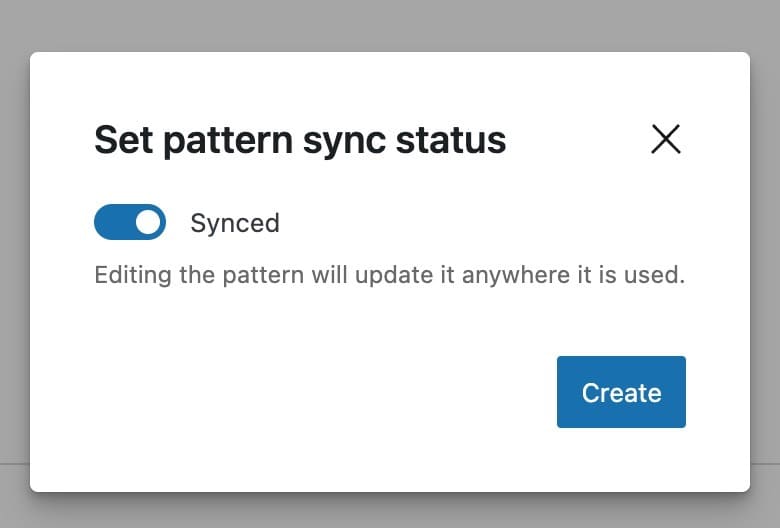
- The Create pattern modal will appear. Give your new pattern a name, select whether it will be a Synced or Unsynced Pattern, and then click the Create button.
Your new Pattern will immediately appear in the block inserter under the Patterns or Synced Patterns sections.
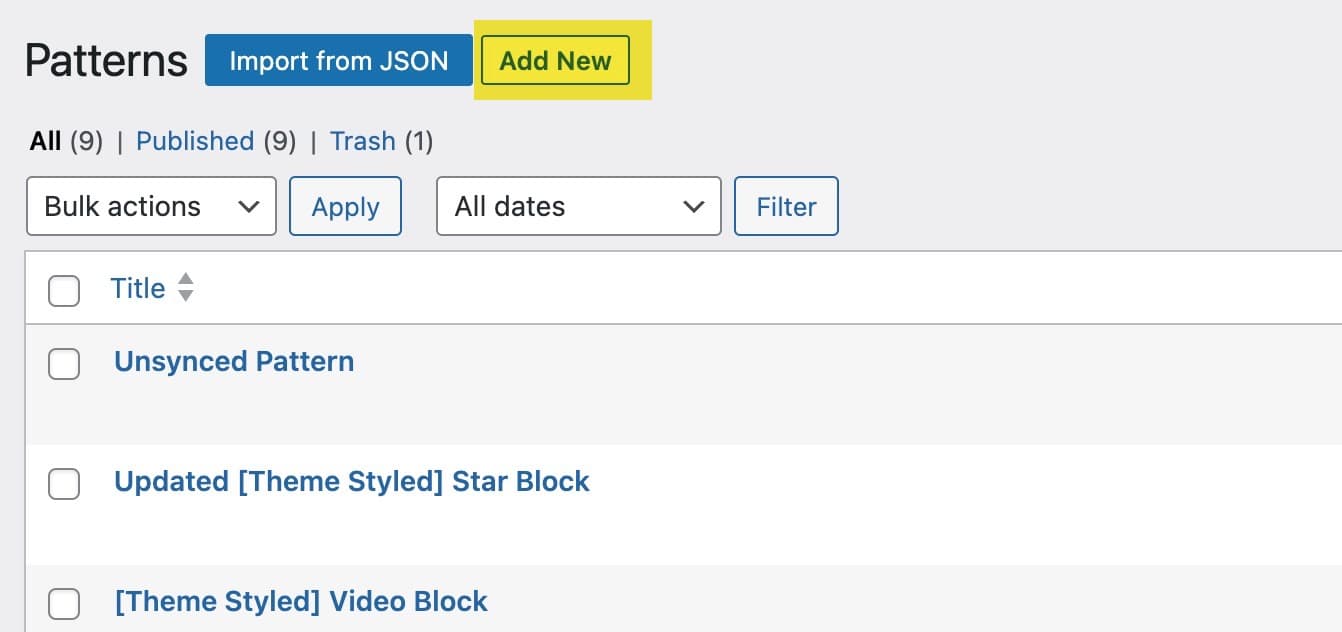
Create a Pattern in the Patterns Page
- In the Patterns page, click the “Add New” button.
- In the Pattern editor, select whether the Pattern will be Synced or Unsynced and then click the Create button. Note that there is currently no way to automatically convert Patterns between Synced and Unsynced, so choose carefully.
- Give your Pattern a name and start adding blocks. Publish your Pattern when ready.
How to Change a Synced Pattern into an Unsynced Pattern (and vice-versa)
Since you can’t convert Synced Patterns into regular Blocks (this used to be possible with Reusable Blocks), it may be helpful to change some of your Patterns from Synced to Unsynced.
Currently, there is no automated way to convert Patterns from Synced to Unsynced or the reverse. This was a deliberate choice by the WordPress core team because of complications that can arise from changing a Pattern’s synced status.
If you want to change a Pattern, you’ll need to create a new Pattern with the sync status you want, and then copy and paste the blocks from the original Pattern into the new Pattern, and then Publish it.
Changes When Adding Links in the Block Editor
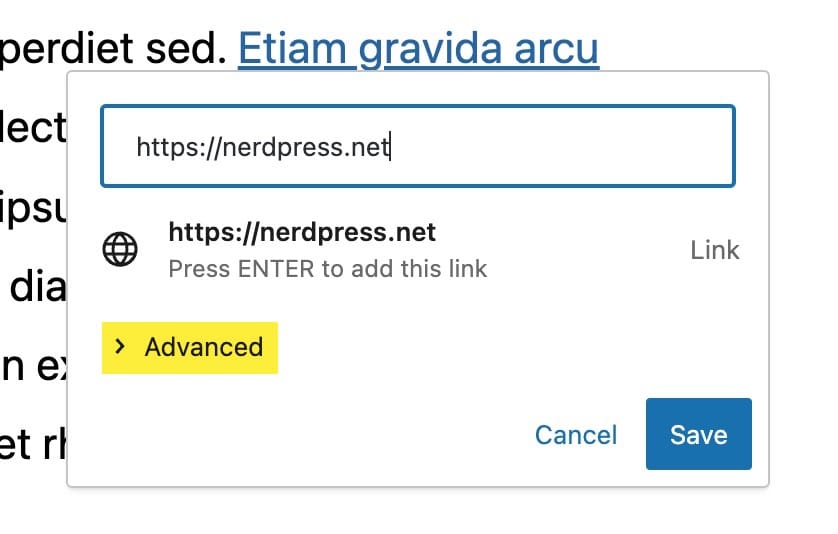
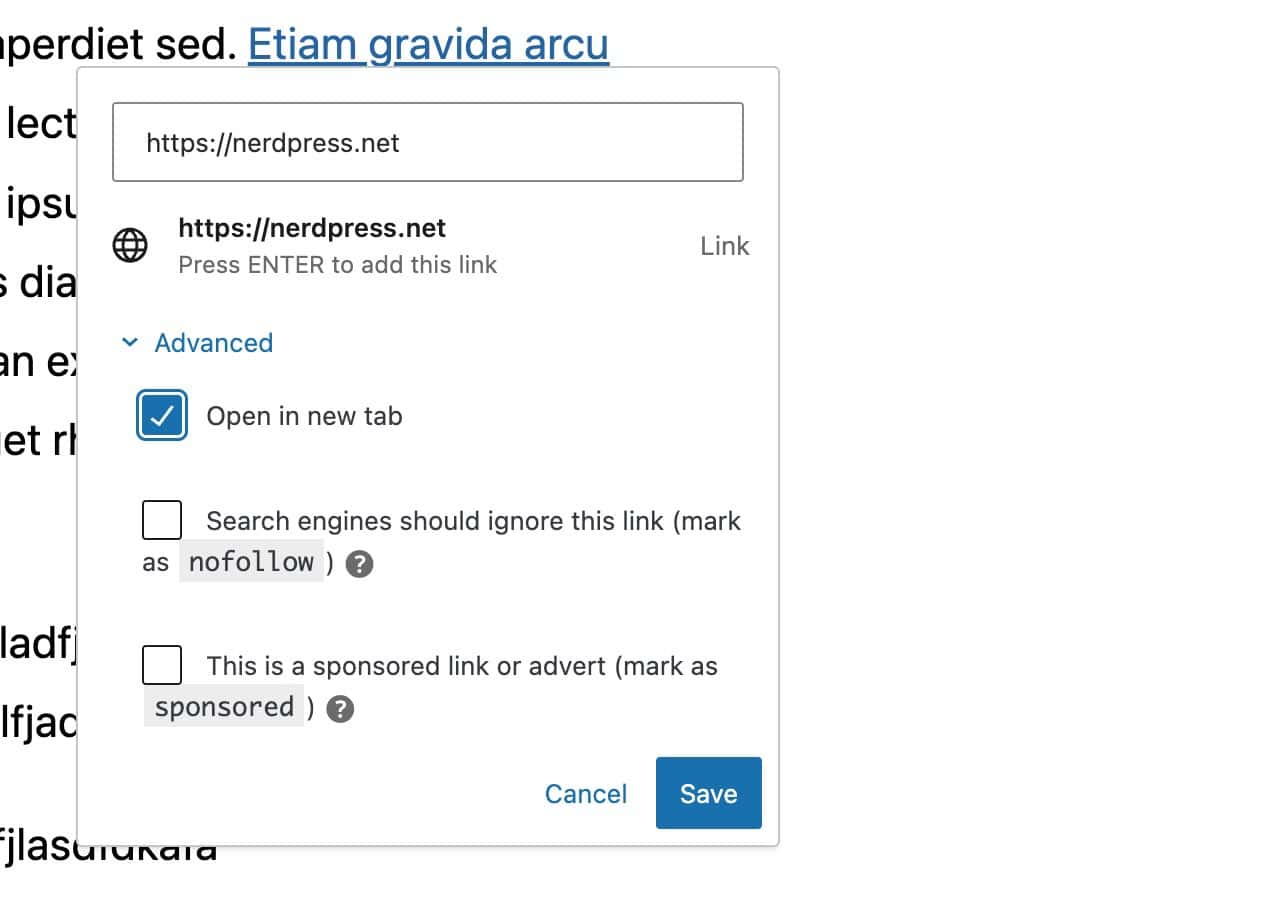
Link control is the tool used by the Block Editor to add and edit links in the content.
With WordPress 6.3, setting a link to open in a new tab or to set links as nofollow or sponsored is now part of the Advanced settings in the link control popup. To reveal these link settings, click the Advanced toggle to expand the section.
New Blocks: Details and Footnotes
WordPress 6.3 introduced two new core blocks: the Details block and the Footnote block.
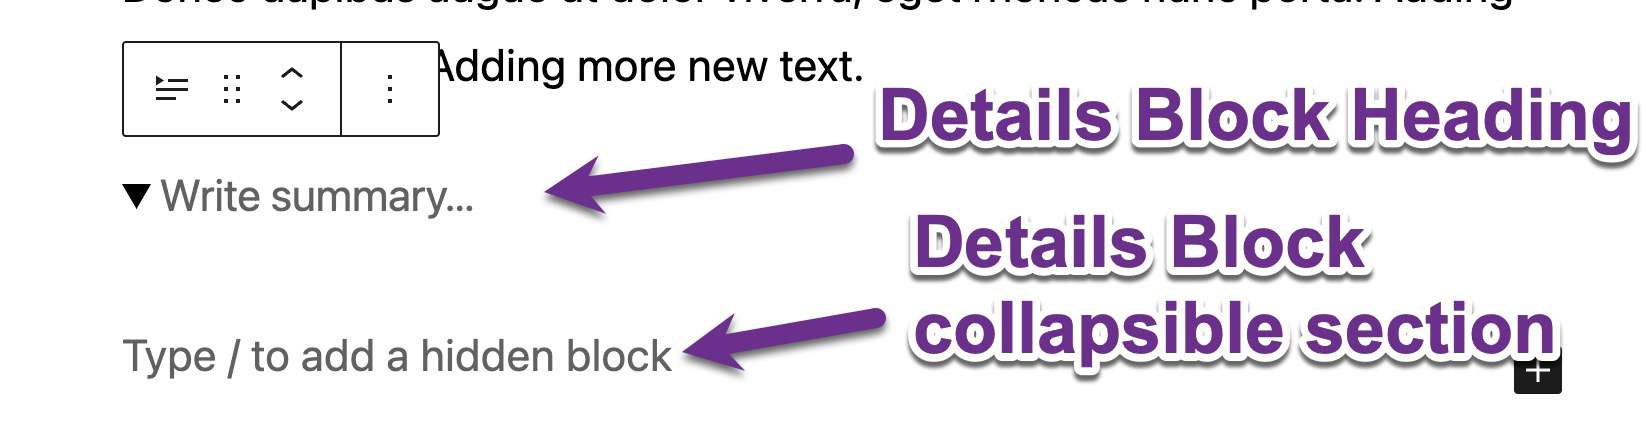
The Details Block
The Details block is made up of a header at the top and a collapsible block nested beneath it. This new block is useful for showcasing lengthy material such as product details, code snippets, and spoilers.
When adding the details block, it includes two spaces – the detail title and the hidden block content.
The title only accepts text, but the design can be customized using the Block settings in the right sidebar. The collapsible section, on the other hand, allows you to add various blocks, including list, image, or code blocks.
How to Add a Details Block
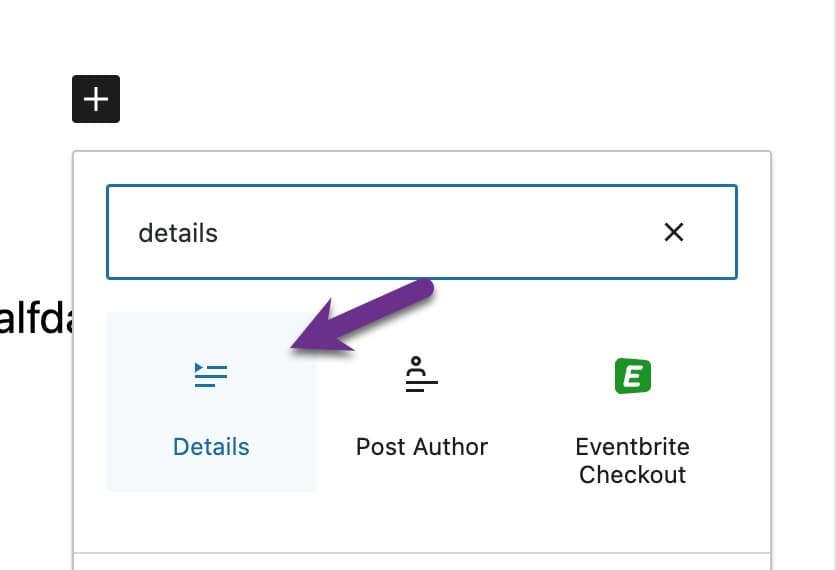
- Click on the “plus”
+icon to open the block inserter panel. Search for “details” to find the new block and click on it to insert it into the page.
- Enter your title or summary in the top section of the block. This is the part of the block that is always visible. In the lower section, add your hidden content, which, besides text, can include images, code, and other blocks.
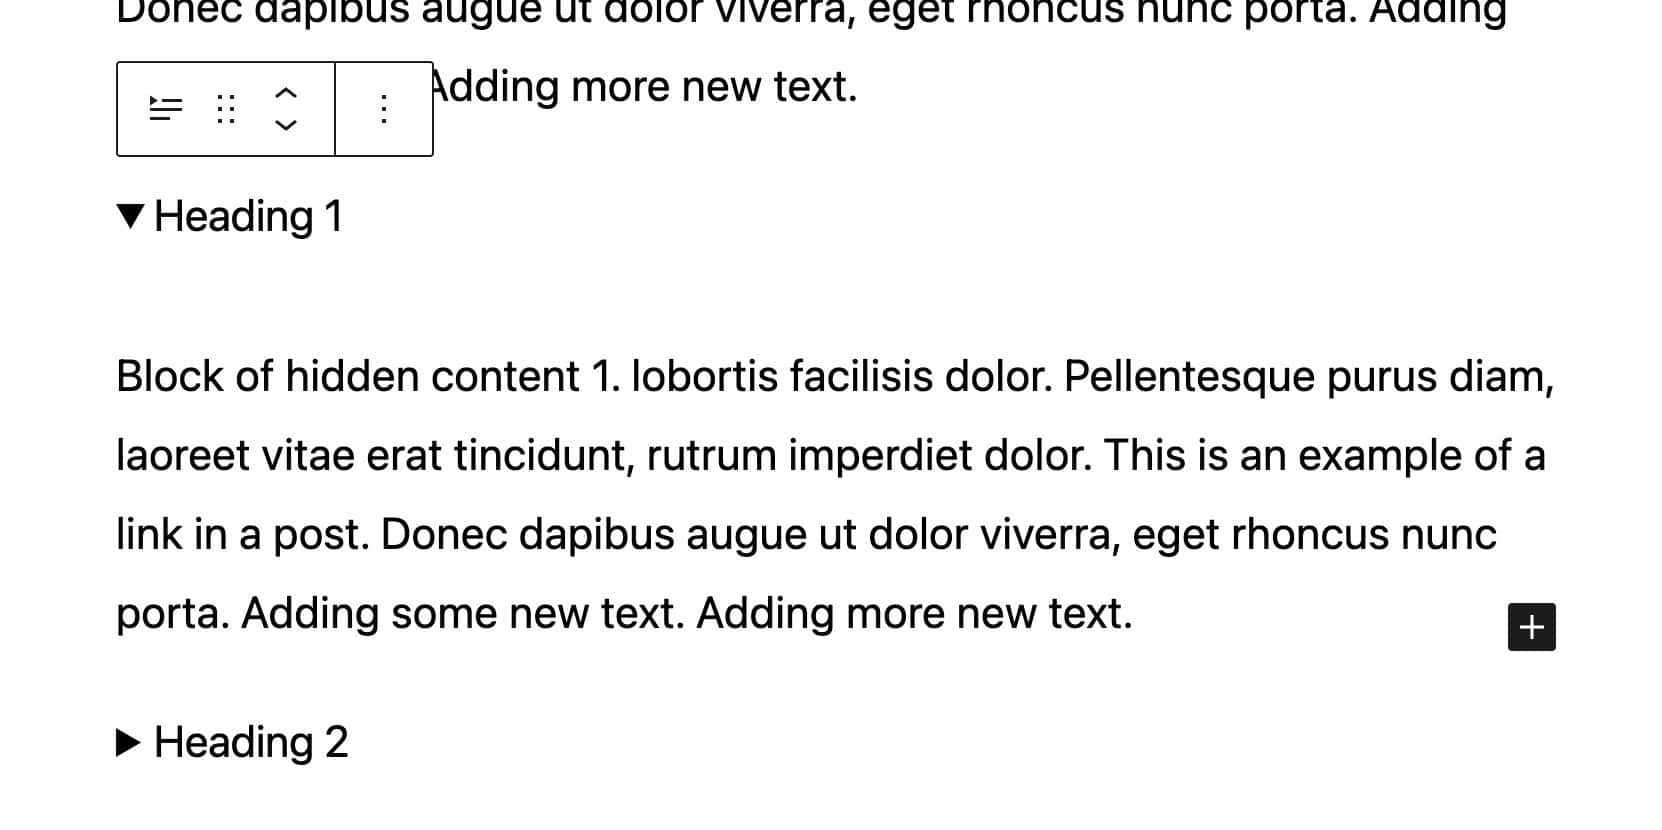
Note that when the Details blocks are not selected in the Block Editor, the collapsible content sections will be hidden.
But when you click on a Details block to edit it, the hidden collapsible section will expand and display so you can edit the content.
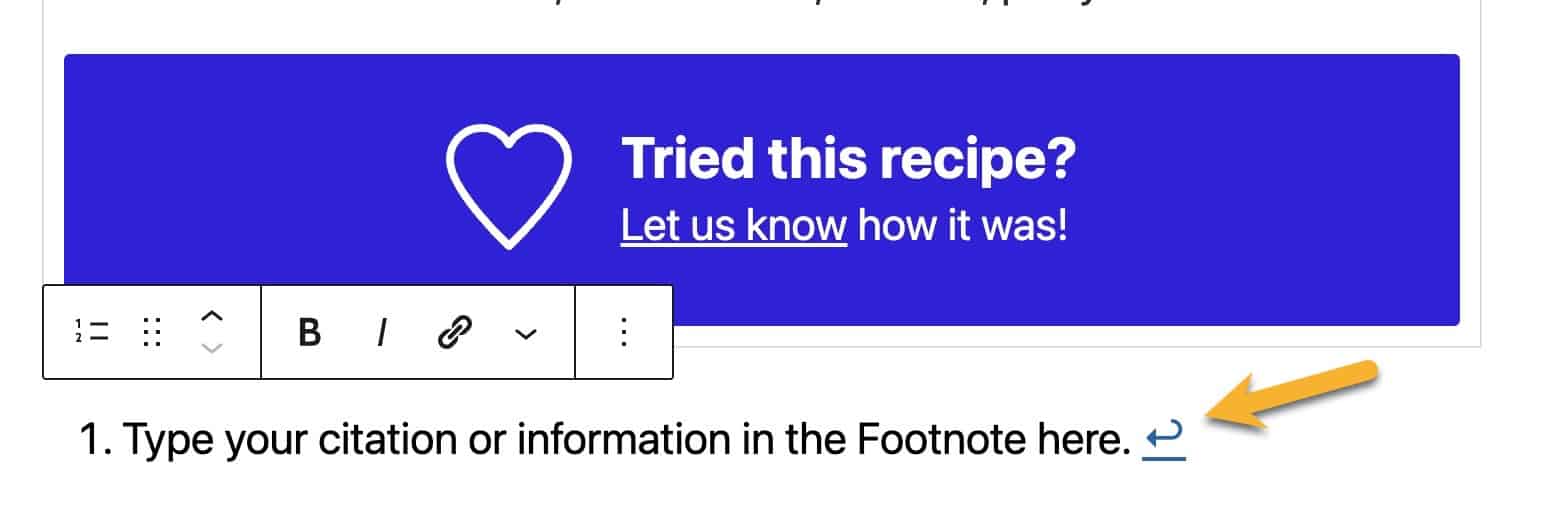
The Footnote Block
The new Footnote block helps add citations or further information to your content.
To add a Footnote, you don’t insert a block via the block inserter panel. Instead, it is added similarly to how you would add a link to your content.
How to Add a Footnote Block
- Select the text you want to annotate and click More (the ⌄ icon) on the block toolbar.
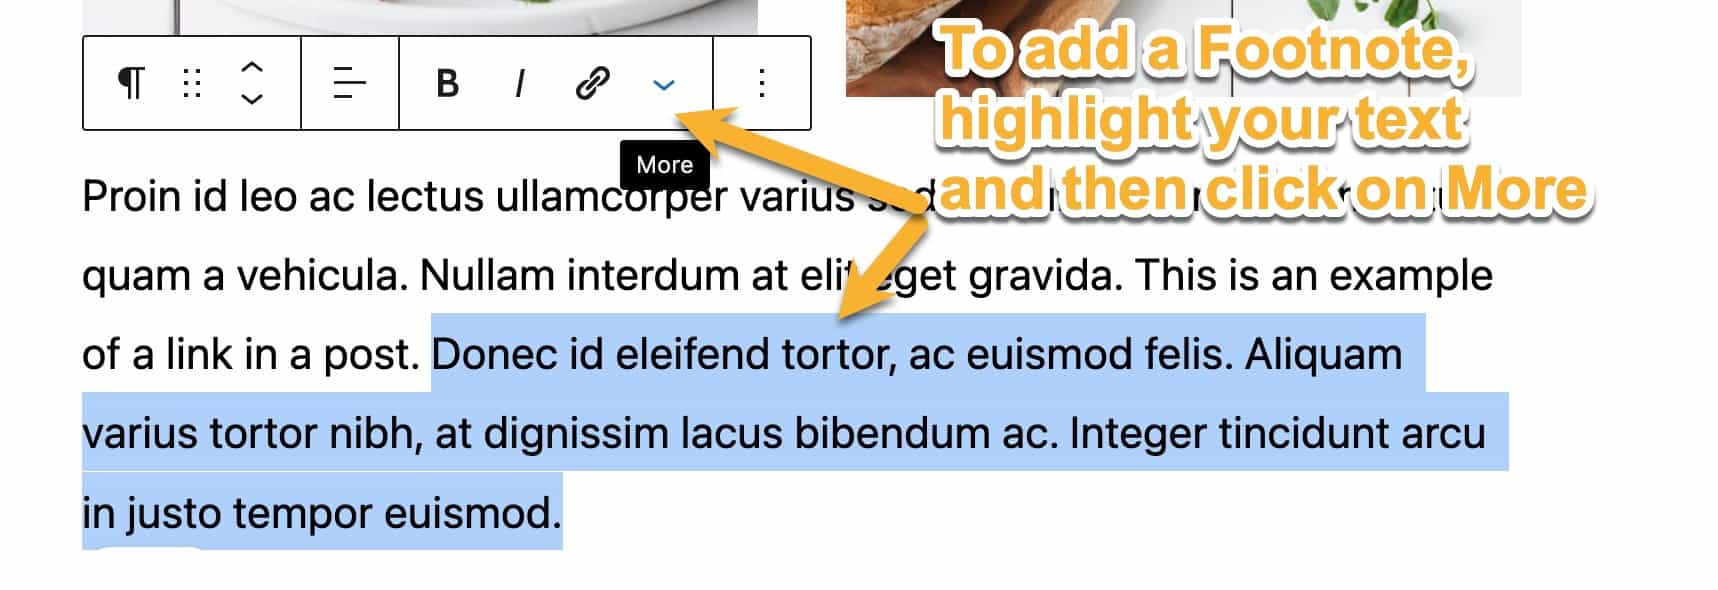
- Select Footnote from the More menu. This will insert the new Footnote block at the very end of your content in the Block Editor.
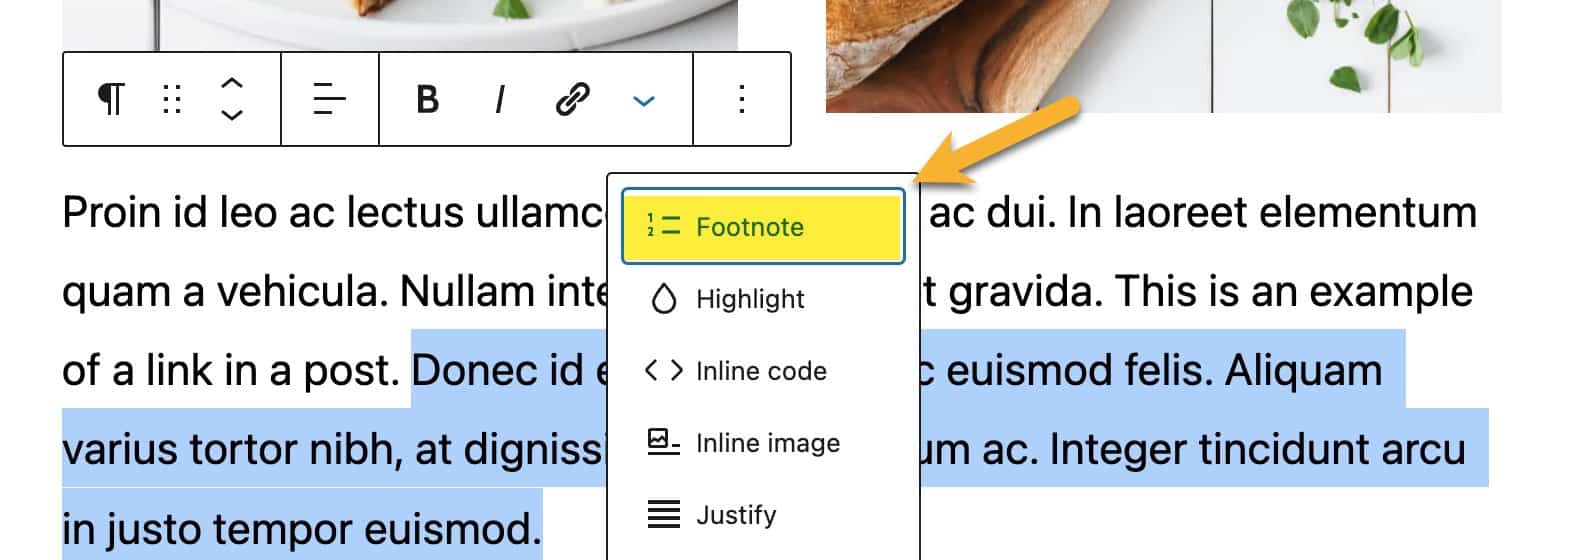
- Add your citation or information to the Footnote block, which can include links and styling.
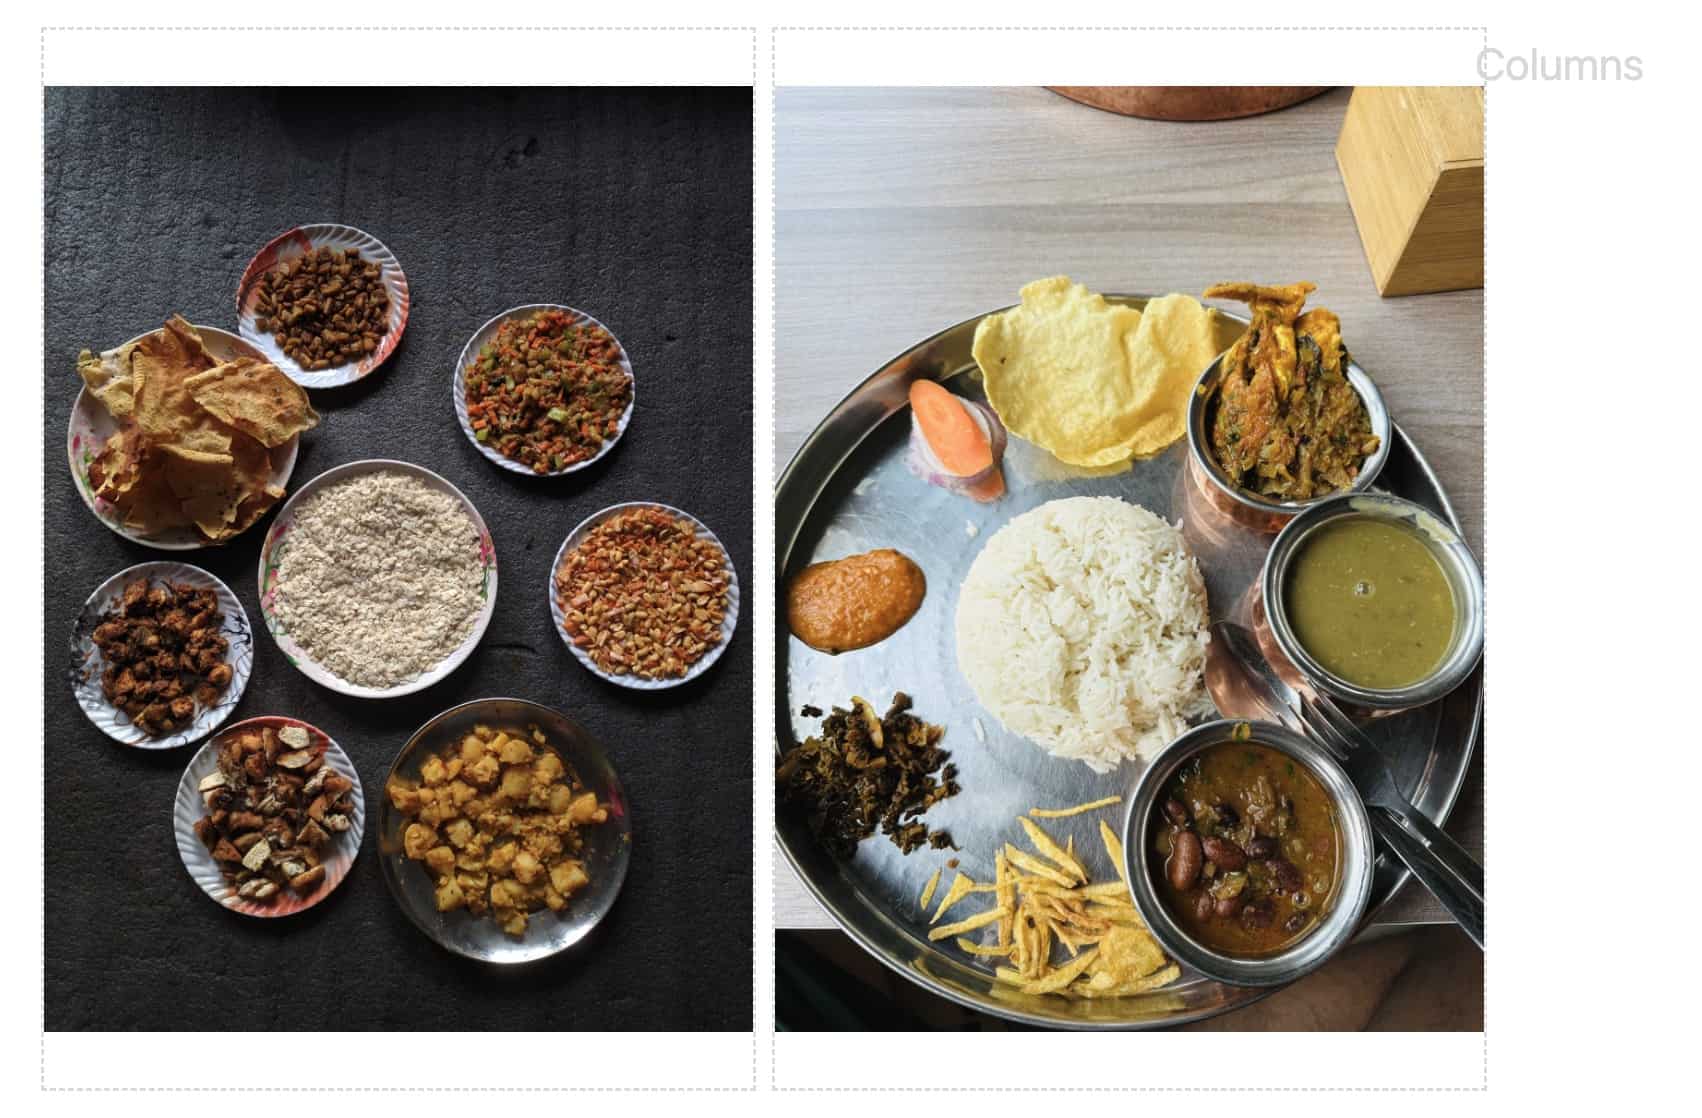
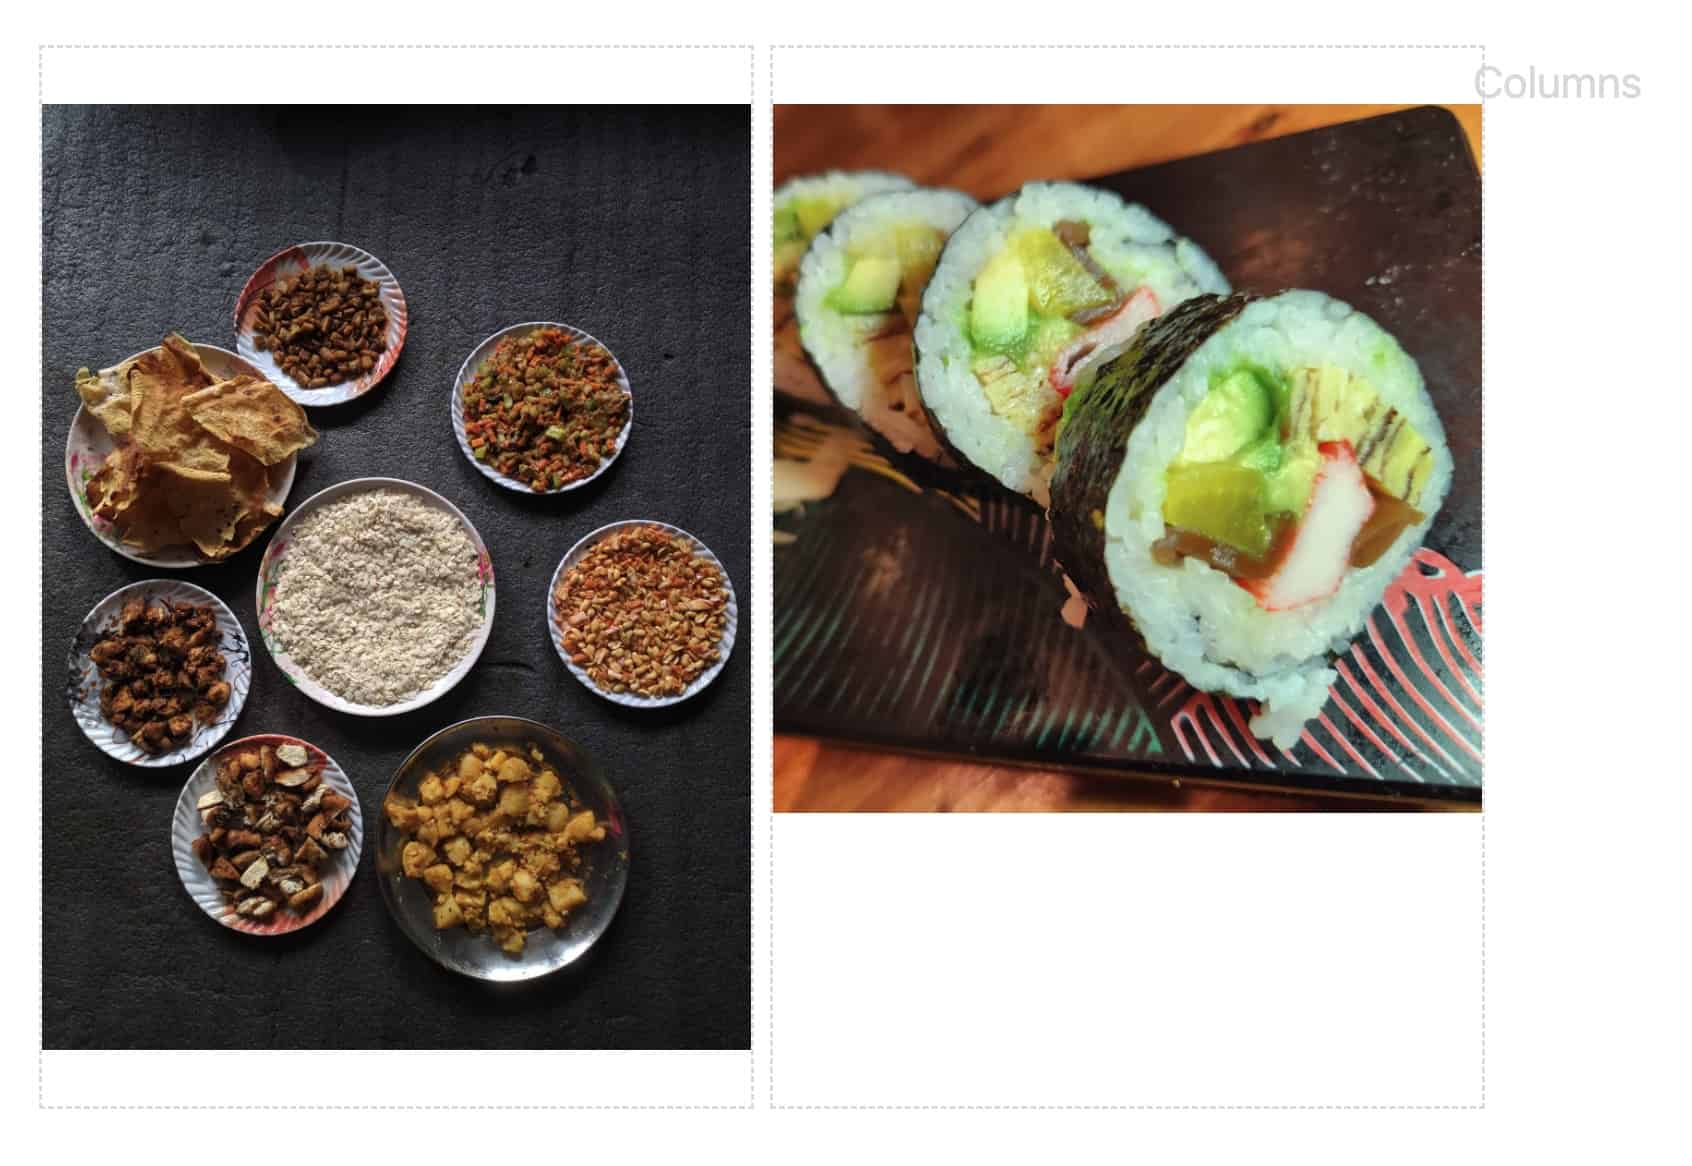
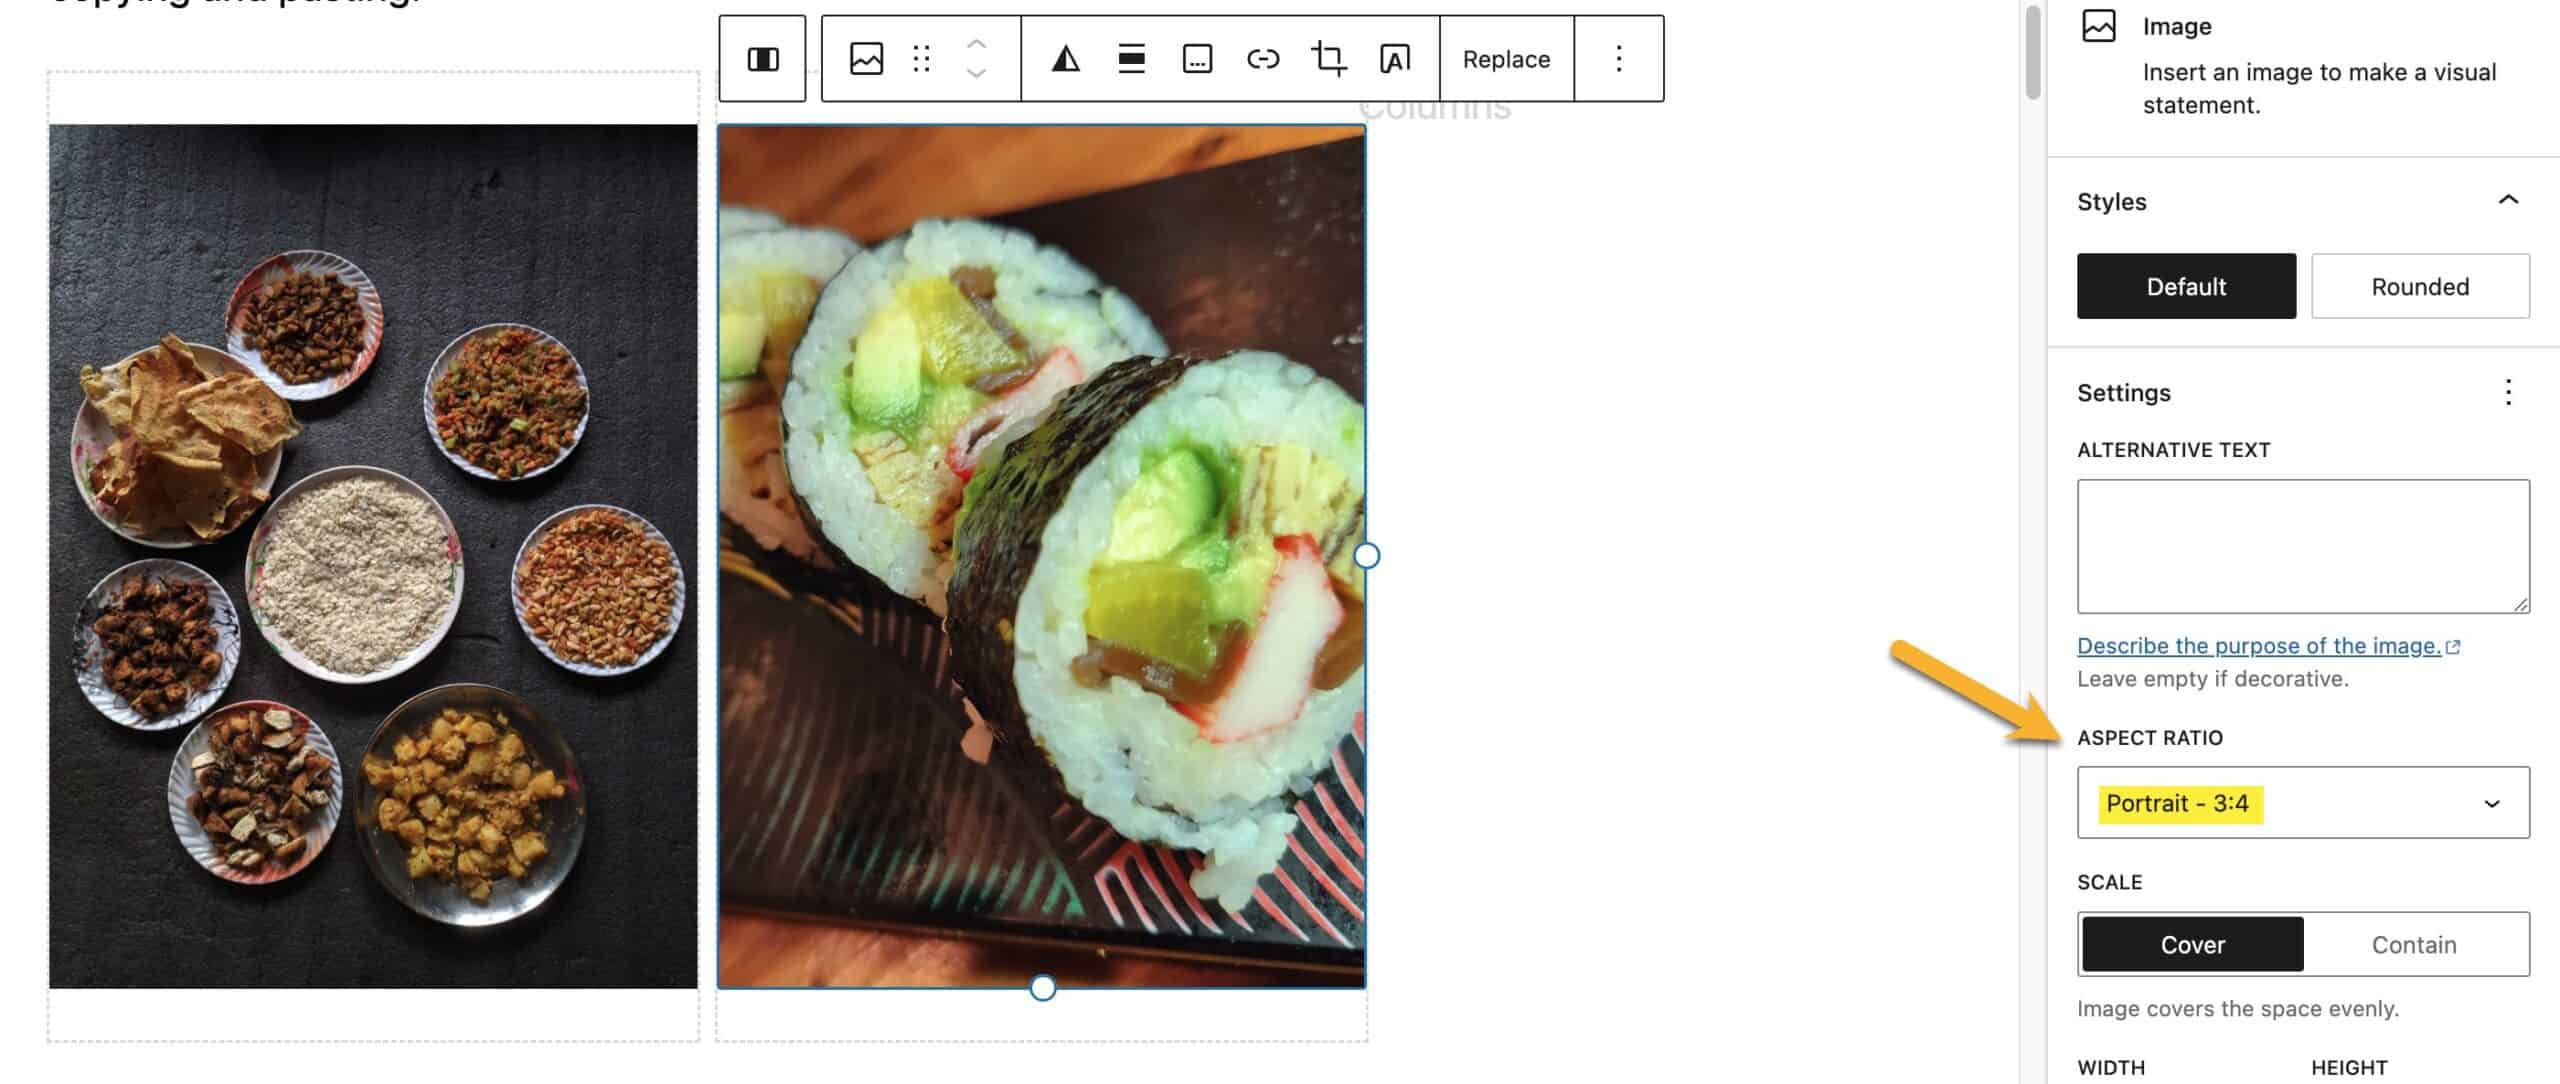
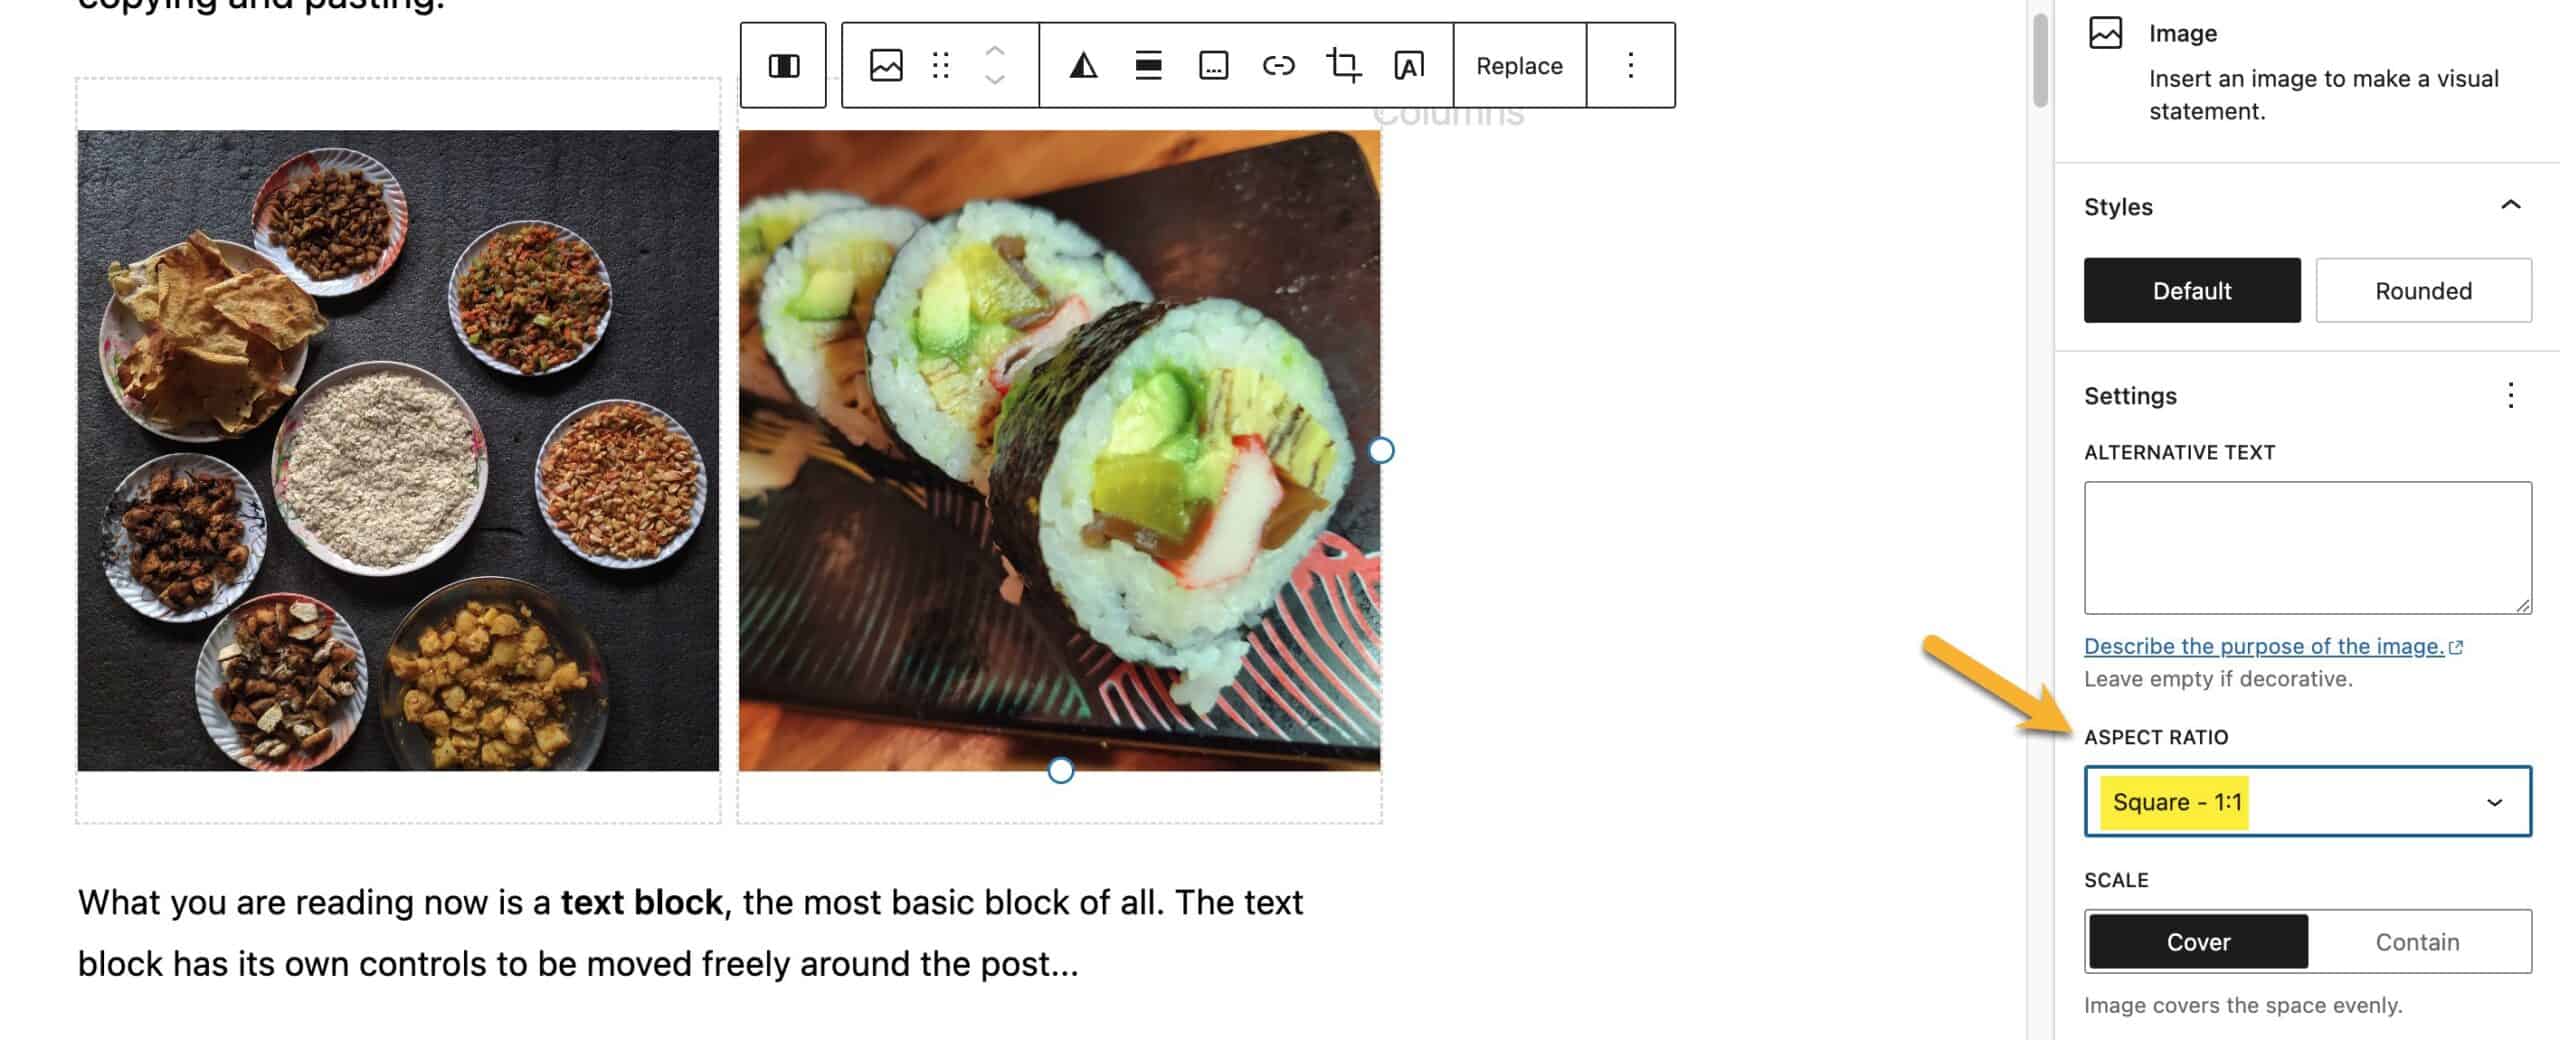
Aspect Ratios for Image Blocks
WordPress 6.3 also added an aspect ratio setting in the Image Block. This setting is especially useful when adding images to column blocks or creating special layouts with images and text.
By setting the aspect ratio on an image, the image will be visually cropped to display at the set ratio. This is especially helpful if using Patterns where you may replace an existing image with an image of a different ratio.
For example, this is a simple, existing layout using images in columns. The image aspect ratio for both images is set to “Original” but since both original images have the same aspect ratio, the layout is even.
If we swap out one of the images with an image with a different aspect ratio while keeping the image block aspect ratio set to “Original”, we end up with uneven images.
However, if we use the new image aspect ratio setting for each image block, we can set both images to be either portrait ratio or square ratio, depending on preference. If one of the images is swapped out, the new image will be displayed with the same ratio despite the original aspect ratio of any images used.
Feature Image Display in Block Editor is Now “Cropped”
Some users have noticed that the preview of the Featured Image in the Block Editor sidebar no longer shows the full image. It now appears “cropped.”
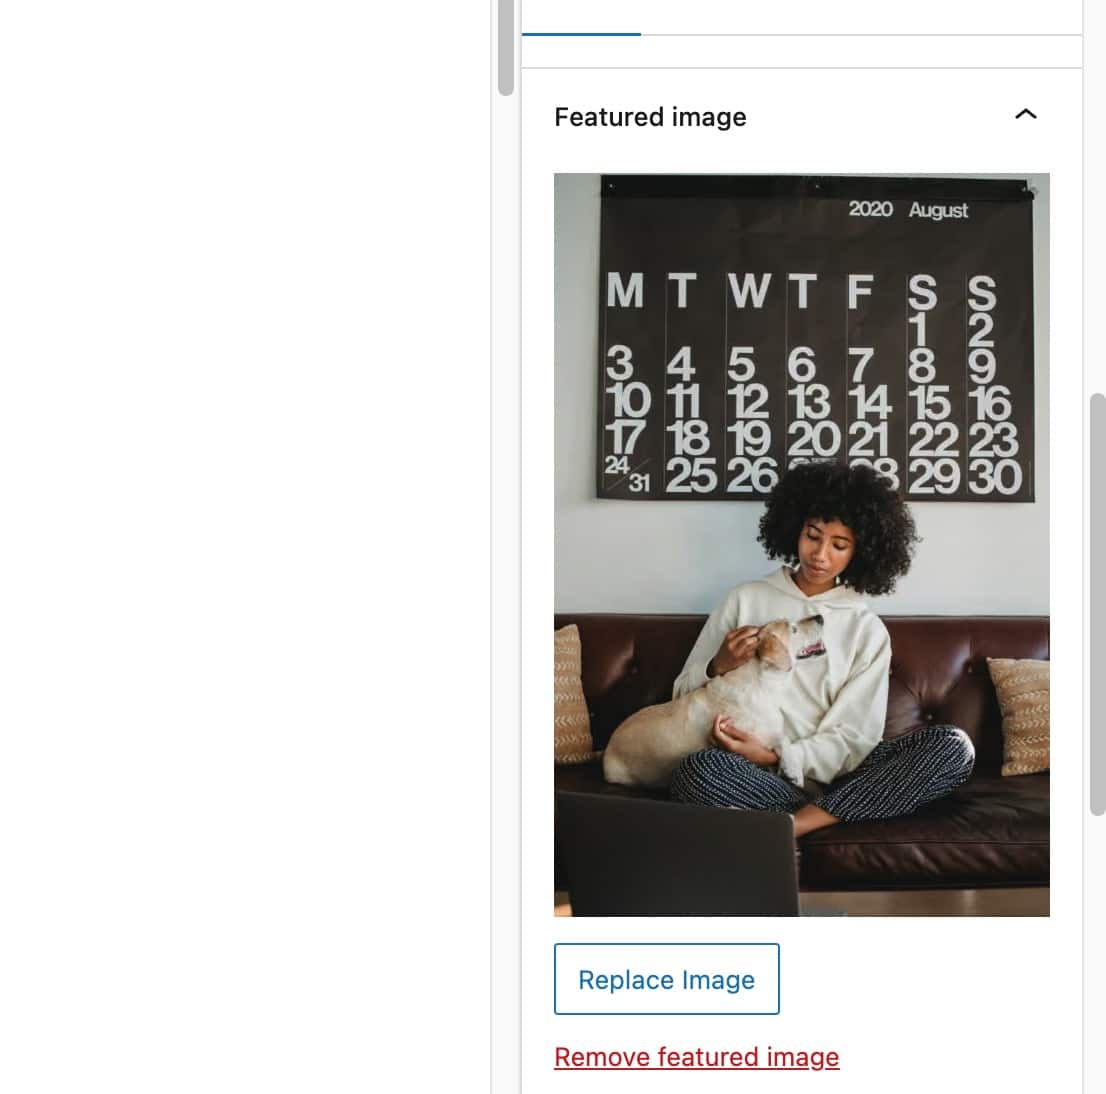
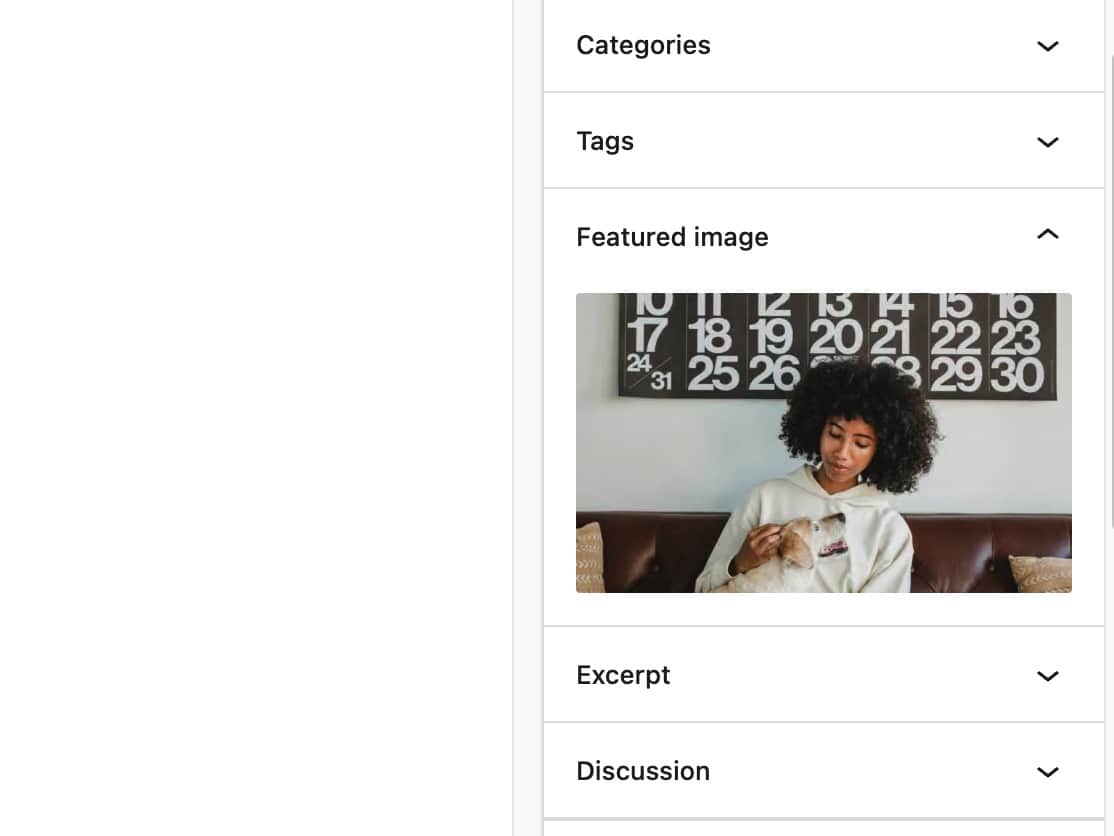
We compared the view of the Featured Image under WordPress 6.2.2 and WordPress 6.3.1, and this is due to a minor change to the CSS for the image container for the Featured Image, which now limits the height of the container to 150px tall. Neither the image itself or the front-end code has been altered. This is a post editor display change only likey done to compact the sidebar view in the post editor. So, this change is nothing to worry about other than a difference in how things look in the editor.
Dive Deeper into WordPress 6.3
While we touched on key updates in WordPress 6.3, it’s just the tip of the iceberg! This release introduced hundreds of new features, refinements, and optimizations designed to enhance your WordPress experience.
To learn more, check out the WordPress 6.3 Field Guide or this video from the WordPress team which explores some of the new features.

This was very helpful and clearly explained.
Thank you
Yay! Thanks. Glad it was helpful!